Let’s be real—some days, the last thing you want to do is stand over a hot stove flipping potstickers. But that doesn’t mean you have to skip this crispy, savory comfort food! I recently discovered a game-changer: making potstickers in an electric rice cooker. No fancy skills, no messy stovetop splatters, just minimal effort and maximum crunch. Trust me, if I (a self-proclaimed lazy cook) can nail this, anyone can. Let’s dive in!

Why Make Potstickers in an Electric Rice Cooker?
First off, why bother with the rice cooker instead of a pan? For starters, it’s foolproof. No more burning the bottoms because you got distracted scrolling TikTok. The rice cooker does most of the work for you—just set it and (sort of) forget it. Plus, if you’re like me and only have one pan clean at a time, this frees up your stovetop for… well, nothing. More time to chill while your food cooks? Sign me up.
Ingredients You’ll Need
Let’s keep this simple—no weird specialty ingredients here. Just stuff you probably already have in your fridge or pantry:
- 250g ground pork (I use lean, but a little fat adds flavor—your call!)
- 250g fresh chives (chop ’em fine, but don’t cry… okay, maybe a little)
- 3-4 shiitake mushrooms (dried works too—just soak ’em first!)
- 1 small onion and 1-2 garlic cloves (or a pinch of garlic powder if you’re extra lazy)
- 1 egg (binds the filling so it doesn’t fall apart—critical!)
- 250g dumpling wrappers (store-bought is totally fine; no need to make your own)
- Salt (to taste—start light, you can add more later)
- Soy sauce (a splash for umami—use low-sodium if you prefer)
- A pinch of black pepper (adds a little kick without being overpowering)
- A drizzle of oil (for the rice cooker liner—prevents sticking!)
Step-by-Step Instructions: Let’s Get Cooking!
Okay, let’s break this down into super easy steps. I even took photos so you can follow along—no confusion here.
1. Prep the Pork Filling
First, grab your ground pork and toss it into a big bowl. This is where the flavor happens, so don’t skip the seasonings!

Add your chopped onion (or onion powder) first—onion = flavor, duh.

Next, mince up some garlic and throw that in too. Garlic makes everything better, right?

Sprinkle in a pinch of salt—don’t overdo it yet, we can adjust later.

Add a splash of soy sauce for that savory umami punch. I use about 1-2 tablespoons, but taste as you go!

Finally, a tiny pinch of black pepper. Now, mix everything together really well—like, use your hands (or a spoon) to knead it until it’s sticky. This is called “waking up the meat” and it makes the filling juicier. Trust me, it’s worth the 2 minutes of mixing.
2. Add Mushrooms and Chives
Now let’s add some veggies to make this filling fresh and crunchy.

Chop up your shiitake mushrooms into tiny pieces—small enough that they don’t fall out of the dumplings.

Toss those mushroom bits into the pork mixture. Mix again to spread them out evenly.

Wash your chives really well—you don’t want any dirt in your filling! Pat them dry with a paper towel (wet chives = soggy dumplings, yuck).

Chop the chives into 1cm pieces. Try to make them all the same size so every bite has that chive flavor.

Add the chives to the bowl, then crack in one egg. The egg acts as a binder, so your filling stays together when cooking. Mix everything one last time until it’s all combined.
3. Wrap the Dumplings (No Stress!)
Okay, wrapping dumplings can be scary if you’ve never done it, but store-bought wrappers are flexible—you don’t need to be a pro! Here’s my lazy way:

Take one dumpling wrapper and put a small spoonful of filling in the center. Don’t overfill it—otherwise, the dumpling will burst open when cooking. I use about 1 teaspoon per wrapper, but adjust based on the size of your wrappers.
To seal it: Dip your finger in a little water and run it along the edge of the wrapper (this makes it sticky). Fold the wrapper in half over the filling, then pinch the top closed. You don’t need fancy pleats—just make sure it’s sealed so the filling doesn’t leak out. If you mess up? No big deal—just eat that one first!

Keep wrapping until you have a whole plate of dumplings. This takes about 10 minutes—put on a podcast or your favorite song to make it go faster.
4. Cook in the Rice Cooker (The Lazy Magic!)
Now for the best part: Letting the rice cooker do the work. This is why we’re here, right?

First, take your rice cooker liner and brush a thin layer of oil all over the bottom. This is key to getting that crispy bottom—don’t skip the oil!
Close the lid and press the “Cook” button. Wait until the “Warm” light comes on—this usually takes 2-3 minutes. That means the liner is hot and ready for the dumplings.

Open the lid and arrange your dumplings in the liner—make sure they’re not touching each other (leave a little space so they can cook evenly). Close the lid again and press “Cook” once more.

When the “Warm” light comes on again (about 5 minutes later), open the lid and pour in some water. How much? Just enough to cover the bottom of the dumplings up to their halfway point. I use about ½ cup—don’t add too much, or your dumplings will get soggy.
Close the lid again and press “Cook” one last time. Now, just wait until the “Warm” light comes on again. This is when the magic happens—the water will evaporate, and the bottom of the dumplings will get crispy and golden.
5. Serve and Enjoy!

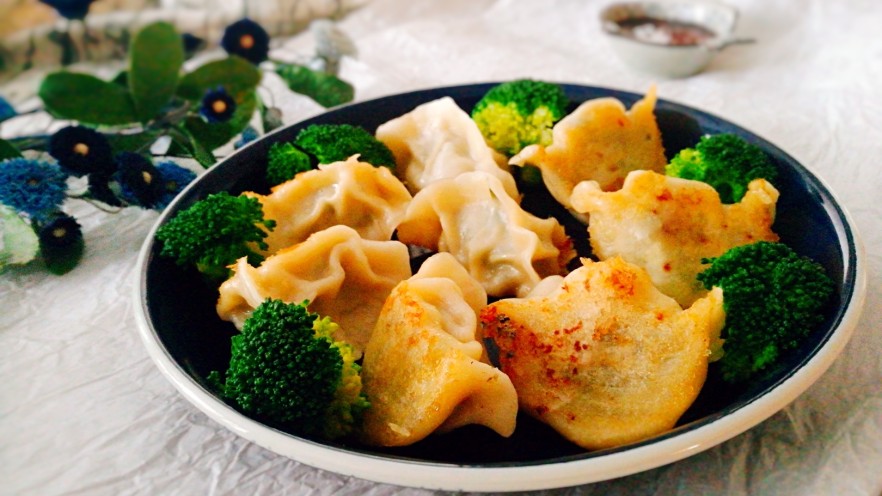
Once the “Warm” light is on, open the lid and check your potstickers. They should have a crispy golden bottom and a soft top. If there’s still a little water left, just close the lid and let it sit on “Warm” for another 2-3 minutes until the water is gone.

Take them out with a spatula (be gentle—you don’t want to break the crispy bottom!) and put them on a plate. Serve with soy sauce, vinegar, or chili oil if you like a little heat. Trust me, these are so good—crunchy on the bottom, juicy on the inside, and full of flavor. I ate three in one bite (don’t judge).
Pro Tips for Perfect Potstickers
Before you go, here are a few quick tips to make sure your potstickers turn out amazing every time:
- Don’t overfill the dumplings: Burst dumplings = sad cook. Stick to 1 teaspoon of filling per wrapper.
- Brush the liner with oil: No oil = stuck dumplings. You’ve been warned.
- Check the water level: If the “Warm” light comes on but there’s still water, leave it on “Warm” until the water is gone. The crispy bottom is worth the extra wait!
- Use fresh chives: Wilted chives = bland filling. Grab the freshest ones you can find.
Final Thoughts
Making potstickers in an electric rice cooker is a total game-changer for lazy cooks like me. It’s easy, fast, and the results are just as good (if not better) than pan-fried. No more standing over the stove, no more burning the bottoms—just delicious, crispy potstickers with minimal effort.
Next time you’re craving something savory but don’t want to cook, give this recipe a try. I promise you won’t regret it. And if you make it, tag me in your photos—I’d love to see your crispy potstickers!