
Introduction: Why These Spicy Crispy Wings Are a Must-Try
Okay, let’s be real—who doesn’t love a good plate of crispy, spicy chicken wings? Whether you’re hosting a game night, craving something to munch on while binge-watching, or just want to impress friends, these homemade spicy crispy wings are the answer. And the best part? I’ve got the secret marination and coating method that makes them even crispier than your favorite fast-food chain. No more sad, soggy wings—this recipe is all about that satisfying crunch and bold flavor that’ll make you want to lick your fingers clean. Let’s dive in!

Ingredients You’ll Need (Makes 8 Wings)
- 8 chicken wings (preferably drumettes and flats, bone-in for extra flavor!)
- 30g cornstarch (this is the secret for that super crispy crust—no soggy mess here)
- 150g all-purpose flour (the base for the coating)
- 1 tsp five-spice powder (adds that warm, complex flavor)
- 1 tsp chili powder (adjust to your spice level—spicier or milder? I like 1.5 tsp for kick)
- 1 tsp black pepper (freshly ground is best!)
- Some cooking wine (or white vinegar, but I prefer rice wine for that tangy aroma)
- Salt to taste (don’t skimp here—flavor starts with good salt)
Step-by-Step Recipe: From Marination to Crispy Perfection
Step 1: Prep the Chicken Wings
First things first—let’s get organized! Grab your 8 chicken wings, cornstarch, flour, the spices, and your mixing bowls. Trust me, having everything laid out before you start saves so much frustration later. No hunting for salt when you’re halfway through marinating, right?

Step 2: Slice the Wings for Better Marination
Okay, take your chicken wings and slice them with a sharp knife. Make diagonal cuts on both sides (as you can see in the image above). Why? Because more surface area means the marinade sticks better, so every bite is packed with flavor. If you’re not sure where to cut, just aim for 2-3 slits per wing—enough to reach the meat but not so deep you take off the bone!

Step 3: Add the Marinade for Maximum Flavor
Now, pop all the sliced wings into a bowl. Add the chili powder, five-spice, black pepper, a splash of cooking wine (about 1-2 tbsp—just enough to coat), and a pinch of salt. Mix everything together, then use your hands to rub the marinade into the cuts. Make sure every inch gets coated!

Step 4: Marinate for Maximum Flavor (Patience is Key!)
Cover the bowl with plastic wrap or a lid and let it marinate in the fridge for at least 4 hours. If you’re in a hurry, you can do 2 hours, but trust me—4 hours = so much better flavor. I once forgot mine in the fridge overnight (oops) and it was actually divine. So even better if you can leave it longer! The longer the marination, the deeper the spice penetration.

Step 5: Mix the Coating (The Secret to Crispiness!)
Here’s where the magic happens! In a large bowl, mix 150g all-purpose flour with 30g cornstarch (that’s the 5:1 ratio—flour to cornstarch, remember?). Then add the same spices you used in the marinade: 1 tsp five-spice, 1 tsp chili powder, 1 tsp black pepper, and a pinch of salt. Mix this dry coating until everything is evenly distributed. If you’re sensitive to spice, you can reduce the chili powder here—no judgment if you go mild!

Step 6 & 7: Combine and Season the Coating
Make sure all the spices are fully blended into the flour-cornstarch mix. This dry blend is what will give your wings that iconic “crackle” when you bite into them. I like to smell it first—if it doesn’t smell fragrant, add a little more five-spice or pepper. Trust your nose here!

Step 8: First Coating—Lightly Dust the Wings
Take a marinated wing and gently dust it with the flour-cornstarch mixture. Make sure all sides are covered, but don’t overdo it yet. The goal is even coverage, not a thick layer.

Step 9: Press and Pat for Extra Crispiness
Now, here’s the pro move: Grab the wing, and with your palm, press the coating into the cuts and crevices. Do this 3-4 times—you want the flour to stick into all the nooks and crannies. Think of it like giving the wing a little massage! This pressing step helps the coating adhere better, which is crucial for that crispy texture.

Step 10: Quick Water Dip (This is the “Scale” Secret!)
Now, take the first-coated wing and dip it quickly into room-temperature water—just 1-2 seconds, no more! The water acts as a “glue” for the second coating. You’ll see the flour start to stick again almost immediately. Pull it out and let the excess water drip off—don’t soak it!

Step 11: Second Coating—Press Again for That Scale Look
Dust the wing again with the flour-cornstarch mix. This time, rub your fingers over the surface to create those tiny “scales”—it’s like giving the wing a little exfoliation! The scales are what make the skin crispy when fried, not soggy. It’s a technique I learned from a pro chef friend, and it’s game-changing.

Step 12: Test the Oil Temperature
Before you drop those wings, test the oil temperature! Heat about 2 cups of oil in a heavy-bottomed pot or deep fryer to 160-170°C (320-340°F). Stick a chopstick into the oil—if you see tiny bubbles forming around the tip, that’s your cue! The oil should be hot enough to make the wings crisp but not so hot that they burn on the outside and stay raw inside.

Step 13: Fry the Wings in Batches
Carefully lower the second-coated wings into the oil. Use a slotted spoon to gently place them in—don’t drop them! Turn the heat down to medium-low and fry for 5-6 minutes, flipping occasionally. The goal is to cook them through first without burning the coating. After 5 minutes, increase the heat to medium-high for 1-2 minutes to crisp them up.

Step 14: Golden Brown and Ready to Eat!
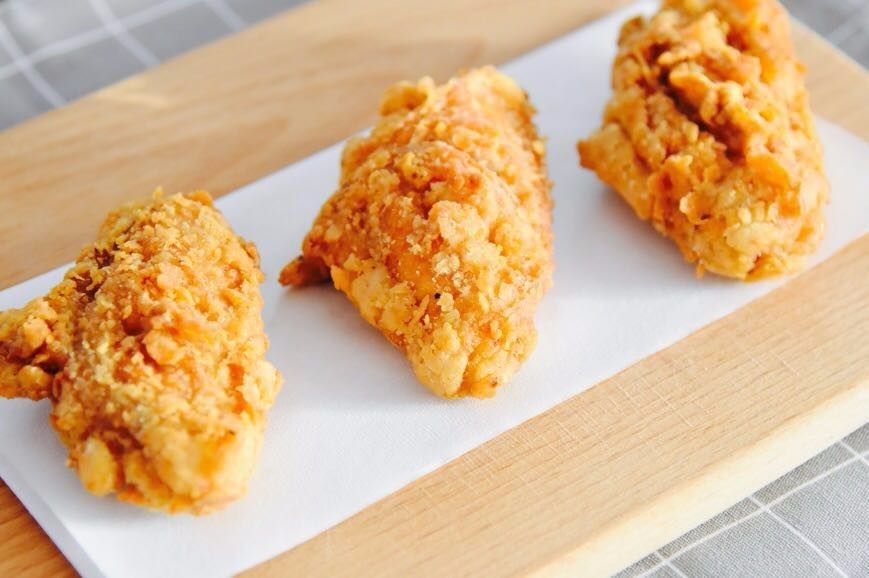
Once both sides are golden brown (about 15-20 minutes total, depending on your oil and pot), remove the wings with a slotted spoon and drain on a paper towel. You can also use a cooling rack for better airflow—this keeps them crisp longer!

Step 15: Final Touch—Serve and Enjoy!
Arrange the crispy wings on a platter, sprinkle with extra chili powder or five-spice if you want, and serve immediately. Pair them with your favorite dipping sauce (I love ranch or honey mustard!) or eat them au naturel—they’re delicious either way.

Pro Tips for Extra Crispy Wings
- Double Coating = Crispy Magic: The “wet and dry” method (first dust, then dip in water, then dust again) is the secret to that KFC-like crunch. If you skip the water step, your wings will be soft—trust me, I’ve tried!
- Press, Press, Press: When coating, press the flour into the wing cuts and crevices. The more pressure you apply in the pressing steps, the more the coating sticks, and the more texture you’ll get when fried.
- Oil Temperature Check: Use a thermometer to check, but if you don’t have one, the chopstick test works! Bubbles around the tip = good. Too many bubbles = too hot, too few = too cold.
- Marinate Overnight (Optional): If you have time, marinating overnight (in the fridge) gives even deeper flavor. I once marinated for 24 hours and the wings were insane—but 4 hours is a solid minimum.
- Don’t Overcrowd the Pot: Fry in small batches to ensure even cooking. Overcrowding lowers the oil temperature, leading to soggy wings.
Final Thoughts: Your New Go-To Snack
Okay, let’s recap—these spicy crispy chicken wings have it all: bold flavor, that satisfying crunch, and a method that’s easier than you think. No fancy equipment needed, just a little patience with the marination and coating steps. Whether you’re serving them as an appetizer, a main dish, or even a midnight snack, these wings will be the star of the show.
I promise you—once you try this recipe, you’ll never go back to bland, soggy chicken wings again. The secret is in the double coating, the marination time, and that perfect balance of spices. So grab your ingredients, preheat the oil, and get ready to make wings that’ll make you want to shout, “Why didn’t I try this sooner?!”