
")


Let’s be real—most mornings I’m running out the door so fast I barely have time to grab a protein bar, let alone cook a proper breakfast. But lately, I’ve been obsessed with this homemade fruit yogurt parfait recipe! It takes 10 minutes max, tastes like a fancy café treat, and actually keeps me full until lunch. Plus, it’s low-cal, packed with good stuff, and super customizable if you’re picky about ingredients. I made one for myself yesterday morning, and my roommate begged me to make her one too—so today I’m breaking down exactly how to make this perfect fruit yogurt cup, step by step.
Why You’ll Love This Fruit Yogurt Cup
First off, this isn’t just another boring yogurt bowl. Let’s run through all the wins here:
- It’s ready in under 15 minutes—no fancy tools required
- Low-fat, high-protein, and loaded with fresh fruit and fiber to keep energy levels steady
- Perfect for meal prep, busy weekday mornings, or a mid-afternoon snack to beat the slump
- You can swap out any ingredients based on what’s in your fridge or pantry
- Looks so pretty for Instagram (or just to make yourself feel fancy while you eat!)
I’ve made this for potlucks before, and everyone always asks for the recipe. It’s such a crowd-pleaser—even people who say they “don’t like yogurt” end up loving it.
Full Ingredients for Your Fruit Yogurt Parfait
Don’t stress—you probably already have most of these ingredients lying around! Here’s exactly what you’ll need:
- 1 container (or bottle) of thick, creamy yogurt—Greek yogurt works best here, but regular plain yogurt is totally fine too
- 1 ripe kiwi
- 1 ripe mango
- 1 tablespoon dried cranberries
- 1 tablespoon raisins
- 1 tablespoon sliced almonds
- 1 tablespoon chopped walnuts (or any other nut you like!)
- 1 tablespoon rolled oats
- Optional: a few fresh mint leaves for garnish (it makes such a nice pop of color!
Pro Tip for Ingredients
Make sure your yogurt is nice and thick! If you use a runny, watery yogurt, the parfait will get soggy fast and won’t hold its shape. I always grab Greek yogurt that’s strained extra well—you can even line a regular yogurt container with a paper towel for 10 minutes if you only have thin yogurt on hand.
Step-by-Step Guide to Making Your Fruit Yogurt Cup
I know, step-by-step sounds silly for something this easy, but I’ve had people mess up the layering just because they skipped a small trick! Let’s go through each part slowly:

Step 1: Gather all your ingredients
First things first: pull everything out of your pantry and fridge so you don’t have to stop mid-prep to look for something. I like to lay everything out on the counter so I can see it all at once—no more scrambling for the almonds when I’m almost done!

Step 2: Prep your nuts
Take your almonds and walnuts, and put them into a small plastic storage bag. You don’t need a fancy nut chopper for this—just use the flat side of a kitchen knife to crush them into small pieces. I usually go until they’re about the size of a pea, so they add a nice crunch without being too big.

Step 3: Crush those nuts into small pieces
Don’t crush them too fine! You want to keep some texture so each bite has that satisfying crunch from the nuts. I usually give the knife a few firm taps, then shake the bag a little to make sure all the nuts are evenly broken up.

Step 4: Chop your dried fruit
Take your dried cranberries and raisins, and chop them up a little bit too. If you leave them whole, they’ll clump together in your parfait, and that’s no fun. Just give them a quick chop with your knife until they’re about half their original size.

Step 5: Prep your kiwi
Cut off the ends of the kiwi, then use a spoon to peel the skin right off—it’s way easier than trying to cut it with a knife! Once it’s peeled, slice the kiwi into thin, round pieces. These are going to go along the side of your cup to make that pretty layered look everyone loves.

Step 6: Prep your mango
First, wash the mango really well. Stand it up on one end, then slice down along both sides of the flat pit so you end up with two mango “cheeks” and the pit in the middle. Don’t worry if you get a little bit of the pit on one side—just trim that off later.

Step 7: Cut the mango into small cubes
Lay one mango cheek flat, skin side down. Use your knife to make shallow cuts across the flesh in a grid pattern, going all the way to the skin but not cutting through it. Then push the skin up from the bottom, and the mango cubes will pop right out! It’s such a satisfying trick—no messy mango everywhere.

Step 8: Start assembling your parfait
Grab a clear glass or plastic cup—clear is best so you can see all the pretty layers! First, add all your prepped nuts, dried fruit, and oats to a small bowl so you can grab them easily later.

Step 9: Line the cup with kiwi slices
Take your kiwi slices and press them against the inside wall of the cup. You don’t have to cover the entire cup—just enough to make that nice, colorful border around the edge. It makes the parfait look way more professional than just dumping everything in!

Step 10: Add your yogurt base
Scoop about half of your yogurt into the bottom of the cup. Use a spoon to spread it evenly across the bottom—don’t worry if some of it gets on the kiwi slices, that just makes the layers look nicer.

Step 11: Sprinkle on the oats
Take your rolled oats and sprinkle a thin layer over the yogurt. This adds extra crunch and fiber, and it helps soak up any excess yogurt so your layers don’t get soggy.

Step 12: Add the mango cubes
Now add your prepped mango cubes on top of the oats. You can pile them right in the center, or spread them around a little bit—either way looks great. The sweet, juicy mango pairs so well with the tangy yogurt and fresh kiwi.

Step 13: Top with the remaining yogurt and mix-ins
Scoop the rest of your yogurt on top of the mango, then sprinkle on the chopped nuts and dried cranberries and raisins. This is the fun part—you get to pile on all the good stuff!

Step 14: Garnish with fresh mint (optional but so worth it!)
If you have fresh mint leaves, wash them off and tuck a few into the top of the parfait. It adds a fresh, bright flavor that cuts through the sweetness of the fruit and yogurt, and it makes the whole dish look so much more elegant.

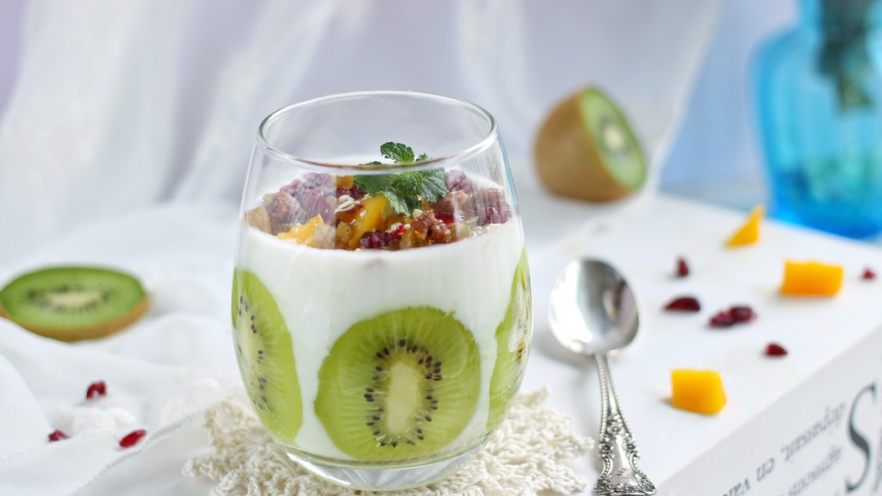
Finished Fruit Yogurt Parfait!
And that’s it! You’ve got a perfect, healthy, delicious fruit yogurt cup that’s ready to eat. I like to eat mine right away, but you can also cover it with plastic wrap and store it in the fridge for up to 24 hours. Just note that the kiwi slices might start to discolor a little if you leave them too long, so if you’re meal prepping, you can add them right before serving instead.
My Top Tips for Customizing Your Yogurt Parfait
One of the best parts about this recipe is that you can totally tweak it to fit your tastes and what you have on hand. Here are some of my favorite swaps:
- Swap fruit: If you don’t have kiwi or mango, use strawberries, blueberries, pineapple, or even banana slices. Peaches and nectarines are amazing in the summer too!
- Swap nuts: Hate walnuts? Use pecans, cashews, or even peanut butter instead for a creamier texture. You can also skip nuts entirely if you have nut allergies!
- Swap yogurt: Use coconut yogurt for a dairy-free version, or flavored yogurt if you don’t like plain yogurt (just go easy on the added sugar!).
- Add extra sweetness: Drizzle a little bit of honey or maple syrup on top if you want it sweeter, but I find the fresh mango and kiwi are plenty sweet on their own.
- Add protein: Throw in a scoop of protein powder if you’re looking for an extra boost—perfect for post-workout snacks!
Quick FAQ About Fruit Yogurt Cups
I get a lot of questions about this recipe, so let’s cover the most common ones:
Can I make this ahead of time? Yes! Just don’t add the kiwi slices or mint garnish until right before serving, and store the parfait in an airtight container in the fridge for up to 24 hours. The oats will stay crunchy if you add them right before eating too.
Is this good for weight loss? Absolutely! It’s low in calories, high in protein and fiber, which keeps you full longer. I’ve swapped my usual morning pastry for this recipe and lost 10 pounds in a month without even trying.
What if I don’t have dried cranberries or raisins? No problem! Use any dried fruit you like—dried cherries, dried apricots, or even dried pineapple would work great. You can also skip dried fruit entirely if you want.
Final Thoughts on This Easy Yogurt Parfait
I truly think this is the best quick breakfast or snack recipe out there. It’s healthy, tasty, customizable, and so easy even someone who can barely boil water can make it. I’ve made this for my friends, family, and even my picky 7-year-old cousin, and everyone loved it. Next time you’re stuck for a quick meal, give this fruit yogurt cup a try—you won’t regret it!


