

 & Red Dates Pork Bone Soup Recipe | Nourishing Chinese Wellness Dish")


Let’s be real—there’s nothing like the smell of a freshly cooked chive pancake wafting through the kitchen. Crispy on the outside, soft and savory on the inside… it’s one of those snacks that hits different. I’ve been craving them like crazy lately, so I decided to stop ordering takeout and make my own. Spoiler: It’s way easier than I thought! If you’re a fan of savory pancakes or just want a fun weekend cooking project, this recipe’s for you. Let’s dive in!
What You’ll Need (Ingredients)
First things first—gather your stuff. I kept this simple, but feel free to tweak to your taste!
- 200g all-purpose flour (you can add a bit more if you want thicker pancakes)
- 110g hot water (not boiling—just steamy!)
- 2 large eggs
- Fresh chives (as much as you want—more = more flavor!)
- Dried vermicelli noodles (a small handful works)
- Seasonings: Salt, sugar (a tiny pinch for balance), sesame oil, MSG (optional), red chili peppers (skip if you hate spice)
Let’s Make the Pancakes! (Step-by-Step)
Step 1: Make the Dough
Start with the base—flour! Grab your measuring cup and weigh out 200g of all-purpose flour. Dump it into a big bowl. Trust me, using a bowl with high sides saves you from flour explosions later.

Now, the hot water part. This is key for a soft dough! Slowly pour in the 110g hot water while stirring with chopsticks. Don’t dump it all at once—every flour brand absorbs water differently. You want to get a shaggy, clumpy mixture first.

Once it’s clumpy, it’s time to knead! Get your hands dirty (or wear gloves if you’re fancy) and work the dough until it’s smooth and elastic. It shouldn’t be sticky—if it is, add a tiny bit more flour. If it’s too dry, splash in a drop more water. Cover the dough with a damp cloth and let it rest for 15-20 minutes. This lets the gluten relax, so rolling it out later is a breeze.

Step 2: Prep the Egg Filling
While the dough rests, let’s make the egg part. Crack two eggs into a small bowl and beat them with chopsticks until the yolks and whites are mixed. I like to add a pinch of salt here for extra flavor.

Heat a non-stick pan over medium heat (no oil needed yet—eggs have their own fat!). Pour in the beaten eggs and let them cook for 30 seconds. Then, use a spatula to stir and scramble them until they’re fully cooked but still soft. Don’t overcook—dry eggs are no fun!


Transfer the scrambled eggs to a plate and let them cool. Once they’re cool enough to touch, chop them into small pieces. The smaller, the better—you don’t want big chunks poking through the pancake later.

Step 3: Chop the Chives
Next up: chives! Wash them thoroughly (they can have dirt hidden in the leaves) and pat them dry with a paper towel. Then, chop them into 1cm pieces. Wait—here’s a lazy hack I use: a food chopper! Just toss the chives in and pulse a few times. It’s way faster than chopping by hand, especially if you’re using a lot of chives.


Step 4: Prep the Vermicelli Noodles
Take your dried vermicelli noodles and soak them in hot water for 5-10 minutes until they’re soft. Drain them well (excess water will make the filling soggy!) and chop them into short pieces. I usually cut them into 2cm lengths—they add a nice chewy texture to the pancake.
Step 5: Mix the Filling
Now, combine all the filling ingredients! Grab a big bowl and add the chopped eggs, chives, and vermicelli. Then, season to taste: a pinch of salt, a tiny pinch of sugar (it balances the salt and chive bitterness), a drizzle of sesame oil (this is non-negotiable—it adds so much aroma!), and optional MSG if you like. If you love spice, chop up some red chili peppers and toss them in too.

Mix everything together gently. Don’t overmix—you don’t want to mash the chives or eggs. Set the filling aside while we get back to the dough.


Step 6: Assemble the Pancakes
Take the rested dough and knead it a few times to make it smooth again. Divide it into 4 equal pieces (or 5 if you want smaller pancakes). Roll each piece into a ball.

Flour your work surface lightly. Take one dough ball and flatten it with your palm. Then, use a rolling pin to roll it into a circle about 10cm wide—make sure the center is thicker than the edges. This prevents the filling from leaking out when you fold it.

Spoon 2-3 tablespoons of filling onto the center of the dough circle. Don’t overstuff it—you’ll regret it when folding! Fold the edges of the dough up over the filling, pinching and twisting to seal it like a dumpling or bao bun. It doesn’t have to be perfect—homemade looks are part of the charm!


Once sealed, flip the pancake over so the smooth side is down. Gently press it with your palm to flatten it into a 15cm-wide disc. Don’t press too hard—you don’t want the filling to squish out.

Step 7: Cook the Pancakes
Heat a non-stick pan over medium-low heat and brush a thin layer of oil on the surface. Place the flattened pancake in the pan and cook for 2-3 minutes, until the bottom is golden brown and crispy.

Flip the pancake over and cook the other side for another 2-3 minutes. If the filling isn’t hot enough, you can cover the pan with a lid for 1 minute to let it steam. Once both sides are crispy and golden, transfer the pancake to a plate.

Pro Tips for Perfect Chive Pancakes
- Don’t overfill the pancakes! It’s tempting to pile on the filling, but this leads to leaks and messy folding.
- Use medium-low heat when cooking. High heat burns the outside before the inside is cooked.
- If you have leftover pancakes, let them cool completely, then wrap them in plastic wrap and freeze. To reheat, pop them in a toaster oven or pan with a tiny bit of oil—they’ll taste almost fresh!
- Add other ingredients to the filling if you want! Some people love adding shredded carrots, mushrooms, or even pork. Get creative!
Final Thoughts
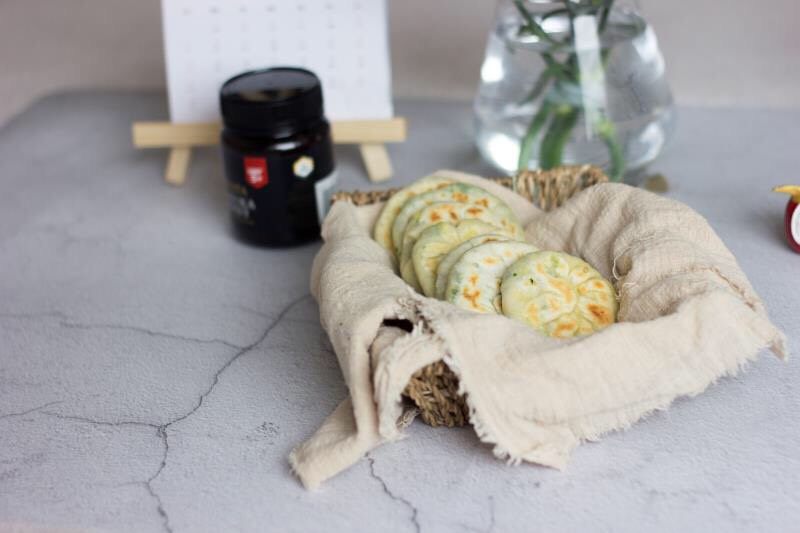
And there you have it—homemade chive pancakes that are crispy, savory, and totally worth the effort! I ate one as soon as it came out of the pan (burned my tongue a little, but it was worth it). The combination of soft dough, chewy vermicelli, and fresh chives is chef’s kiss.

Whether you’re making these for breakfast, a snack, or even a light dinner, they’re sure to be a hit. So grab your flour, chives, and a pan—let’s get cooking!


