


")
Why Onion and Pork Stir-Fry Is My Go-To Weeknight Meal
Let’s be real—weeknights are chaos. Between work, errands, and trying not to burn the house down, I need a meal that’s fast, tasty, and doesn’t require a million fancy ingredients. Enter: onion and pork stir-fry. It’s been my kitchen hero for years, and today I’m spilling all the details—from why onions are way more than just a flavor boost to the exact steps to make this dish perfect every single time.
Wait, Onions Are Actually Good for You? Who Knew!
I used to think onions were just there to make my eyes water and add a little zing to dishes. But turns out, they’re a total superfood in disguise! Let me break it down:
- Vitamins & Minerals Galore: Onions are packed with vitamin C (hello, immune system!), B vitamins (great for energy), and potassium (keeps your heart happy).
- That Spicy Kick Has Benefits: Ever notice that sharp, eye-stinging smell when you cut an onion? That’s allicin, a compound that fights bacteria and inflammation. It’s like a tiny natural antibiotic in your pan!
- Long-Term Perks: Some studies even link onions to lower cancer risk. Plus, they’re low in calories but high in fiber—so you feel full without overdoing it.
Who would’ve thought that the veggie I used to avoid chopping (thanks, teary eyes!) is this good for me? Now I chop onions like a pro—okay, maybe still with a tissue nearby, but progress!
Ingredients You’ll Need (No Fancy Stuff, Promise)
One of the best things about this stir-fry is that you probably already have most of these ingredients in your fridge or pantry. Here’s the full list:
- 1 medium onion (I prefer yellow or white—they’re milder than red for stir-fry)
- 150g lean pork (pork tenderloin or loin works best—trim any fat to keep it light)
- 3 tbsp light soy sauce (adds that savory umami flavor)
- 2 tbsp cooking wine (rice wine is ideal, but dry sherry works in a pinch—trust me, it cuts the pork’s gamey taste)
- 1 flat spoon cornstarch (this is the secret to juicy, tender pork—don’t skip it!)
- Pinch of salt (to taste—go easy at first, since soy sauce is salty)
- Enough cooking oil (I use vegetable or canola—something with a high smoke point)
See? No weird sauces or specialty veggies. Just simple, affordable stuff.
Step-by-Step Guide: Let’s Cook This Bad Boy
Okay, let’s get to the fun part—cooking! I’ve broken this down into 13 easy steps, with photos to help you along. No culinary degree required, I swear.
Step 1: Gather Your Ingredients First

Pro tip: Mise en place (fancy French for “get everything ready”) is your friend here. Stir-fry moves fast, so you don’t want to be rummaging for soy sauce while the pan is smoking. Lay out all your ingredients on the counter before you turn on the stove.
Step 2: Slice the Pork (Thinly, Please!)

Wash the pork first, then pat it dry with a paper towel (wet pork = sad, steamed meat instead of crispy, seared goodness). Slice it into thin strips—if the pork is a little tough, pop it in the freezer for 15 minutes first; it’ll slice like butter. Trust me, this trick changed my life.
Step 3: Add 2 tbsp Soy Sauce to the Pork

Pour 2 tablespoons of soy sauce over the pork strips. This is where the flavor starts—soy sauce adds saltiness and that deep, savory taste we all love.
Step 4: Drizzle in 2 tbsp Cooking Wine

Cooking wine might seem optional, but it’s not! It helps tenderize the pork and gets rid of any “porky” smell. If you don’t have rice wine, dry sherry is a great substitute—just don’t use drinking wine (it’s too sweet).
Step 5: Mix in Cornstarch & Marinate for 10 Minutes

Add that 1 flat spoon of cornstarch and mix everything together until the pork is coated. Let it sit for 10 minutes—this is non-negotiable. The cornstarch forms a protective layer, so when you cook the pork, it stays juicy instead of drying out. I usually set a timer here so I don’t forget!
Step 6: Slice the Onion (And Fight the Tears)

Peel the onion and slice it into thin strips—try to make them about the same size as the pork so everything cooks evenly. Pro tear-fighting hack: chill the onion in the fridge for 30 minutes before cutting, or cut it under running water. I still end up sniffling a little, but it’s worth it.
Step 7: Cook the Pork Until It’s No Longer Pink

Heat a wok or large frying pan over medium-high heat (woks are better for stir-fry, but a pan works too). Add a splash of oil—enough to coat the bottom. Once the oil is hot (it should shimmer), toss in the marinated pork. Stir it around constantly for 2-3 minutes until it’s just cooked through (no pink left!). Then scoop it out and set it aside on a plate.
Step 8: Use the Same Pan for Onions (Flavor = Gold)

Don’t wash the pan! The little bits of pork left in the pan (called “fond”) are packed with flavor. Just add a tiny bit more oil if needed, then throw in the onion strips. Stir them around for 1-2 minutes—we want them to start softening but still have a little crunch (unless you like them mushy, which is totally fine too).
Step 9: Add the Last tbsp of Soy Sauce

Pour in the remaining 1 tablespoon of soy sauce and stir everything together. This gives the onions that nice, savory color and ties the whole dish together.
Step 10: Season with Salt (Go Easy!)

Add a pinch of salt to taste, but remember—soy sauce is already salty! I usually start with a tiny pinch, taste, and add more if needed. It’s easier to add salt than to fix an over-salty dish.
Step 11: Put the Pork Back In

Now add the cooked pork back into the pan with the onions. We just need to warm it up and make sure everything is mixed together.
Step 12: Stir & Turn Off the Heat

Stir everything for about 30 seconds—don’t overcook it! You want the pork to stay juicy and the onions to have that perfect texture.
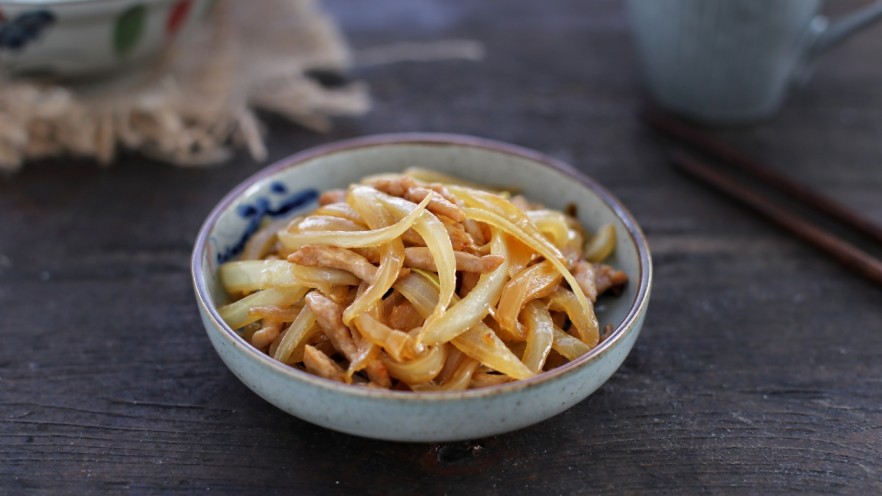
Step 13: Ta-Da! Your Finished Dish

Serve it over rice, noodles, or even just on its own. I promise, it’ll smell so good that your family will be hovering around the stove before you’re done.
My Top Tips for Perfect Onion and Pork Stir-Fry
I’ve made this dish more times than I can count, so I’ve learned a few tricks along the way:
- Crispy vs. Soft Onions: If you want crispy onions, cook them for 1-2 minutes. If you prefer them soft and caramelized, cook for 3-4 minutes. It’s all about personal preference!
- Don’t Overcook the Pork: Pork gets tough if you cook it too long. Take it out as soon as it’s no longer pink—you can always warm it up later.
- Marinate the Pork: I know 10 minutes seems like a long time, but it’s worth it. The cornstarch and seasonings really penetrate the meat, making it juicy and flavorful.
- Use a Hot Pan: A hot pan is key for stir-fry. If the pan is too cold, the pork will stick and steam instead of searing.
Final Thoughts: Why This Dish Works for Everyone
Onion and pork stir-fry isn’t just easy—it’s versatile. You can add veggies like bell peppers, carrots, or broccoli if you want to bulk it up. Or swap the pork for chicken or tofu if you’re vegetarian. It’s perfect for busy weeknights, lazy weekends, or even when you have friends over (they’ll think you’re a chef!).
So next time you’re staring into the fridge wondering what to make, give this recipe a try. It’s simple, delicious, and good for you—what more could you ask for? Let me know how it turns out in the comments!


: A Spicy, Tangy Winter Comfort Food You Need to Try")