


Introduction: Why This Soy Sauce Chicken is a Game-Changer
Let me guess—you’re tired of spending hours in the kitchen for a decent chicken dinner, right? Or maybe you just want something simple, flavorful, and ready in under 30 minutes? Well, I’ve got news for you: your rice cooker isn’t just for making rice anymore! This soy sauce chicken recipe is a total lifesaver—no fancy stoves, no complicated stir-frying, just tender, juicy chicken thighs that taste like they came from a 5-star restaurant. Trust me, I’ve tested this recipe a million times (okay, maybe 10, but still!) and it never fails. Let’s dive in!
Ingredients You’ll Need: No Fancy Stuff, Just Good Flavor
First, let’s gather the basics. You probably already have most of these in your pantry! Here’s what you’ll need:
- Chicken thighs (4-5, bone-in or boneless—thighs are the best for juiciness!)
- Soy sauce (3-4 tablespoons, adjust to taste—low-sodium works too if you’re watching salt)
- Ginger (3-4 slices, fresh is best—no dried ginger substitute here!)
- Green onions (3-4 stalks, chopped—for that fresh, fragrant kick)
- Sichuan pepper powder (1/4 tsp, optional but so worth it for that numbing-spicy flavor! If you don’t have it, regular black pepper works, but Sichuan is the secret)
Step-by-Step: Let’s Cook That Chicken! (With Zero Stress)
Okay, let’s get this show on the road. No need to preheat the oven or clean a million pans—your rice cooker is about to be your new best friend. Let’s break it down:
Step 1: Prep the Chicken Thighs (Dry = Tasty)

First things first: wash those chicken thighs thoroughly under cold water. Then, dry them completely with paper towels—this is KEY! If there’s moisture left, the chicken won’t absorb the sauce as well, and it’ll turn out soggy instead of tender. I once forgot to dry mine and ended up with a mushy mess… lesson learned! So dry, dry, dry those babies.
Step 2: Make the Magic Marinade

Now, let’s make the marinade! Grab a small bowl and pour in the soy sauce—about 3-4 tbsp. Then add the ginger slices (fresh ginger from the fridge? Perfect!). Chop up the green onions and toss those in too. Finally, a pinch of Sichuan pepper powder—stir it all together until everything’s mixed. Taste as you go: if it’s too salty, add a splash of water; if it’s too plain, more soy sauce. You’re the boss here!
Step 3: Marinate the Chicken (Patience = Flavor)

Time to marinate! Put the dry chicken thighs into a bowl, pour the marinade over them, and rub it in with your hands (messy but effective!). Cover the bowl with plastic wrap or a lid and let it sit for 1 hour. Trust me, the longer it marinates, the more flavor the chicken soaks up. I usually set a timer so I don’t get distracted and forget. While marinating, you can binge-watch a show or fold laundry—multi-tasking at its finest!
Step 4: Heat the Rice Cooker & Sauté Aromatics

Now, fire up the rice cooker! Press the “cook” button to preheat it. Once warm, add 1 tbsp of oil (just enough to coat the bottom). Toss in the leftover ginger slices and green onions from the marinade bowl—let them sizzle for 30 seconds until fragrant. You’ll smell that amazing ginger-onion aroma, and your kitchen will suddenly feel like a cozy Chinese restaurant. Yum!
Step 5: Cook the Chicken (Rice Cooker Does All the Work)

Add the marinated chicken thighs to the rice cooker—make sure to pour in all the leftover marinade too! Close the lid and press “cook” again. Let it go for 7 minutes. Don’t open the lid yet—patience, grasshopper! The rice cooker is working its magic, cooking the chicken evenly without you lifting a finger.
Step 6: Flip & Finish (Almost Done!)

After 7 minutes, carefully flip the chicken thighs over with tongs or a spatula. Close the lid and let it cook for another 5-7 minutes. Total cooking time should be around 12-15 minutes. Check if the chicken is done by poking it with a fork—if the meat is tender and the sauce is sticky, you’re golden! The rice cooker will switch to “warm” mode when it’s done, so you can safely open the lid.
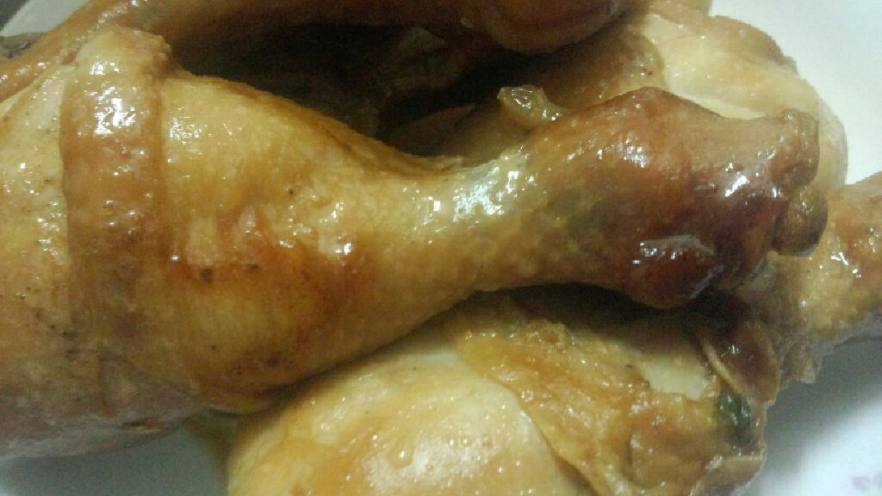
Step 7: Serve & Enjoy! (The Best Part)

Ta-da! Your soy sauce chicken is ready. Transfer it to a plate and marvel at that glossy, flavorful sauce. Serve it with white rice, noodles, or just by itself—either way, it’s delicious. I swear, this recipe is so easy even my 10-year-old nephew could make it (with adult supervision, of course). Pair it with a cold beer or a glass of tea, and you’ve got the perfect weeknight dinner.
Pro Tips to Level Up Your Chicken Game
Want to take this recipe to the next level? Here are my secret hacks:
- Bone-in thighs > Boneless: They stay juicier and add more flavor as they cook.
- Marinate overnight: For extra flavor, marinate the chicken in the fridge for 24 hours—game-changer!
- Adjust the sauce: Add honey or brown sugar for a sweet-savory twist, or skip Sichuan pepper if you don’t like spicy.
- Don’t overcook! The rice cooker can dry out the chicken if left too long—check at 12 minutes max.
FAQ: Everything You Need to Know
Can I use chicken breasts instead?
Sure! Just reduce the cooking time to 10 minutes total (since breasts cook faster). But thighs are way juicier, so stick with thighs if you can!
What if I don’t have a rice cooker?
No rice cooker? Use a slow cooker on low for 4-5 hours, or a regular pot on low heat for 30 minutes. The goal is to cook the chicken slowly to keep it tender.
How to store leftovers?
Store in an airtight container in the fridge for up to 3 days. Reheat in the microwave with a splash of water to keep it moist, or eat cold (it’s still amazing!).


 at Home")

