


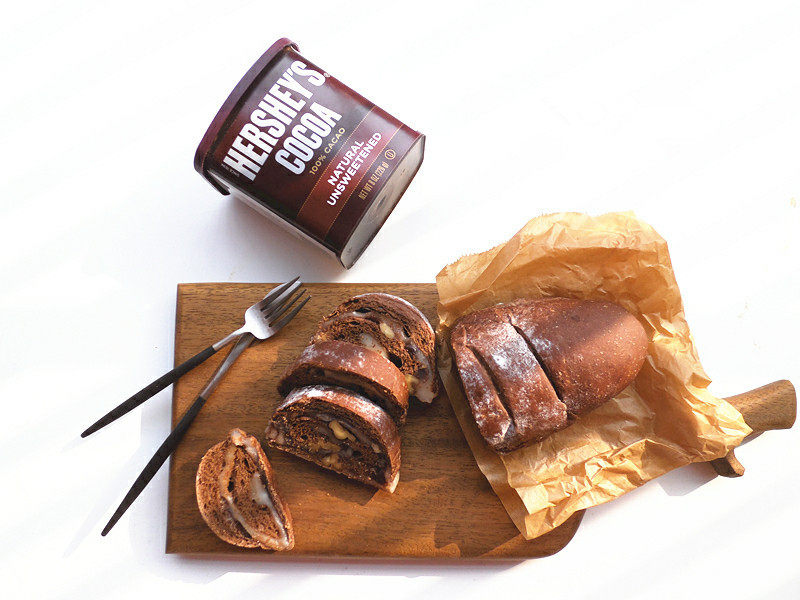
Why This Cocoa Mochi Soft European Bread Is a Game-Changer
Let’s be real—store-bought bread can be so boring. Dry, lacking flavor, and zero excitement. But this cocoa mochi stuffed soft European bread? Total game-changer. Imagine biting into a fluffy, cocoa-kissed crust that gives way to a chewy, stretchy mochi center loaded with sweet red bean paste, crunchy walnuts, and bursts of honey beans. Oh, and the first bite when it’s still warm? The mochi pulls into these amazing strings—you’ll feel like you’re eating a fancy bakery treat right at home. Trust me, once you make this, you’ll never go back to plain bread again.
What You’ll Need (Ingredients Breakdown)
First things first: gather your ingredients. I’ve split them into two parts—bread dough and mochi filling—so it’s easier to follow. Pro tip: For the red bean paste, homemade is way better. Store-bought is usually too sugary, which can throw off the balance. But if you’re short on time, just cut back on the sugar in the mochi a little.
Bread Dough Ingredients:
- 200g high-gluten flour (the secret to that chewy bread texture)
- 50g whole wheat flour (adds a nice nutty depth)
- 1 large egg (binds everything and adds richness)
- 3g salt (enhances all the flavors—don’t skip this!)
- 35g sugar (just enough sweetness without being overpowering)
- 3g active dry yeast (make sure it’s fresh so your dough rises properly)
- 130g water (adjust this based on your flour—some flours absorb more than others)
- 25g unsalted butter (softened, for that melt-in-your-mouth texture)
- 17g cocoa powder (use good quality for a deep chocolate flavor)
Mochi Filling & Extras:
- 105g glutinous rice flour (for that classic mochi chew)
- 15g unsalted butter (softened, to make the mochi smooth)
- 35–40g powdered sugar (adjust to taste)
- 180g milk (whole milk works best for creaminess)
- 30g cornstarch (thickens the mochi so it’s not too runny)
- Red bean paste (homemade preferred)
- Honey beans (or regular red beans if you don’t have honey beans)
- Walnuts (chopped, for crunch)
- Dried fruits (optional—raisins or cranberries add a fun tang)
Step-by-Step Instructions (With Pro Tips)
Okay, let’s dive into the steps. I’ve included photos for each part so you can visualize what to do. Take your time with the dough kneading—getting that windowpane effect is key for fluffy bread.
1. Start the Bread Dough (No Butter Yet!)

Pop all the bread ingredients into your bread machine except the butter. Select the dough function and set it for 15 minutes. Now, about the water: don’t pour it all in at once. Flour absorbs moisture differently, so add a little at a time until the dough comes together into a soft ball (not too sticky, not too dry).
2. Add Butter & Knead Until Smooth

After 15 minutes, toss in the softened butter. Keep kneading until the dough forms a thin, elastic membrane when you stretch it—this is called the “windowpane test.” If the membrane tears easily, keep kneading a bit more. This step is crucial for that light, airy bread texture.
3. Let the Dough Ferment

Leave the dough in the bread machine to ferment until it doubles in size. This usually takes 1–1.5 hours, depending on how warm your kitchen is. To check if it’s ready, poke it with a finger—if the indentation stays, it’s good to go.
4. Make the Mochi While the Dough Ferments

Don’t waste time! While the dough is rising, make the mochi. Mix glutinous rice flour, cornstarch, and powdered sugar in a bowl. Pour in the milk and whisk until everything is smooth—no lumps allowed!
5. Steam the Mochi

Pour the mochi mixture into a heatproof bowl and steam it for 15 minutes. How do you know it’s done? Poke it with a chopstick—if it comes out clean (no runny batter), it’s ready. Let it cool down a bit until it’s warm (not hot).
6. Knead Butter Into the Mochi

Add the softened butter to the warm mochi and knead it in until the butter is fully absorbed. The mochi will be sticky at first, but keep going—it’ll get smoother. Wrap it in plastic wrap and pop it in the fridge to chill while you work on the dough.
7. Shape the Dough & Add Fillings

Take the fermented dough out and punch it down to release the air. Split it into 3 equal parts, cover with plastic wrap, and let it rest for 15 minutes (this makes it easier to roll).

Roll each dough ball into a long oval. Take a piece of the chilled mochi and stretch it out (it’s easier when it’s cold!) to cover most of the dough. Spread a thin layer of red bean paste on top, then sprinkle with walnuts, honey beans, and any dried fruits you like.
8. Roll & Second Ferment

Roll the dough up tightly from the bottom to the top—like a burrito. Place the rolls on a baking sheet lined with parchment paper. Let them ferment again until they double in size (about 30–45 minutes). To keep them moist, put a bowl of warm water in the oven while they rise.
9. Bake to Perfection

Preheat your oven to 180°C (350°F). Once the rolls are puffy, dust them with a little flour and make a few slashes on top (this lets the steam escape and makes them look professional). Bake for 23 minutes—every oven is different, so check after 20 minutes. The crust should be golden brown and sound hollow when you tap it.
Final Thoughts & Pro Tips
Let the bread cool for 5–10 minutes before slicing (I know, it’s hard to wait!). The first bite when it’s still warm is unbeatable—the mochi is chewy, the fillings are sweet, and the bread is fluffy. If you have leftovers, store them in an airtight container for up to 3 days. To reheat, pop them in the microwave for 10 seconds—they’ll taste almost as good as fresh.
And one last thing: don’t stress if your first try isn’t perfect. Kneading the dough takes practice, and adjusting the water amount is normal. Just have fun with it—baking is all about experimenting and enjoying the process. Now go make this bread and impress your friends (or just eat it all yourself—no judgment here).
 – A Classic Chinese New Year Dish")


")
