


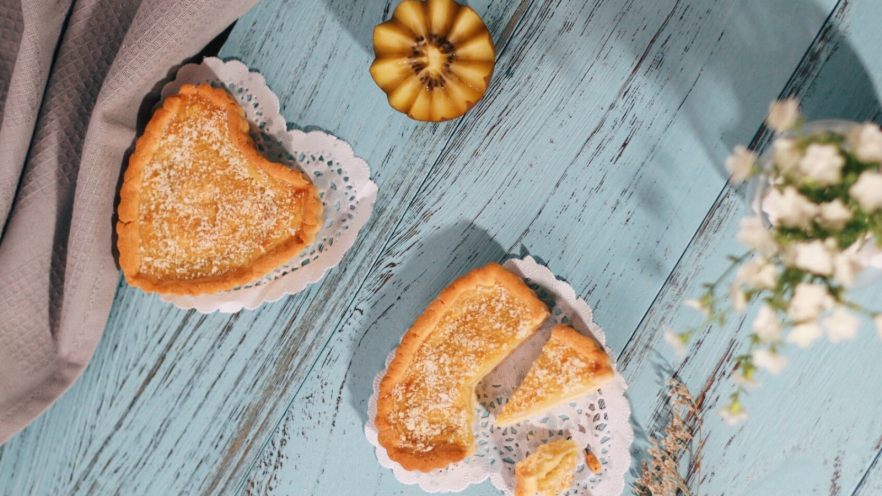
Craving a coconutty delight that’s crispy on the outside and creamy on the inside? Let me introduce you to my all-time favorite homemade coconut pie recipe! I’ve been perfecting this for years, and honestly? It’s so easy even if you’re new to baking. The secret? Using Kara coconut milk powder for that intense coconut aroma—trust me, just opening the container will make your kitchen smell like a tropical paradise. Plus, the crust is surprisingly flaky with a tiny bit of butter (no, you can’t skimp on that!), and the filling is sweet, smooth, and packed with coconut flavor. If you’re a coconut fanatic like me, this one’s for you! Let’s get baking!
Why This Coconut Pie Works (Spoiler: It’s All About the Details)
Okay, let’s talk about why this recipe is a winner. First, the crust: we’re using just the right amount of butter (not too much, not too little) to keep it tender but still flaky. No fancy equipment needed—just a hand mixer or even your hands (my personal preference!). Then the filling: boiling water + coconut milk powder creates that rich, concentrated coconut taste. We also add a bit of cornstarch to thicken it up, so it’s not runny—perfect for slicing without a mess. And the cherry on top? Sprinkling toasted coconut on top 5 minutes before baking… that’s when the magic happens, folks!
What You’ll Need: Ingredients Breakdown
Let’s grab everything first so you don’t have to run back and forth. Here’s the shopping list:
For the Buttery Pie Crust:
- Butter (unsalted, softened): 40g (about 3 tbsp—don’t overdo it, but don’t skimp!)
- All-purpose flour (low protein, for that flakiness): 100g
- Salt: 1g (just a pinch, to enhance sweetness)
- Powdered sugar: 20g (or 2 tbsp—adds a subtle sweetness)
- Egg (large, room temperature): 15g (just enough to bind everything)
For the Coconut Filling:
- Coconut milk powder (Kara brand, if you can find it): 30g (the star of the show!)
- Boiling water: 70g (about ¼ cup—this dissolves the powder quickly)
- Egg (large, room temperature): 20g (another binding agent)
- Powdered sugar: 10g (adjust to taste—maybe add more if you like it sweeter)
- Cornstarch: 5g (to thicken the filling so it holds shape)
Pro tip: If you’re out of coconut milk powder, swap it with 1 can of full-fat coconut milk (strained if needed) to save time!
Step-by-Step Guide: Let’s Make This Pie!
Alright, let’s roll up our sleeves. This is a two-part process: first the crust, then the filling. Let’s start with the crust because it needs time to rest (patience is key here!).
Part 1: Making the Flaky Pie Crust

Step 1: Soften the butter (and let’s get cozy with it!)
First, take the butter out of the fridge and let it sit at room temperature for about 30 minutes—until it’s soft enough to press with your finger easily. Don’t melt it! Soft, not mushy. I usually leave mine on the counter while I prep the filling, so it’s ready when I need it.
Step 2: Cream the butter & sugar (the fluffy base!)

Grab a mixing bowl and add the softened butter. Now, add the powdered sugar and a pinch of salt. Use a hand mixer on low speed (or even a fork, if you’re old-school) to beat them together until the butter turns pale and fluffy—this takes about 2-3 minutes. See? It’s already smelling nutty!
Step 3: Add the egg (bind it all together)

Pour in the room-temperature egg and mix on low until everything’s fully combined. The butter should look lighter and slightly yellow now—nice! Don’t overmix here, just enough to incorporate the egg.
Step 4: Mix in the flour (dry ingredients time!)

Now, sift the all-purpose flour into the bowl. Sifting is important for a smooth crust! Use a rubber spatula to gently fold the flour into the butter mixture until there are no dry patches left. Stop when it’s just mixed—no overworking, or the crust will get tough.
Step 5: Form the dough & chill

Turn the dough out onto a clean surface and knead it a few times with your hands (I love the feel of dough between my fingers!) to form a smooth ball. Wrap it tightly in plastic wrap and let it rest in the fridge for 30 minutes. This step is NON-NEGOTIABLE—resting the dough makes it easier to roll out without shrinking!
Part 2: Preparing the Coconut Filling
While the crust chills, let’s make the filling. It needs time to rest too, so you’ll have a smooth, thick base ready when the crust is done.
Step 6: Dissolve the coconut milk powder

Grab a small bowl and add the 30g of coconut milk powder. Pour in 70g of boiling water (careful, it’s hot!) and whisk like crazy until there are no lumps. You should have a thick, creamy coconut mixture—this is where the amazing coconut smell starts!
Step 7: Add eggs and sugar

Whisk in the egg (20g) and 10g of powdered sugar. Stir until everything’s combined—this is getting sweet! Taste it a little if you want; it should already smell coconutty and sweet.
Step 8: Thickening with cornstarch

Add the 5g of cornstarch and mix well. The cornstarch will help thicken the filling later, so make sure it’s fully incorporated—no clumps!
Step 9: Sift and rest the filling

Strain the filling through a fine sieve into another bowl to remove any lumps. This makes it super smooth—trust me, you’ll thank me later when slicing the pie! Cover the sieve with plastic wrap and let it rest at room temperature for 30 minutes. Another rest step for texture magic!
Part 3: Assembling & Baking the Pie
Now we’re ready to put it all together. Let’s roll out the crust and fill the pie!
Step 10: Roll out the pie crust

Take the rested dough out of the fridge and divide it into two equal parts (I usually use a scale for this, but you can just eye it). Take one part and place it between two sheets of plastic wrap. Roll it out with a rolling pin until it’s about 3mm thick (not too thin, not too thick!) and slightly larger than your pie pan (mine’s a 9-inch tart pan). Don’t rush this—slow, even rolling keeps the crust uniform!
Step 11: Transfer the crust to the pan

Gently peel off the top plastic wrap and carefully drape the dough over your tart pan. Press it into the pan, then peel off the remaining plastic. Use your fingers to press the dough into the pan edges—don’t worry if it cracks a little; we’ll fix it! Use a fork to prick the bottom all over (this prevents air bubbles while baking). Pro tip: If it cracks, just pinch the cracks together—it’ll be fine!
Step 12: Blind bake the crust (no filling yet!)

Line the crust with parchment paper and fill it with baking weights or dried beans (if you don’t have weights, use ¼ cup of uncooked beans). This keeps the crust from puffing up while baking. Preheat your oven to 160°C (320°F) and bake for 15 minutes. The crust will start to turn golden here—you’re doing great!
Step 13: Fill the pie

After 15 minutes, take the crust out of the oven and remove the parchment paper and weights. Pour the coconut filling into the crust—it should be about ¾ full (it’ll rise a bit during baking, so don’t overfill!).
Step 14: Final bake with coconut topping

Return the pie to the oven (still at 160°C) and bake for 25 minutes. This is the long part, but patience pays off! Five minutes before it’s done, sprinkle a generous amount of unsweetened shredded coconut on top. The oven heat will toast it slightly, making the coconut smell unreal.
Step 15: Cool and enjoy!

Once done, take the pie out of the oven and let it cool completely on a wire rack. Wait, no—actually, let it rest for 10 minutes, then carefully remove it from the pan. Slice and serve with a scoop of vanilla ice cream, or just eat it straight from the plate. I won’t judge if you do both!
Pro Tips for the Perfect Coconut Pie
1. Butter matters! The pie crust uses 40g of butter, and you can’t reduce that—too little butter makes the crust tough, too much makes it greasy. Stick to the amount!
2. Baking weights = game-changer. If you don’t have ceramic pie weights, use dry beans or lentils (they’re reusable!).
3. Coconut milk powder vs. fresh coconut milk. If you can’t find the powder, 1 can of full-fat coconut milk (strained) works, but the powder is easier to store and gives a stronger coconut flavor.
4. Toasted coconut is key. Sprinkle the coconut right before baking, not earlier. The heat will make it fragrant and golden, not burnt.
Final Verdict: This coconut pie is the ultimate comfort dessert. Whether you’re hosting a brunch, treating yourself, or just want something sweet after dinner, this recipe delivers every time. The crust is flaky, the filling is creamy, and the coconut aroma is incredible. Trust me, once you make this, you’ll be hooked. Tag me if you bake it—I’d love to see your creations! Happy baking!

Now go grab your ingredients and make this coconut pie—your taste buds will thank you!


 at Home")

