


Okay, let’s start with a confession: I’ve been there—the kitchen disaster where you swear you’re making something fancy, but instead, you end up with a bowl of buttery chaos. 😅 I was trying to make these intricate braided cookies, and the butter? Oh man, I over-whipped it so much it turned into this fluffy cloud that refused to braid. Instead of tossing the dough (which, let’s be real, took forever to mix!), I thought, “Why not turn this into a pumpkin?” And voilà! These adorable little pumpkin-shaped cookies were born. They’re not just cute—they’re soft, slightly sweet, and surprisingly easy to make, even if you’re a baking newbie. Let’s dive into how you can make them too!
Ingredients You’ll Need
To make these pumpkin cookies, you’ll need just a few simple ingredients. Grab your measuring cups and spoons, and let’s get started:
- 280g all-purpose flour (or low-gluten flour, if you have it)
- 100g unsalted butter, softened to room temperature
- 60g powdered sugar (also called icing sugar)
- 50g whole egg (or egg liquid—just whisk it up first)
No fancy ingredients here, which is perfect if you’re short on time or pantry staples!
Step-by-Step: Making the Pumpkin Cookies
Don’t worry if you’ve never baked before—these steps are super straightforward. Let’s break it down:
First, gather all your ingredients and measure them out. Accuracy is key here, but don’t stress if you’re off by a little (baking is forgiving!). Set them next to your mixing bowl so you can grab them easily.


Next, let’s prep the butter. Soften it by leaving it out at room temperature for about 30 minutes, or if you’re in a rush, pop it in the microwave for 10-15 seconds (but watch it—you don’t want melted butter!). Softened butter creams much better than cold butter, so patience here pays off.

Add the powdered sugar to the softened butter. To keep the sugar from flying everywhere (we’ve all had that mess!), gently mix it with a spatula first. This prevents a sugar explosion in your kitchen.

Now, use an electric mixer (or a whisk if you’re old-school) to beat the butter and sugar until it’s smooth and creamy. It should look light and fluffy but not too airy—we’ll get back to that in a sec.

Next, add the whole egg (or egg liquid). Mix on low speed until it’s fully incorporated. The texture should stay smooth, and the egg will help bind everything together.

Beat until the mixture is light and fluffy again—this is the key to a soft cookie. If you overbeat it, the cookies might spread too much, so keep an eye on the texture here.

Now, add the flour. Make sure you’ve sifted it first (sifting removes lumps and makes the dough lighter!). Add it slowly to the butter mixture and mix on low until just combined—no need to overmix, or the cookies will get tough.

Once the flour is mixed in and there are no dry bits left, you’re done with the wet ingredients! The dough should feel smooth and hold together if you press a bit of it between your fingers.

Transfer the dough to a clean surface and knead it gently a few times to make it uniform. Then wrap it tightly in plastic wrap or put it in a zip-top bag. Pop it in the fridge for 30 minutes to chill. This step is super important—it firms up the dough so you can shape it without it falling apart.

After chilling, take the dough out and divide it into 24 equal pieces. I use a scale, but if you don’t have one, just estimate—each piece should be around 15-20g. Roll each piece into a smooth ball with your hands.

Now for the fun part: shaping the pumpkins! Take one dough ball and place it on a flat surface. Using a toothpick, press 3 lines in a row on the top of the ball—these will be the pumpkin’s ribs.

Then, take two toothpicks (or a fork works too!) and press them into the sides of the ball to make the pumpkin’s “grooves.” Think of it like making a tiny smiley face, but with a pumpkin twist. You’ll have 6 lines total—3 on top, 3 on the sides.

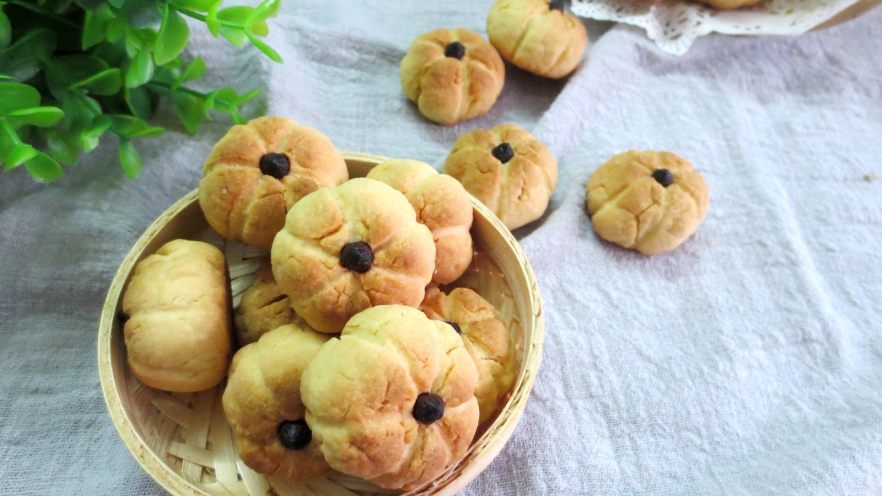
Place each shaped pumpkin on a baking sheet lined with parchment paper (or a silicone mat—this prevents sticking!). If you want extra cuteness, add a small raisin or a mini chocolate chip on top for the pumpkin stem. I love using raisins because they’re sweet and blend right in!

Preheat your oven to 160°C (320°F). Bake the cookies for 15 minutes, or until the edges are just slightly golden. Let them cool on the baking sheet for 5 minutes before moving them to a wire rack—this helps them set without breaking.

Once fully cooled, store the cookies in an airtight container. They’ll stay fresh for up to a week, but let’s be real—they’ll probably disappear in 2 days tops!

Pro Tips for Perfect Pumpkin Cookies
I’ve made these cookies a million times, and I’ve learned a few tricks to avoid common mistakes:
- Don’t overbeat the butter! If you beat the butter and sugar too much, the cookies will spread too much in the oven. Aim for a smooth, creamy texture—not a fluffy cloud. If it does get too fluffy, just let it rest for 5 minutes, and it’ll firm up a bit.
- Chill the dough! This is non-negotiable. Chilling the dough keeps the butter solid, so when you bake, the cookies hold their shape and stay soft. If you skip this, they might turn out flat or crispy.
- Get creative with the “stem”! The raisin trick works, but you could also use a mini chocolate chip or even a small piece of cinnamon stick if you’re feeling fancy. Just make sure whatever you use is safe to eat!
Why You’ll Love These Pumpkin Cookies
These cookies are the ultimate fall treat! They’re:
- Easy to make: No special tools or skills needed—just follow the steps!
- Adorable: Who can resist a tiny pumpkin with a stem? Perfect for kids or gifting.
- Soft and chewy: The secret is the chilled dough and gentle mixing—no hard, crumbly cookies here!
- Versatile: Add extra spices like cinnamon or nutmeg for a pumpkin-spice twist, or swap raisins for chocolate chips for a different flavor.
So next time you’re in the kitchen and a recipe goes wrong, don’t panic! Sometimes the best memories (and cookies) come from turning a mistake into something magical. I hope you love these pumpkin cookies as much as I do—let me know how they turn out in the comments! Happy baking!


")


")