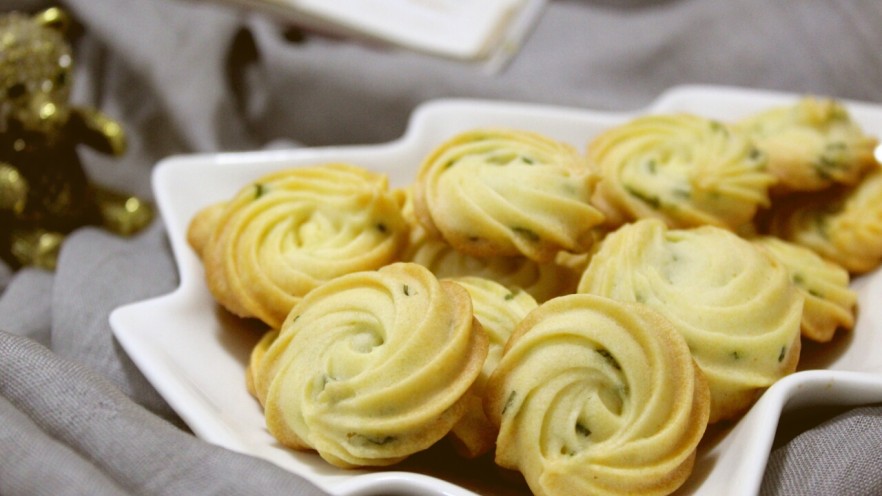
Hi there, cookie lovers! 🍪 If you’re on the hunt for a sweet, crispy, and super buttery treat that’s not just any ordinary cookie, you’ve come to the right place. Today, we’re diving into the world of Grape Milk Crisp Cookies—a recipe that’s equal parts cozy and delicious. Picture this: a buttery, melt-in-your-mouth base with a hint of milky sweetness, and plump raisins adding a chewy, fruity contrast. It’s the kind of cookie you’ll make once and then wonder why you didn’t start sooner. Trust me, even if you’re new to baking, these are doable—no fancy tools needed, just good vibes and simple ingredients!
Why These Cookies Are a Must-Try
First off, let’s talk about the vibe: they’re crispy, not crumbly; buttery, not greasy; and sweet without being cloying. The raisins (or dried grapes, if you prefer) add a little burst of natural sweetness and chewiness that keeps you coming back for more. Plus, they’re perfect for sharing with friends, dipping in your morning coffee, or even as a little “me-time” snack when you need a sugar pick-me-up. I’ve made these for parties, book clubs, and even my picky little nephew—he declared them “the best cookies ever,” so that’s a win!
Ingredients You’ll Need (No Fuss, Just Goodies!)
Before we get into the steps, let’s list out what you need. All these ingredients are easy to find in your pantry (or local grocery store).
- Butter: 80g (softened at room temperature—key for that creamy texture!)
- Sugar: 70g (granulated, to add sweetness and help with crispiness)
- Milk Powder: 12g (this is what gives the “milk” flavor—don’t skip it! It’s like a secret ingredient for extra creaminess)
- Egg Yolks: 3 whole eggs, separated (the yolks are for the dough, and 1/2 yolk left for brushing the top)
- Low-Gluten Flour: 195g (also called all-purpose flour in some regions—make sure it’s sifted to avoid lumps)
- Dried Raisins: 80g (I used two types for extra texture, but regular ones work too! If you’re using fresh raisins, soak them first and dry them off—just a tip!)
- Optional: A pinch of salt (to balance the sweetness, but optional if you want it super sweet)
Step-by-Step: How to Bake These Crispy Delights
Okay, let’s roll up our sleeves and get baking! I’ll break this into easy-to-follow chunks so even beginners can keep up. Remember, every oven is a little different, so adjust temperatures/time if needed.
Step 1: Prep Your Ingredients (and Your Space!)
First, grab all your ingredients and lay them out. It’s way easier than scrambling halfway through!
- Take the butter out of the fridge and let it soften at room temperature for 1–2 hours. You’ll know it’s ready when you can press a finger into it easily (no hard chunks!).
- Preheat your oven to 170°C (340°F). This gives it time to heat up while you prep the dough.
- Wash and dry the raisins if they’re not already dried (if using fresh). If you’re using two types, mix them together.
Step 2: Cream the Butter & Sugar (The Secret to Crispiness!)
This step is crucial for that fluffy texture.
- Add the softened butter to a large mixing bowl. Use a hand mixer or stand mixer for this (but a whisk works too, though it takes a bit more arm muscle!).
- Add the 70g of sugar. Cream the butter and sugar together until they’re light and fluffy—about 2–3 minutes. The color will lighten a bit, and it’ll look like a pale, smooth mixture. If your butter was too cold, it might be lumpy here, so make sure it’s softened first!

Step 3: Add Milk Powder & Mix Thoroughly
Now, we’re building the flavor!
- Sprinkle the 12g of milk powder over the butter-sugar mixture. Mix it in until the powder is fully incorporated. The mixture might look a bit dry at first, but keep mixing—it’ll come together!

Step 4: Add Egg Yolks (One at a Time!)
Egg yolks add richness and help bind the dough.
- Crack the 3 eggs and separate the yolks into a small bowl. We’ll use all 3 yolks in the dough.
- Add the first egg yolk to the butter mixture. Use the mixer on low speed to blend it in completely—scrape down the sides of the bowl with a spatula if needed.
- Repeat with the second and third yolks, one at a time. After each addition, let it mix until smooth and creamy. The final mixture should be thick, fluffy, and a pale yellow color.

Step 5: Combine Flour (Sift First!)
Here’s where the flour comes in. Sifting is key to avoid lumps—trust me, I’ve had dough with lumps before, and it’s a pain!
- Take the 195g of low-gluten flour and sift it into the bowl. Sifting removes any clumps and adds air, which keeps the cookies light and crispy.
- Use a spatula or your hands to gently mix the flour into the butter mixture. You want to stop as soon as everything is combined—overmixing can make the cookies tough!

Step 6: Fold in the Raisins
Now, add the raisins! This is where the “grape” part of the cookie shines.
- Pour in the 80g of raisins (or your mixed raisins) and gently fold them into the dough. Use a spatula to press them in, making sure they’re evenly distributed. Some people like to soak raisins in rum or brandy for extra flavor, but that’s optional—if you’re short on time, skip it!

Step 7: Shape the Dough
Time to turn this sticky dough into cookies!
- Transfer the dough onto a clean, floured surface. Pat it into a flat disk with your hands.
- Use a rolling pin to roll the dough out to about 1cm (or 0.4 inches) thick. If the dough is too sticky, dust the rolling pin and surface with a little extra flour. Aim for a smooth, even layer—no thin spots!

Step 8: Cut the Cookies into Shapes
Now, get creative! Use a cookie cutter or a knife to cut the dough into neat shapes.
- First, use a knife to trim the edges of the dough (like a rectangle or square) if it’s uneven. This makes cutting easier and looks neater.
- Then, cut the dough into small rectangles or squares—whatever size you like! I usually make mine about 5cm (2 inches) long, but you can go smaller or larger. Just aim for consistency so they bake evenly.

Step 9: Brush the Top with Egg Yolk (For That Golden Glow!)
This is the finishing touch to make them look pretty and add a slight egg flavor.
- Crack the 1/2 egg yolk into a small bowl and whisk it lightly with a fork.
- Take each cut cookie and brush the top with a thin layer of the egg yolk. Don’t overdo it—just a light coat so the top gets a shiny, golden look when baked.

Step 10: Bake to Perfection
Finally! Time to pop these into the oven.
- Place the cookies on a baking sheet lined with parchment paper (this prevents sticking!). Leave a little space between each cookie so they have room to spread slightly.
- Slide the baking sheet into the preheated oven (170°C). Set a timer for 15 minutes. But always check after 12 minutes—every oven runs at a different temperature!
- The cookies are done when the edges are golden brown and the tops are a beautiful light golden color. If they’re still pale, bake for another 2–3 minutes.

Step 11: Cool & Enjoy!
Once out of the oven, let the cookies cool on the baking sheet for 5 minutes, then transfer them to a wire rack to cool completely. They’ll crisp up more as they cool—patience is key here!
- Store them in an airtight container at room temperature for up to a week. If you want them fresher longer, freeze them for up to 3 months. When you’re ready to eat, take them out and let them come to room temperature.

Pro Tips to Avoid Common Mistakes
- Butter Temperature: Undermined butter = lumpy dough; over-softened butter = cookies that spread too much. Aim for room temp (1–2 hours).
- Sifting Flour: It removes lumps and adds air, making cookies lighter. Skip this, and you’ll get dense cookies!
- Raisins: Soak them in warm water for 10 minutes if they’re dry, then drain and dry before adding to the dough—this keeps them plump, not dry.
- Oven Temperature: If your oven runs hot, reduce by 10°C. If it runs cold, increase by 10°C. Use an oven thermometer to check!
Final Thoughts: Why These Cookies Are a Game-Changer
These Grape Milk Crisp Cookies are the perfect blend of crispy, buttery, and fruity. They’re not too sweet, which makes them ideal for pairing with tea or coffee. I’ve made them for friends who said they’re “better than store-bought,” and even my mom (who’s picky about baking) gave them a 10/10. Plus, the process is therapeutic—mixing, rolling, cutting, and watching them turn golden in the oven feels so satisfying.
If you’re new to baking, this recipe is a great confidence booster. No fancy techniques, just simple steps that yield amazing results. And if you’re an experienced baker, feel free to experiment with different raisin types or add a pinch of cinnamon for a twist!
So, what are you waiting for? Grab your ingredients, preheat the oven, and get ready to enjoy these crispy, milky, raisin-packed cookies. Let me know in the comments how they turn out—I’d love to hear your stories! Happy baking! 🍪✨