What Are Norwegian Pannekake, Anyway?
Let’s cut to the chase: if you’ve ever had a Chinese egg pancake (dan bing), you might think, “Oh, pannekake are just the Norwegian version of that!” And you’re not wrong—they’re both thin, eggy pancakes cooked in a pan. But here’s the thing: the tiny differences in the batter and how you eat them make pannekake a whole different vibe. Think of it like comparing a classic American burger to a Japanese teriyaki burger—same base, totally different feels.
First, the batter: Norwegian pannekake skip the sugar (shocking, I know—no sweet stuff here!) and rely on a simple mix of eggs, flour, milk, a pinch of salt, and a splash of oil. No fancy add-ins, no hidden spices. Just pure, straightforward flavor. Then there’s the eating part: Norwegians don’t pair these with congee or pickles like we do with dan bing. Oh no—they go all in on sweet toppings like sugar, fresh blueberries, or blueberry jam. And get this: they often eat pannekake for weekend lunch or dinner, not just breakfast. Who knew pancakes could be a main meal? Game. Changer.
Ingredients You’ll Need (No Fancy Groceries Required!)
Before we dive into the steps, let’s talk ingredients. The best part about pannekake is that you probably already have most of this stuff in your kitchen. No need to hunt down weird Nordic ingredients—promise.
- 2 large eggs (room temp is better, but cold works in a pinch—don’t stress)
- 125 grams all-purpose flour (plain flour is fine too)
- 250 milliliters whole milk (or skim, but whole gives better richness—trust me)
- A tiny pinch of salt (just enough to bring out the flavors, not make it salty)
- 1 tablespoon vegetable oil (or melted butter, if you want extra buttery goodness)
Quick note: I know some of you might be tempted to add sugar to the batter. Don’t do it. Pannekake are not a dessert—they’re a blank canvas for your sweet toppings later. Adding sugar now will throw off the texture and make them too… well, cakey. And we don’t want cakey. We want thin, delicate, and slightly chewy.
Step-by-Step: Making Perfect Norwegian Pannekake
Okay, let’s get cooking. This recipe is super forgiving, but there are a few tricks to make sure your pannekake turn out thin and fluffy (yes, thin and fluffy is a thing—stick with me).
Step 1: Gather Your Stuff (No Last-Minute Frantic Searches)

First things first: lay out all your ingredients on the counter. Eggs? Check. Flour? Check. Milk? Check. Oil, salt? Double-check. I’ve made the mistake of starting to mix batter only to realize I’m out of milk—don’t be me. Pro tip: If you’re using butter instead of oil, melt it first and let it cool a little so it doesn’t cook the eggs when you mix the batter.
Step 2: Mix the Batter (Easy Peasy, No Muscle Required)

Throw all your ingredients into a medium bowl—eggs, milk, flour, oil, and that tiny pinch of salt. No need to whisk in a specific order; just dump ’em in. Now, grab a whisk or a hand mixer (on low speed!) and mix until the batter is smooth and has no lumps. Wait, but here’s a crucial rule: don’t overmix. If you beat the batter like it owes you money, you’ll develop the gluten in the flour, and your pannekake will turn out tough. Nobody wants tough pancakes. Mix just enough to get rid of lumps—some small ones are okay, they’ll disappear when you cook them.
Step 3: Let the Batter Rest (Patience Is Key Here)

Now, cover the bowl with plastic wrap or a clean kitchen towel and let the batter sit for at least 30 minutes. I know, I know—waiting is the worst. But here’s why it matters: resting lets the flour absorb the liquid, which makes the batter smoother and the pannekake more tender. If you skip this step, your pancakes might be a little runny and hard to flip. So go grab a coffee, scroll through Instagram, or fold a load of laundry—just don’t touch that batter.
Step 4: Prep Your Pan (Nonstick Is Your BFF)

While the batter rests, get your pan ready. You need a nonstick frying pan—no exceptions. If you don’t have one, borrow a friend’s or run to the store (it’s worth it). Heat the pan over medium-low heat—too hot and your pannekake will burn before the inside cooks. Once it’s warm, take a paper towel or a brush and wipe a thin layer of oil (or butter) over the surface. You don’t need a lot—just enough to keep the pancake from sticking.
Step 5: Cook the First Pannekake (Don’t Panic If It’s Ugly)

Now for the fun part! Grab a ladle (or a measuring cup—about ¼ cup of batter per pancake works) and pour the batter into the center of the pan. Immediately lift the pan and tilt it in a circular motion to spread the batter evenly across the bottom. You want a thin layer—think crepe-thin, not American pancake-thick. Let it cook for 1-2 minutes until the edges start to curl up and the top looks set (no more wet batter). Then, flip it! If you’re nervous about flipping, use a spatula to loosen the edges first, then give it a quick flip. Don’t worry if your first one is a little wonky—practice makes perfect.
Step 6: Finish Cooking and Keep Them Warm

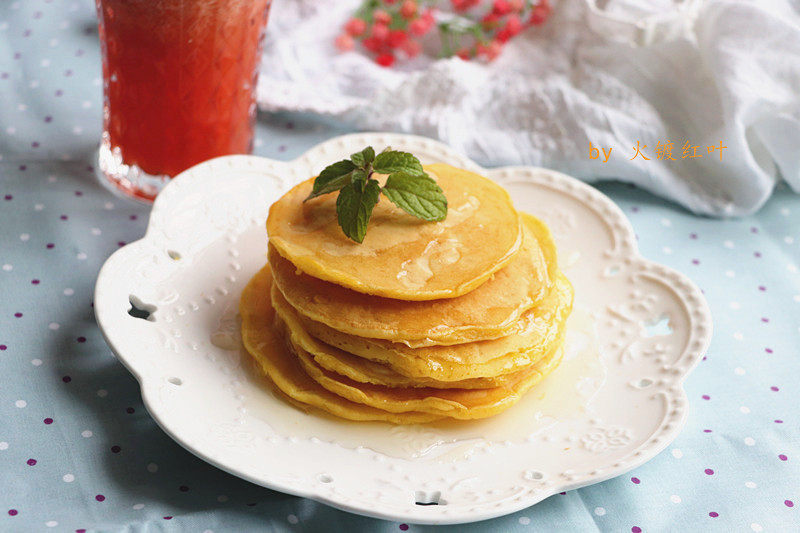
Cook the other side for another 30 seconds to 1 minute until it’s golden brown. Then, transfer the pannekake to a plate. Here’s a pro tip: stack them up and cover with a clean kitchen towel to keep them warm and soft. If you let them sit out uncovered, they’ll get dry and crispy—yuck. Keep cooking until all the batter is gone.
How Norwegians Eat Pannekake (Spoiler: Blueberries Are Non-Negotiable)
Now that you’ve made your pannekake, let’s talk toppings. Norwegians are serious about their pannekake traditions, and blueberries are a big deal here. Like, really big.
1. Classic Blueberry Jam (Norway’s Favorite)

Norwegians are obsessed with blueberry jam on pannekake. I’m not exaggerating—ask any Norwegian, and they’ll tell you it’s the only “real” way to eat them. No strawberry jam, no raspberry jam—just blueberry. Slather a thin layer of jam over the pannekake, roll it up, and eat it with a fork and knife. Simple, sweet, and totally satisfying.
2. Fresh Blueberries + Sugar (Summer Vibes)

If you’re lucky enough to have fresh blueberries (especially wild ones—they’re the best!), skip the jam. Sprinkle a handful of fresh blueberries over the pannekake, add a dusting of sugar, and roll it up. The sweetness of the sugar pairs perfectly with the tartness of the blueberries. It’s like a summer picnic in every bite.
3. Just Sugar (No Frills, All Flavor)

Don’t have blueberries? No problem. A simple dusting of sugar is all you need. Roll up the pannekake, take a bite, and let the subtle eggy flavor shine through. It’s minimalistic, but it works.
4. Banana Slices (A Fun Twist)

Want to mix things up? Add some banana slices! Lay a few thin slices of banana over the pannekake, roll it up, and enjoy. The creamy banana adds a nice texture contrast to the soft pancake. It’s not traditional, but it’s delicious—don’t tell the Norwegians I said that.
Final Tips to Make Your Pannekake Perfect Every Time
Before you go, let’s recap the most important tips to ensure your pannekake turn out amazing:
- Don’t overmix the batter—lumps are okay!
- Rest the batter for at least 30 minutes (your future self will thank you).
- Use a nonstick pan and low to medium heat—no burning allowed.
- Keep cooked pannekake covered with a towel to stay warm and soft.
- Embrace the blueberry obsession—Norwegians know what’s up.
And that’s it! Making Norwegian pannekake is easy, fun, and totally worth the wait. Whether you’re making them for a lazy weekend brunch or a weeknight dinner (yes, dinner!), they’re sure to be a hit. So grab your ingredients, fire up the pan, and let’s make some pannekake!