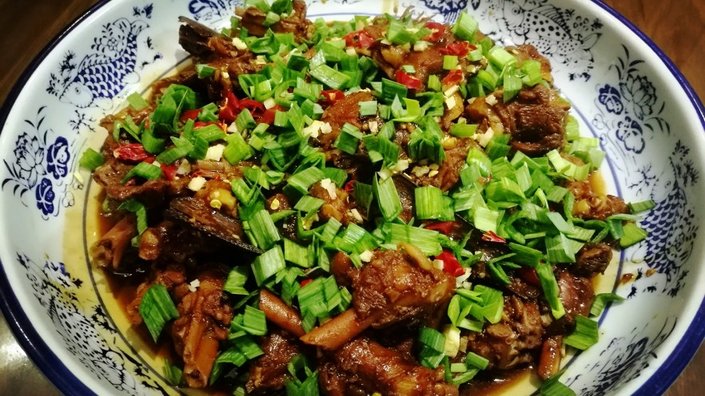

Why This Braised Lamb is a Winter Must-Have
Winter’s here, and let’s be real—we all need something to keep us warm and nourished, right? That’s where this braised lamb recipe comes in! Chinese cuisine has long celebrated lamb as a winter staple, and trust me, it’s not just a cultural thing—it’s science. Young lamb is packed with nutrients that fight the cold, boost your immune system, and leave you feeling cozy from the inside out. Unlike some heavier winter dishes, this tender, aromatic braised lamb is easy to digest, so even if you’re not a die-hard lamb fan, you’ll be hooked after the first bite.
No dry, chewy mess here! The secret is using young lamb cuts and slow-braising them with the right spices. This recipe is perfect for freezing too—make a big batch on a weekend, and you’ll have ready-to-go comfort food for busy weekdays. Let’s dive into how to make this magic happen!
Ingredients You’ll Need (Serves 4-6, Adjust to Your Crew)
- Young lamb (net weight) – 1200g (this is the star! Go for bone-in leg or shoulder; ask your butcher to cut into 2-3 inch chunks if possible—tender cuts make all the difference)
- Ginger – 50g (split: 25g for blanching, 25g for garnish later)
- Garlic – 50g (whole cloves, peeled; more if you’re garlic-obsessed)
- Star anise – 3 pods (don’t skip these for that signature warm aroma)
- Fennel – 2 small pieces (or 1 tsp fennel seeds; adds a subtle licorice note)
- Sichuan peppercorns – a pinch (about 1/4 tsp; gives a slight numbing kick that’s chef’s kiss)
- Bay leaves – 3-4 leaves (fresh is best, but dried works too)
- Light soy sauce – 50g (for color and umami)
- Dark soy sauce (old soy) – 30g (for deep color and rich flavor)
- Red and green bell peppers – 30g (optional, but add a pop of color and a tiny crunch! If peppers aren’t your vibe, swap for carrots)
- Olive oil (or cooking oil) – 60g (neutral oil works too; olive adds a mellow flavor)
- Shaoxing wine (cooking wine) – 200g (split: 100g for blanching, 100g for braising)
- Red dates (jujubes) – 3 pieces (natural sweetness + extra nourishment—winter MVP!)
- Garlic chives (garlic leaves) – 2 stems (chopped, for garnish at the end)
Step-by-Step Cooking Guide (No Fancy Tools Needed!)
Let’s get cooking! This is a bit methodical, but trust me, it’s worth every step for that melt-in-your-mouth goodness. Let’s start with the prep:

Step 1: Fresh Young Lamb Prep – Grab your 1200g of young lamb and give it a good look. Look for bright pink, not grayish-red, and ask the butcher if it’s bone-in (bone marrow adds so much flavor!). If the lamb is still whole, ask to cut it into chunks now—aim for 2-3 inch pieces so they cook evenly. The smaller the chunks, the faster they’ll cook, but we want tender, not mushy, so keep them substantial!

Step 2: Rinse & Trim – Place the lamb chunks in a colander and rinse under cold water for 1-2 minutes to wash away any blood or debris. Pat dry with paper towels (moisture = steam, not sear later, so dry is key!). If there’s excess fat on the chunks, trim it off with kitchen scissors or a knife—we don’t want greasy broth at the end.

Step 3: Cut into Chunks (Again, Patience!) – If you didn’t get the butcher to do it, now’s the time. Cut the lamb into pieces that are roughly 2.5cm thick—this size holds up well during boiling and braising. If you’re worried about size, think: you want each bite to be meaty but easy to chew. Avoid tiny bits—they’ll turn to paste!

Step 4: Gather Your Spices & Seasonings – Time to assemble the flavor team! Peel the garlic cloves (50g total—yes, that’s a lot, but garlic is the backbone here), slice the ginger into 25g (set aside the other 25g for later), and measure out the star anise, fennel, Sichuan peppercorns, and bay leaves. Grab the cooking wine, light/dark soy sauces, red dates, and garlic chives. Everything should be at room temp for faster cooking—no cold spices here!

Step 5: Boil Water for Blanching – Grab a large pot (at least 6L—you need room for the lamb and water). Fill it with cold water, bring to a rolling boil over high heat. Once boiling, turn off the heat temporarily to start adding the lamb—this helps the meat cook evenly without shocking it.

Step 6: Blanch the Lamb to Cleanse – Add the lamb chunks, the 25g ginger slices (the ones we set aside for blanching), and pour in 100g of the cooking wine. Stir gently, then bring the pot back to a simmer over medium heat. The lamb will start releasing impurities—this is normal!

Step 7: Skim the Foam (Critical!) – As soon as the water simmers, you’ll see a layer of white foam on top. This is the “gunk” from the lamb—don’t ignore it! Use a slotted spoon to skim it off, one scoop at a time. The cleaner the foam, the clearer and less gamy the final broth will be. Keep skimming until the water looks mostly clear.

Step 8: Prep the Lamb for Braising – Once the foam is gone, turn off the heat. Drain the lamb in a colander and rinse with warm water to stop the cooking. This step ensures the meat is clean and ready to soak up the braising sauce. Pat the lamb dry again with paper towels—we’re almost ready for the sauce!

Step 9: Sauté the Spices for Aroma – Heat the olive oil in a large, heavy-bottomed pot (or wok, if you have one) over medium heat. Add the garlic cloves, star anise, fennel, Sichuan peppercorns, and bay leaves. Stir them around for 1-2 minutes until fragrant—you’ll smell that amazing Chinese spice blend! Don’t burn them—they’ll get bitter if you overcook.

Step 10: Brown the Spices (Color = Flavor) – Now, let the spices toast gently. Stir occasionally until they’re a deep golden brown—about 2-3 minutes. The garlic will start to smell nutty, and the star anise will pop with aroma. This is the magic step—those deep flavors are locking in!

Step 11: Add the Lamb to the Spice Party – Toss the drained lamb chunks into the pot with the spiced oil. Stir-fry for 3-4 minutes, making sure every piece gets coated in the oil and spices. The lamb will start to brown slightly on the edges—this is how we get that caramelized flavor that makes braised dishes so addictive.

Step 12: Braising Time Begins – Pour in the second batch of cooking wine (100g), along with the light soy sauce, dark soy sauce, red dates, and a pinch of salt and sugar (about 1/2 tsp each—sugar balances the saltiness, and it makes the meat tender!). Stir everything together so the lamb is fully coated. Taste the sauce—add a splash more soy or a pinch of salt if needed now!

Step 13: Add Water to Braise – Now, add enough water to completely cover the lamb chunks. Use a ladle to pour the water in—start with 1L, then add more if needed. The water should be warm or hot, not ice cold, to keep the meat from shrinking. Stir once more to make sure all the seasonings are mixed in.

Step 14: Simmer Low & Slow – Bring the pot to a boil over high heat, then immediately reduce the heat to low. Cover the pot with a tight-fitting lid (or a heavy plate if you don’t have a lid) and let it simmer undisturbed for 20 minutes. This slow cooking time is what makes the lamb so tender—all the collagen breaks down into that silky, melt-in-your-mouth texture.

Step 15: Stir to Prevent Sticking – After 20 minutes, carefully lift the lid and stir the lamb gently. The sauce should be thickening now, so give it a stir with a wooden spoon to make sure nothing is sticking to the bottom. This is also a good time to taste again—adjust salt or sugar if needed before letting it cook further.

Step 16: Reduce the Sauce to Perfection – Let it simmer for another 10-15 minutes, uncovered this time, so the sauce thickens. Keep an eye on it—you want the sauce to coat the lamb nicely but not dry out. If it gets too thick, add a splash more water. The goal is a glossy, aromatic sauce that sticks to the lamb like a warm hug.

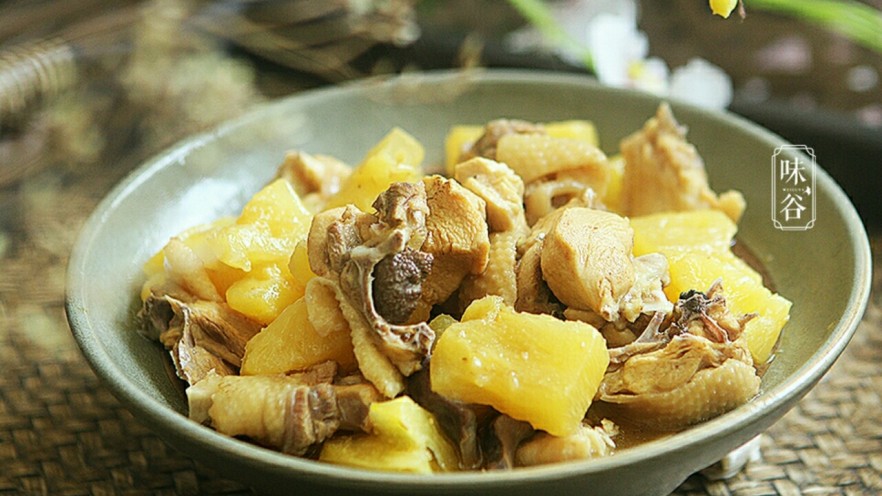
Step 17: Plate the Masterpiece – Turn off the heat and carefully transfer the lamb (and sauce!) to a serving platter. If you’re feeling fancy, arrange the lamb in a circle and spoon the sauce over top. This is the moment of truth—look at that tender, golden meat!

Step 18: Garnish with Spicy & Fresh Flavors – Now, add the final touches! Slice the remaining 25g ginger (we saved it for this!) into thin strips and sprinkle them over the lamb. If you like a kick, add a pinch of chili flakes or sliced fresh chili peppers (the original recipe mentions red/green peppers—those work great here!).

Step 19: Fresh Garlic Chives for the Win – Finally, chop the garlic chives (or garlic leaves) into 1-inch pieces and sprinkle them over the top. The fresh green adds a bright, herbaceous note that cuts through the richness of the lamb. Trust me, this garnish isn’t just pretty—it’s a flavor game-changer!

Step 20: Serve & Enjoy! – And there you have it: braised lamb chunks with a side of warmth, nutrition, and pure happiness. Pair it with steamed rice or noodles for the ultimate comfort meal. The aroma will fill your kitchen, and the first bite? Chef’s kiss—tender, sweet, and slightly spicy, with a sauce you’ll want to drink straight from the spoon. “Lamb with Shaoxing wine—so good!” as the final step exclaims.
Pro Tips to Level Up Your Braised Lamb
Even if you’re a kitchen newbie, these pro tips will make your lamb perfect every time. Trust me, I’ve messed up enough lamb dishes to know what works!
- Choose the right lamb: “Young lamb” = 3-6 months old, so it’s leaner and tenderer than older mutton. Look for cuts labeled “leg of lamb” or “shoulder”—both are ideal for braising.
- Seasonings hack: If you’re short on time, skip the red dates and add a tablespoon of honey or brown sugar to the sauce for extra sweetness. No red dates? A pinch of brown sugar works too!
- Freeze & reheat: This dish freezes beautifully! Let it cool completely, then store in airtight containers. Reheat in the microwave or on the stovetop with a splash of water—it’ll taste even better the next day.
- Wine swap: If you don’t have Shaoxing wine, use dry sherry or red wine (about 150ml). The key is to add a liquid that’s rich and not too sweet.
- Timing is everything: Aim for 45-50 minutes total cooking time for the most tender result. If you’re pressed for time, use a pressure cooker (50g ginger, add all spices, pressure cook for 15 minutes, then release naturally). But honestly, slow simmering is worth the wait!
There you have it—your ultimate winter braised lamb recipe. Whether you’re hosting friends, treating yourself, or just want a hearty meal that keeps you warm all night, this dish delivers. The best part? It’s packed with nutrients to fight off the winter blues and boost your energy. So grab that young lamb, gather your spices, and get cooking. Your taste buds (and your immune system) will thank you!