
Introduction: Why These Shrimp Crackers Are a Game-Changer
Whoa, let’s talk about the snack that’s about to become your new obsession: crispy dried shrimp crackers! These little golden bites are like a flavor bomb—crunchy on the outside, packed with savory goodness on the inside, and surprisingly easy to make at home. I’ve been making these for years, and trust me, once you try them, store-bought versions will taste… well, boring. No offense to those, but homemade? Chef’s kiss.
First off, let’s gush about why dried shrimp is the star here. This tiny ingredient is a nutritional powerhouse! It’s loaded with calcium (hello, strong bones!), potassium (great for heart health), iodine (thyroid support, anyone?), and tons of protein. Plus, it adds this umami depth that’s hard to beat. And the best part? You get to control the salt, sugar, and texture—so no weird preservatives or excess oil. Let’s dive in!
Ingredients: What You’ll Need (Most Likely Already in Your Pantry!)
Don’t stress—this recipe uses simple, everyday ingredients. Here’s the list:
- Dried shrimp: 50 grams (about a small handful—go for high-quality ones without extra additives; you can find these at Asian grocery stores or online)
- All-purpose flour: 80 grams (regular flour works, but whole wheat or chickpea flour for a twist if you’re feeling fancy)
- Duck egg: 1 (duck eggs are richer, but chicken eggs work too—just swap if you don’t have duck eggs)
- Sugar: 1 small spoonful (tablespoon or teaspoon? A teaspoon—it’s just enough to balance the saltiness)
- Lemon juice: A few drops (optional, but so good for cutting through the richness; skip if you don’t have it)
- Vegetable oil: A little (for pan-frying—just enough to coat the pan, no need for a lake of oil)
- Water: A splash (to thin the batter—adjust as needed; we’ll talk about consistency next)
Step-by-Step: How to Make Crispy Dried Shrimp Crackers
Let’s get cooking! This is a super straightforward process—even if you’re new to baking, you’ll nail this. Let’s go step by step:
Step 1: Prep the Dried Shrimp

First, we need to rehydrate the dried shrimp. Grab your 50g of dried shrimp and put them in a small bowl. Cover with warm water (not boiling—too hot will cook them!), and let sit for 5 minutes. This softens them up and washes off any excess salt (since dried shrimp can be salty). After 5 minutes, drain the water completely and pat the shrimp dry with a paper towel. Pro tip: Any moisture left here will make the batter soggy, so dry thoroughly!
Step 2: Mix the Egg & Lemon Juice

Crack the duck egg into a mixing bowl. Add those 2-3 drops of lemon juice (skip this if you’re out—no biggie, but it’ll make the shrimp taste brighter). Use a whisk or fork to stir clockwise until the egg is smooth. If you’re worried about the “eggy” smell, the lemon juice helps neutralize that—trust me, your taste buds will thank you.
Step 3: Add Flour to the Batter

Slowly pour in the 80g of flour. Stir gently with a spatula or whisk until there are no lumps. The batter should be thick but pourable—like a thick milkshake. If it’s too thick, add a splash more water; if too runny, stir in a bit more flour. Consistency is key here!
Step 4: Thin the Batter with Water

Now, add water to thin the batter. Start with 2-3 tablespoons—this will make it pourable but not watery. The goal? A batter that drips off a spoon slowly, like thick cream. If you’re using a spoon and the batter pours too fast, it’ll spread too thin; if it’s too slow, it’ll be thick and chewy. Adjust with water/flour as needed!
Step 5: Add Shrimp & Sugar

Toss in the drained, dried shrimp. Stir gently to mix them evenly into the batter. Then add that tiny spoonful of sugar—this is crucial for balancing the saltiness of the shrimp. The sugar brings out the natural sweetness, so the crackers aren’t just salty—they’re balanced.
Step 6: Heat the Pan & Start Frying

Heat a non-stick pan over low heat. Once warm, brush a very thin layer of oil. A little goes a long way—no need to drown the pan! If you don’t have a non-stick pan, use a regular one and add a touch more oil to prevent sticking.
Step 7: Scoop & Spread the Batter

Use a spoon to scoop a portion of the batter (about 1-2 tablespoons). Hold the pan handle with one hand and tilt the pan gently to spread the batter into a thin circle. Aim for a 4-5 inch diameter—too big, and they’ll take forever to cook; too small, and you’re wasting batter.
Step 8: Cook Until Golden (Don’t Rush!)

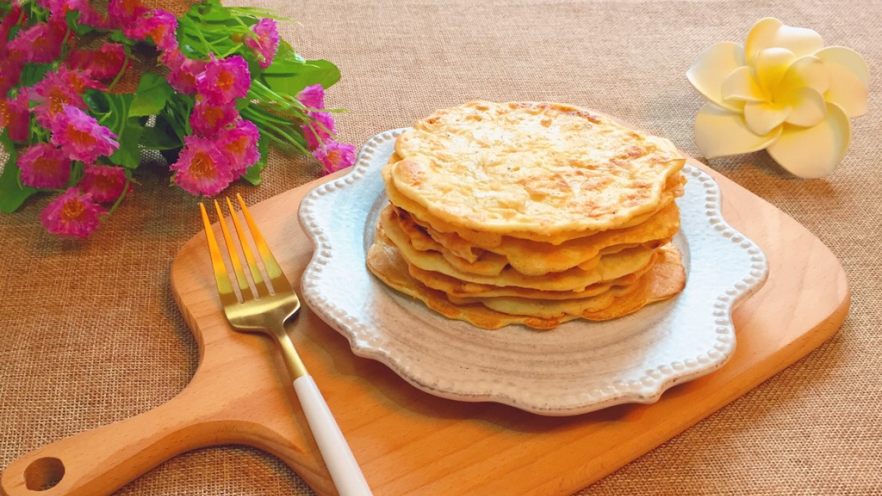
Cook on low heat for 2-3 minutes until the bottom is golden brown. Then, use a spatula to flip it carefully. Cook the other side for another 2-3 minutes until both sides are golden. Patience alert! High heat will burn the outside before the inside crisps, so low heat is your friend here.
Step 9: Cool & Repeat

Once golden, slide the cracker onto a plate lined with paper towels to soak up excess oil. Repeat with the remaining batter until all crackers are done. Let them cool for 5 minutes—they’ll get extra crispy as they cool!
Tips for Perfect Shrimp Crackers Every Time
Here are my pro tips to avoid common mistakes:
- Soak shrimp properly: If you skip soaking, the shrimp will be tough and chewy. 5 minutes is all you need!
- Batter consistency=success: If the batter is too thick, the crackers will be hard; too thin, they’ll spread into nothing. Aim for “thick cream” consistency.
- No extra salt! Dried shrimp is naturally salty, so skip the salt shaker. The sugar is enough to balance flavors.
- Use low heat: High heat = burnt edges, raw center. Low heat = even cooking and crispy texture.
- Store them right: Cool completely, then store in an airtight container at room temp for up to 3 days. For longer storage, pop in the fridge (they’ll be softer, so let them sit out for 10 minutes before eating to crisp up).
Final Verdict: Why This Recipe Beats Store-Bought
Store-bought shrimp crackers? Boring. They’re often full of preservatives, too much oil, and weird additives. But with this recipe, you get:
- Control: Fresh ingredients, no sketchy stuff.
- Customization: Add chili flakes, garlic powder, or honey for new flavors!
- Cost-effectiveness: Way cheaper than buying from the store, and you can make a huge batch for parties.
Imagine serving these at movie night—crunchy, savory, and everyone’s asking for the recipe. Or munching while working from home—no guilt, just deliciousness. Trust me, once you make these, you’ll never go back to the store-bought version!
Ready to Make Your Own? Let’s Go!
I hope this recipe makes you as happy as it makes me. It’s simple, uses pantry staples, and the result is crispy, golden, and so addictive. Tag me in your creations—I’d love to see your homemade shrimp crackers!
Happy cooking, and enjoy every crunchy bite!