
Why Homemade Pork Floss Buns Are Worth the Hype
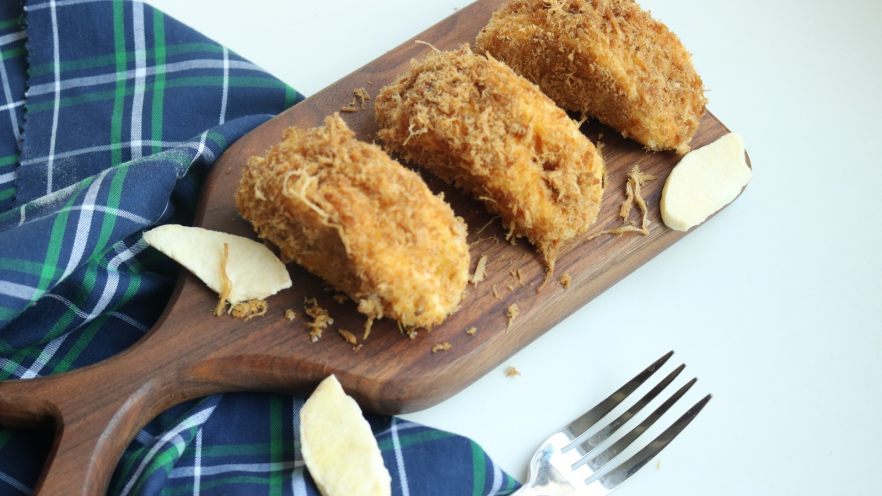
Let’s be real—who hasn’t seen those fluffy, pork floss-covered buns all over social media? They’re the ultimate snack: soft sponge cake, creamy salad dressing, and that salty-savory pork floss crunch. But buying them from bakeries? Sometimes they’re too sweet, or the floss is skimpy. So why not make your own? It’s easier than you think, and you can load up on all your favorite toppings (spoiler: more pork floss is always better).
Today’s recipe adds a fun twist: freeze-dried apple from Guoyu Town. It’s not just for show—those little tart, crispy bits cut through the richness of the salad dressing and add a pop of flavor that’ll make your buns stand out. Trust me, your taste buds will thank you.
Ingredients You’ll Need
First things first: gather your supplies. No fancy tools here—just basic baking stuff you probably already have in your kitchen. Here’s the list:
- 40g corn oil (neutral oil works too, like canola)
- 40g cake flour (low-gluten flour—don’t use all-purpose unless you have to! It’ll make the cake dense)
- 4 large eggs (separated into yolks and whites)
- 40ml milk (whole milk is best for richness, but skim works in a pinch)
- 40g granulated sugar (split into 10g for yolks and 30g for whites)
- 25g freeze-dried apple (crushed into small pieces—save some big bits for texture!)
- Plenty of pork floss (I mean it—“plenty” is non-negotiable)
- Salad dressing (Japanese-style or mayo works—creamy is key)
Step-by-Step Instructions
Okay, let’s get baking! I’ll walk you through each step with photos to make it easy. No stress—even if you’re new to sponge cakes, this recipe is forgiving.
1. Prep Your Ingredients First

Pro tip: Measure everything out before you start. Baking is science, but it’s also chaos if you’re scrambling for sugar while your egg whites deflate. Lay out all your bowls and ingredients—you’ll thank yourself later.
2. Crush the Freeze-Dried Apple

Take the freeze-dried apple and crush it into small pieces. You can use a mortar and pestle, a rolling pin (wrap it in a plastic bag!), or even just your hands. Leave some tiny chunks—they add a nice crunch in every bite.
3. Make the Yolk Batter

Separate your egg yolks and whites (important: no yolk in the whites, or they won’t whip!). Take the yolks and mix in 10g of sugar until it’s light and pale. Don’t overmix—just stir until the sugar dissolves.
4. Add Milk to the Yolks

Pour in the milk and stir until it’s smooth. The mixture will look thin—don’t worry, that’s normal.
5. Mix in Corn Oil

Add the corn oil and stir well. You want the oil to be fully incorporated—no weird oily layers here. If it looks a little curdled at first, keep stirring; it’ll come together.
6. Sift in the Cake Flour

Sift the cake flour into the yolk mixture. Sifting is crucial—it prevents lumps and makes the cake super soft. Don’t skip this step!
7. Fold Until Smooth

Use a rubber spatula to fold the flour into the yolk mix. Fold gently—cut through the center, scrape the bottom, and turn the bowl. Overmixing will make the cake tough, so take it easy.
8. Whip the Egg Whites

Now for the fun part: whipping the egg whites. Put them in a clean, dry bowl (water or grease will ruin this!). Add a tiny pinch of salt and a few drops of lemon juice (this helps stabilize the whites). Whip on medium speed until you see big, foamy bubbles.
9. Add Sugar to the Whites

Pour in the remaining 30g of sugar all at once (yes, all at once—no need to add it gradually for this recipe!). Keep whipping until you get soft peaks. What’s a soft peak? When you lift the mixer, the peak bends over gently at the top. Perfect—don’t overwhip to stiff peaks, or the cake will crack.
10. Combine Yolk Batter and Whites (Part 1)

Take a big spoonful of the whipped whites and fold it into the yolk batter. This lightens up the yolk mix so it’s easier to combine with the rest of the whites without deflating them.
11. Fold in the Rest of the Whites

Now pour the lightened yolk batter back into the bowl with the remaining whites. Fold gently—remember, we want to keep those fluffy bubbles intact. Fold until there are no white streaks left, but don’t overdo it.
12. Add the Crushed Apple

Stir in the crushed freeze-dried apple. Just a few gentle folds—you don’t want to knock out all the air you worked so hard to whip up.
13. Bake the Sponge Cake

Pour the batter into a lined baking pan (I used a 9×9 inch pan). Smooth the top with a spatula. Preheat your oven to 350°F (175°C) and bake for 20 minutes. To check if it’s done, insert a toothpick—if it comes out clean, it’s ready!
14. Cool the Cake

Take the cake out of the oven and tap the pan on the counter a few times to release hot air. Let it cool in the pan for 5 minutes, then transfer it to a wire rack to cool completely. Don’t skip cooling—warm cake will make the salad dressing runny.
15. Cut the Cake into Rounds

Once the cake is cool, use a round cookie cutter (or a clean bottle cap—genius hack!) to cut out small circles. You should get about 8-10 rounds, depending on the size.
16. Assemble the Buns

Take one cake round and spread a thin layer of salad dressing on top. Place another round on top to make a sandwich. Then spread more dressing all over the outside of the sandwich—this is what makes the pork floss stick.
17. Roll in Pork Floss

Put a pile of pork floss on a plate. Roll the dressed cake sandwich in the floss until it’s completely covered. Press gently to make sure the floss sticks—more is more here!
18. Enjoy Your Homemade Pork Floss Buns!

That’s it! Your homemade pork floss buns are ready. They’re best eaten fresh, but you can store them in an airtight container in the fridge for up to 2 days (let them come to room temp before eating—cold cake is less fluffy).
Pro Tips for Perfect Buns
- More pork floss = better buns. Don’t be shy—load it up!
- If you don’t have freeze-dried apple, try dried cranberries or raisins. Or skip it—classic pork floss buns are still amazing.
- Make sure your egg whites are at room temp—they whip up fluffier that way.
- Don’t open the oven door while the cake is baking! It can cause the cake to sink.
Final Thoughts
Homemade pork floss buns are so rewarding. They’re soft, creamy, salty, and a little sweet—everything a snack should be. Plus, adding freeze-dried apple gives them a unique twist that’ll impress your friends (or just your own cravings). So grab your ingredients, put on some music, and bake up a batch. You won’t regret it!