
What is Xue Mei Niang (Mochi Ice Cream)?
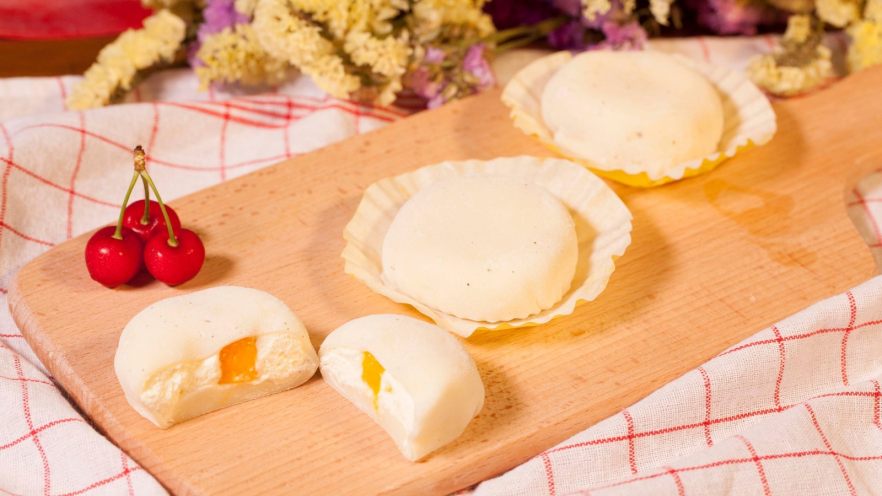
Have you ever tried a dessert that’s soft, chewy, creamy, and sweet all at once? That’s Xue Mei Niang for you! Also known as Mochi Ice Cream, this popular treat originated in Kyoto, Japan. The name “Xue Mei Niang” translates to “snow maiden,” which perfectly describes its white, delicate appearance. Legend has it that it was named after the fresh strawberries used in the original recipe, which were picked from snowy fields. But don’t worry—you don’t need to wait for snow to enjoy this delicious snack!
Imagine biting into a thin, elastic rice cake wrapper that gives way to a burst of cold, smooth ice cream. It’s like a party in your mouth! The combination of chewy mochi and creamy ice cream is addictive, and once you try it, you’ll want to make it again and again.
Ingredients You’ll Need
Before we start, let’s gather all the ingredients. Don’t worry—most of these are easy to find at your local grocery store or Asian market. Here’s what you’ll need:
- 250g glutinous rice flour (shiratamako or sweet rice flour)
- 90g granulated sugar (for the mochi)
- 50g unsalted butter
- 75g cornstarch (for dusting and the mochi)
- 400ml milk
- 30g hot water
- 300ml heavy cream
- 30g granulated sugar (for the cream)
- Optional fillings: red bean paste, matcha powder, fresh fruit (strawberries, mangoes), or Oreo crumbs
Step-by-Step Guide to Making Xue Mei Niang
Now, let’s get to the fun part—making the mochi ice cream! Follow these simple steps, and you’ll have a batch of delicious Xue Mei Niang in no time.
Step 1: Prepare Your Workspace

First, make sure your kitchen is clean and organized. You’ll need a mixing bowl, a whisk, a steamer, a rolling pin, and a baking sheet lined with parchment paper. Also, dust your work surface with cornstarch to prevent the mochi from sticking later.
Step 2: Mix the Sugar and Hot Water

In a small bowl, dissolve 90g of granulated sugar in 30g of hot water. Stir until the sugar is completely melted. This will be added to the mochi batter later to give it a sweet flavor.
Step 3: Prepare the Mochi Batter

In a large mixing bowl, combine 250g of glutinous rice flour, 75g of cornstarch, and the sugar-water mixture from Step 2. Gradually add 400ml of milk while whisking continuously. Make sure there are no lumps in the batter—it should be smooth and runny.
Step 4: Steam the Mochi Batter

Pour the batter into a heatproof dish and place it in a steamer. Steam over medium heat for 20-25 minutes, or until the mochi is translucent and firm to the touch. You can check if it’s done by inserting a toothpick—if it comes out clean, it’s ready!
Step 5: Add Butter to the Mochi

Once the mochi is steamed, remove it from the steamer and add 50g of unsalted butter. The heat from the mochi will melt the butter, so use a spatula to mix it in until the mochi becomes smooth and elastic. Let it cool slightly for about 10 minutes.
Step 6: Prepare the Ice Cream Filling

While the mochi is cooling, prepare the ice cream filling. In a mixing bowl, whip 300ml of heavy cream with 30g of granulated sugar until it forms stiff peaks. You can also add flavorings like matcha powder, cocoa powder, or fruit puree at this stage. Once whipped, transfer the cream to the freezer for about 30 minutes to firm up.
Step 7: Shape the Mochi Wrappers

Dust your work surface with cornstarch to prevent sticking. Take a small portion of the mochi (about 30g) and roll it into a ball. Flatten it with your hands or a rolling pin into a thin circle, about 10cm in diameter. The edges should be thinner than the center to make folding easier.
Step 8: Fill and Fold the Mochi

Place a spoonful of the whipped cream (or your favorite filling) in the center of the mochi wrapper. Fold the edges up to enclose the filling, pinching the top to seal it. Roll the mochi in cornstarch to prevent it from sticking to your hands or other mochis.
Step 9: Chill and Serve

Place the filled mochi in an airtight container and freeze for at least 2 hours. This will help the mochi firm up and the ice cream set. When you’re ready to eat, let them sit at room temperature for 5-10 minutes to soften the mochi slightly. Enjoy your homemade Xue Mei Niang!
Tips for Perfect Xue Mei Niang
- Use glutinous rice flour (shiratamako) for the best chewy texture. Regular rice flour won’t work!
- Dust your hands and work surface with cornstarch to prevent the mochi from sticking.
- Don’t overfill the mochi—this will make it hard to seal and may cause the filling to leak out.
- Store the mochi in the freezer for up to 1 week. Let them thaw slightly before eating for the best texture.
- Experiment with different fillings! Try red bean paste, mango chunks, or even chocolate ice cream for a unique twist.
Why Make Xue Mei Niang at Home?
Making Xue Mei Niang at home is not only fun but also allows you to customize the flavors to your liking. Store-bought versions can be expensive and may not have the fresh, homemade taste. Plus, it’s a great activity to do with friends or family—everyone will love rolling and filling the mochi!
Whether you’re a dessert lover or just looking for a new recipe to try, Xue Mei Niang is sure to impress. So grab your ingredients and get started—your taste buds will thank you!