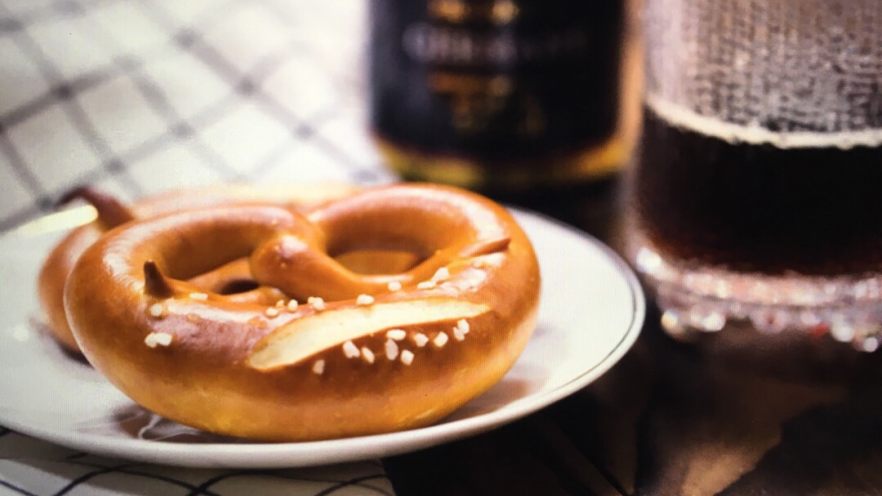

Let’s be real—some food and drink pairings were just meant to be. PB&J, coffee and donuts, pizza and soda… but if you ask any German (or anyone who’s ever visited a German beer garden), they’ll tell you: soft pretzels and German beer take the crown. There’s something about that chewy, salty pretzel crust giving way to a warm, soft inside, paired with the crisp, malty bite of a German lager or wheat beer. It’s like a flavor party in your mouth, and trust me, you don’t want to miss out.
Now, I know what you’re thinking: “Do I really need to make pretzels from scratch? Can’t I just grab one from the store?” Hear me out—store-bought pretzels are fine, but homemade? Oh, it’s a game-changer. The smell of fresh pretzels baking? Unbeatable. And when you dip that warm, salty creation into a cold German beer? Chef’s kiss. Plus, it’s way easier than you think. Let’s dive in.
Why Soft Pretzels and German Beer Are a Match Made in Heaven
First, let’s talk about the science (okay, maybe just the vibe) behind this pairing. German soft pretzels—called Laugenbrezeln—are known for their distinctive shiny, dark brown crust and salty exterior. That saltiness? It cuts through the bitterness of beer, while the pretzel’s chewy texture balances the carbonation and smoothness of the drink. Whether you’re sipping a Helles (light lager), a Dunkel (dark lager), or a Hefeweizen (wheat beer with that classic banana-clove flavor), the pretzel’s salt and crunch make every sip better.
And let’s not forget the cultural side! In Germany, you’ll find pretzels at every beer garden, Oktoberfest tent, and even street stalls. They’re not just a snack—they’re a tradition. So making your own pretzels and pairing them with German beer? You’re basically bringing a little piece of Bavaria to your kitchen. How cool is that?
Homemade Soft Pretzels: The Step-by-Step Guide
Okay, let’s get to the good stuff. I’m going to walk you through making these pretzels, and I promise—no fancy equipment required (well, except an oven, obviously). Let’s start with the ingredients.
Ingredients You’ll Need
- 1000g high-gluten flour (this gives the pretzels that chewy texture—don’t skimp!)
- 15g yeast (active dry or instant works; just follow the package directions if using active dry)
- 15g salt (table salt is fine, but sea salt adds a nice touch)
- 110g butter (unsalted, softened—trust me, unsalted lets you control the saltiness later)
- 35g cornstarch (this helps with the crust texture)
- 40g milk powder (adds a subtle creaminess—skip if you don’t have it, but it’s worth grabbing)
- 560g water (warm, not hot—you don’t want to kill the yeast!)
- 25g baking soda (for the lye bath—this is what gives the pretzels that iconic crust)
- 500g water (for the lye bath)
- 10g sea salt (for sprinkling on top—flaky sea salt is chef’s kiss)
Let’s Make Pretzels! (Step-by-Step)
Okay, roll up your sleeves—this is where the magic happens. I’ve broken it down into super simple steps, so even if you’re a baking newbie, you’ve got this.
Step 1: Gather All Your Ingredients

First things first—lay out all your ingredients. There’s nothing worse than realizing you’re missing milk powder halfway through. Pro tip: Measure everything out before you start mixing. It’ll save you a ton of stress.
Step 2: Mix the Dry Ingredients (Minus Butter!)

Take a big mixing bowl (or a stand mixer if you’re fancy) and add the flour, yeast, salt, cornstarch, and milk powder. Wait—important note: Don’t put the salt directly on top of the yeast! Salt can kill yeast, so mix them into the flour separately first. Then pour in the warm water and stir until a rough dough forms.
Step 3: Add the Butter (Slowly!)

Once the dough is starting to come together, add the softened butter a little at a time. Keep mixing (or kneading, if you’re doing it by hand) until the butter is fully incorporated and the dough is smooth and elastic. This should take about 5-7 minutes with a mixer, or 10-12 minutes by hand. Your arms might get a workout, but it’s worth it!
Step 4: Divide and Shape the Dough

Now, take the dough and divide it into 50g pieces. I like to use a kitchen scale for this—consistency is key! Once you have your little dough balls, it’s time to shape them into pretzels. This part is fun (and a little messy).
Step 5: Roll the Dough into a Long Strip

Take one dough ball and roll it into a long strip—about 30cm (12 inches) long. Here’s the trick: make the middle a little thicker than the ends. That way, when you shape the pretzel, the center is nice and plump.
Step 6: Shape into a Pretzel and Freeze

Now for the classic pretzel shape: cross the two ends over each other, then twist them once, and bring them back down to the bottom of the strip. Press the ends into the dough to hold them in place. Once all your pretzels are shaped, pop them in the freezer for 30 minutes. This helps them hold their shape when you dip them in the lye bath later.
Step 7: Make the Lye Bath (Don’t Panic!)

Okay, the lye bath is what gives pretzels that shiny, dark crust. Take 500g of water and add 25g of baking soda. Stir it up until the baking soda is fully dissolved. Important: Baking soda is alkaline, so don’t get it on your skin or eyes. Wear gloves if you’re worried—better safe than sorry!
Step 8: Stir Until Smooth

Make sure the baking soda is completely mixed in—no clumps allowed! The water should be clear (or slightly cloudy) when you’re done.
Step 9: Dip the Pretzels in the Lye Bath

Take the frozen pretzels out of the freezer and dip each one into the lye bath for about 10 seconds. Don’t leave them in too long—they’ll get too dark. Use a slotted spoon to take them out and let any excess water drip off.
Step 10: Score the Pretzels

Using a sharp knife or a razor blade, make a small slit (about 1cm deep) on the top of each pretzel. This helps them expand evenly when baking and gives them that classic pretzel look.
Step 11: Sprinkle with Sea Salt

Now for the best part—salt! Sprinkle a little flaky sea salt on top of each pretzel. Go easy, but don’t be shy—remember, this is what pairs so well with the beer.
Step 12: Bake Until Golden Brown

Preheat your oven (I used a Haier T3 oven, but any oven works) to 200°C (400°F). Use the upper and lower grill mode if you have it—this gives the pretzels a crispy crust all over. Bake for 18 minutes, or until they’re a deep golden brown. The house will smell amazing—you’ve been warned!
The Best German Beers to Pair with Your Pretzels
Now that your pretzels are baking, let’s talk beer. Not all beers are created equal when it comes to pairing with pretzels. Here are my top picks:
Helles Lager
Helles is a light, crisp lager with a subtle malty flavor. It’s not too bitter, so it lets the pretzel’s saltiness shine. Perfect for a hot day or a casual afternoon.
Dunkel Lager
If you like darker beers, Dunkel is your go-to. It’s rich and malty with hints of caramel, which pairs beautifully with the salty pretzel. It’s like a warm hug in a glass.
Hefeweizen
Hefeweizen is a wheat beer with a creamy texture and notes of banana and clove. The fruitiness balances the pretzel’s salt, and the carbonation cuts through the chewy dough. It’s a fun, refreshing pairing.
Pilsner
Pilsner is a classic—light, hoppy, and super crisp. The hop bitterness contrasts with the pretzel’s salt, making every bite and sip feel fresh. It’s great for pairing with spicy pretzels too (if you want to add a little kick).
Final Thoughts: Pretzels, Beer, and Good Times

Once your pretzels are done, let them cool for a minute (they’ll be hot!), then grab a cold German beer, plop down on the couch, and enjoy. Whether you’re watching a soccer game, hanging out with friends, or just treating yourself, this pairing is unbeatable.
Making homemade pretzels might seem intimidating at first, but trust me—once you try it, you’ll never go back to store-bought. And pairing them with German beer? It’s like taking a mini vacation to Germany without leaving your kitchen. So what are you waiting for? Grab your ingredients, fire up the oven, and let’s get baking. Prost!