")


Why This Viral Baked Milk is Taking Over the Internet
Have you scrolled through TikTok or Instagram lately and seen that crispy, golden dessert everyone’s talking about? That’s the viral baked milk trend, and I’m here to tell you—this isn’t just another pretty photo. It’s a game-changer for dessert lovers! No frying, no heavy oil, and it’s surprisingly easy to make at home. The outside gets crispy, the inside stays creamy, and the cheese adds a perfect salty-sweet kick. Trust me, once you try this, you’ll wonder why you didn’t find it sooner!
Ingredients You’ll Need (Makes ~20 Bites)
- Egg yolks: 2 (plus 1 extra for brushing the top)
- Whole milk: 600g (regular milk works best, but oat/almond milk is optional)
- Granulated sugar: 25g (adjust if you like it sweeter)
- Cornstarch: 60g (this thickens the milk into a creamy base)
- Cheese slice: 1 (cheddar or mozzarella works—adds that rich flavor!)
Step-by-Step Instructions
Let’s get started! This recipe is straightforward, but follow these steps carefully for the best results:
Step 1: Gather All Ingredients

First things first—prep all your ingredients! Measure out the egg yolks, milk, sugar, cornstarch, and cheese slice. Having everything ready means you’ll breeze through the next steps without hunting for stuff. Pro tip: Use a small pot, a spatula, and a mixing bowl to keep things organized!
Step 2: Add Egg Yolks to the Pot

Take a small pot and crack in the 2 egg yolks. Whisk them gently with a fork until they’re smooth. No need to overbeat—just enough to break up the yolks into a light yellow base.
Step 3: Stir in the Sugar

Now add the 25g of sugar. Stir it into the yolks until it dissolves completely. You’ll notice the mixture starts to look a bit lighter and sweeter. Taste a little (carefully, it’s hot!)—adjust the sugar if you want it sweeter later.
Step 4: Pour in the Milk

Slowly pour in the 600g of milk while stirring constantly. This prevents lumps and mixes the milk evenly with the egg-sugar base. Keep stirring until everything’s combined—you’re almost there!
Step 5: Mix in the Cornstarch

Add the 60g of cornstarch. This is the secret to making the milk thicken later! Whisk vigorously to break up any cornstarch clumps. The mixture will still be a bit runny now, but that’s okay—cooking will fix it!
Step 6: Stir Until Smooth

Stir the mixture over low heat for 2-3 minutes. It’ll start to thicken, so keep stirring to avoid burning. You’ll know it’s getting there when it coats the back of a spoon easily—like a thick custard!
Step 7: Add the Cheese Slice

Now, tear the cheese slice into small pieces and stir them in. The cheese will melt and create a creamy, cheesy goodness—so good! The mixture will get even thicker and creamier as the cheese melts.
Step 8: Cook Over Low Heat (Constant Stirring!)

Continue stirring over low heat for 2-3 more minutes until the mixture is thick enough to hold its shape. You’ll see it go from runny to a thick, glossy paste—just like the image! This is the key step to getting that perfect texture later.
Step 9: Pour into a Mold and Chill

Quickly pour the thickened milk into a mold (any shape works, but a square pan is easiest). Smooth the top with a spatula, then cover and refrigerate for at least 4 hours. Overnight is even better if you have time—this lets the milk set rock solid!
Step 10: Prepare the Egg Wash

While the milk chills, take the extra egg yolk and beat it with a fork until smooth. This will be your golden egg wash for brushing the top—trust me, it makes all the difference in that crispy, golden finish!
Step 11: Unmold and Cut into Pieces

After chilling, take the milk out of the fridge and let it sit for 5 minutes. Then, gently unmold it (it should slide right out!) and cut into small squares or rectangles. Aim for 1.5-inch pieces—they’re perfect for grabbing and eating!
Step 12: Line a Baking Sheet with Parchment Paper

Preheat your air fryer oven to 180°C (350°F) for 5 minutes. While that’s preheating, line a baking sheet with parchment paper to prevent sticking. This step is crucial for easy cleanup later!
Step 13: Arrange the Milk Pieces on the Baking Sheet

Place the cut milk pieces on the parchment-lined sheet, leaving a little space between each. You don’t want them touching—they need room to crisp up all around! If your pieces are too small, they might stick together, so space is key here.
Step 14: Brush with Egg Wash

Using a pastry brush, gently brush the top of each milk piece with the egg wash. This creates that glossy, golden layer that’s so Instagrammable. Make sure to cover each piece evenly—you’ll love how it looks!
Step 15: Air Fry at 180°C for 8 Minutes

Carefully place the baking sheet into your preheated air fryer oven. Set the temperature to 180°C (350°F) and bake for 8 minutes. Keep an eye on it—every oven is different! If it’s too pale, bake an extra minute or two.
Step 16: Enjoy the Crispy, Creamy Result!

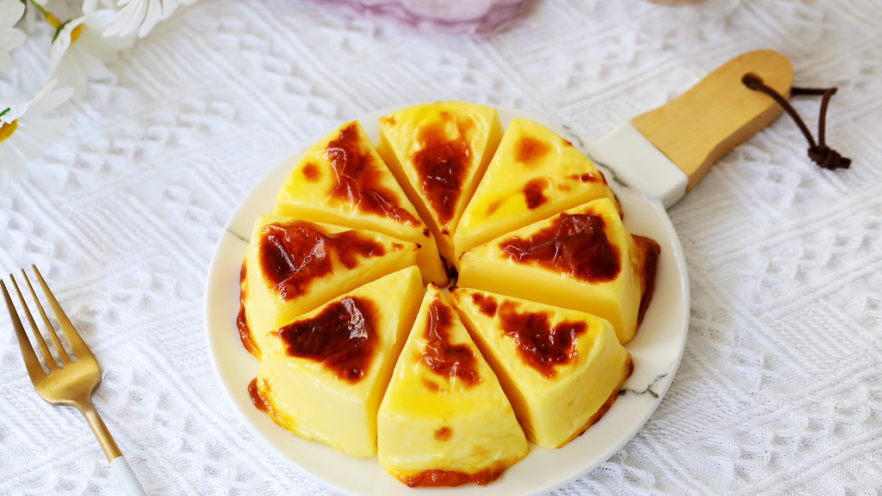
After 8 minutes, your baked milk should be golden-brown and crispy on top. Let it cool for 5 minutes before serving—this is super important! The inside stays creamy, and the outside gets that perfect crunch. It’s like biting into a crispy cookie with a cheesecake center!
Pro Tips for Success
• If you don’t have an air fryer, use a regular oven at 180°C (350°F) for 10-12 minutes.
• For extra saltiness, add a pinch of salt to the sugar.
• If you want more sweetness, add 5g extra sugar.
• Use a sharp knife to cut the milk for clean edges—this makes it look professional!
• For a quicker fix, do a 3-hour chill instead of 4, but longer is better for solidity.
And there you have it—my favorite viral dessert made easy! This baked milk is perfect for parties, movie nights, or just satisfying a sweet tooth. No frying, no mess, just pure crispy, creamy joy. Tag me if you try it—I’d love to see your creation! Happy baking, and enjoy every bite! 🥰


 – Perfect for Snacks or Breakfast")


")
 Recipe – Easy, Nutritious, and Versatile!")


