")


Introduction: Nostalgia Meets Chocolatey Magic
Hey there, cookie lovers! If you’re a kid at heart (or just love sweet, nostalgic treats), let me tell you about my latest baking obsession: Lollipop Chocolate Chip Cookies. These aren’t just any ordinary cookies – they’re shaped like tiny lollipops, packed with melty chocolate, and perfect for celebrating Children’s Day (or any day, really). Let me walk you through how I came up with this recipe, and trust me, it’s all because of a simple childhood memory.
Back in the day, my favorite part of Children’s Day (June 1st) wasn’t the presents or the games – it was the big, colorful lollipop my parents gave me. You know the ones: those swirls of pink, yellow, and blue that tasted like pure happiness? I’d lick it slowly, savoring every bite until there was nothing left but a sticky, sugary mess on my fingers. Fast forward to now, when my own little one asked for “cookies that look like lollipops” for their birthday, I thought, “Why not combine that lollipop joy with chocolate chips?” That’s how these adorable cookies were born. They’re crispy on the outside, soft on the inside, and look so cute you’ll want to eat them straight from the tray – no shame here!
Why These Lollipop Cookies Are a Game-Changer
Let’s be real: kids (and let’s admit it, adults too) go crazy for lollipops. They’re colorful, fun to hold, and instantly make you feel like a kid again. But what if you could turn that joy into a cookie? These Lollipop Chocolate Chip Cookies do exactly that! Here’s why they’re a hit:
- Kid-Friendly Design: The lollipop shape is eye-catching, so kids will beg to help (and eat) them faster than you can say “Chocolate!”
- Double Chocolate Love: Who doesn’t love chocolate chips? These have 80g of them, so every bite is packed with melty goodness.
- Easy-Breezy Baking: No fancy tools needed! Just a mixing bowl, an egg whisk, and your patience (okay, maybe a little patience, but mostly fun).
- Perfect for Any Occasion: Whether it’s Children’s Day, a birthday party, or just a rainy afternoon, these cookies will make the moment special.
Ingredients: Let’s Gather the Stars of the Show
First things first: you need the right ingredients to make these cookies shine. Let’s list them out (and don’t worry, I’ll note any swaps if you’re missing something!):
- Cake flour: 135g (This gives the cookies a soft, tender texture. If you don’t have cake flour, all-purpose flour works, but the texture might be a tiny bit crisper – still delicious though!)
- Cocoa powder: 15g (For that rich, chocolatey flavor and a deep brown color – bonus: it makes your kitchen smell amazing!)
- Baking powder: 4g (Super fine, no gritty bits! This is what makes the cookies rise a little, so they’re not flat. If you don’t have baking powder, skip it – but your cookies will be flatter. Not bad, just different!)
- Whole milk: 45g (Or any milk you have in the fridge – just make sure it’s not expired, okay? We’re not risking food poisoning here.)
- Corn oil: 75g (Light and neutral, so it keeps the cookies tender. If you don’t have corn oil, vegetable oil works too.)
- Egg whites: 48g (That’s about 1 large egg white – so save the yolk for scrambled eggs later! Egg whites help the cookies hold their shape.)
- Powdered sugar: 65g (This sweetens the cookies without grit, so they’re smooth and melt-in-your-mouth. If you don’t have powdered sugar, you can blend granulated sugar in a blender until it’s fine – easy hack!)
- Chocolate chips: 80g (Mini chocolate chips are chef’s kiss for this recipe! They’re easier to distribute, and the cookies look extra cute. If you only have regular chocolate chips, chop them up smaller.)
- Straw Trick: If you have colorful straws, use them to make the lollipop hole! Push the straw into the top while the cookies are warm, then gently pull it out. It’ll leave a cute hole, and you can even put a real lollipop stick in later for extra fun.
- Adjust for Texture: If you prefer softer cookies, reduce the baking time to 10 minutes. If you like them crispy, bake for 14 minutes. Ovens vary, so keep an eye on them!
- Store Them Right: Keep the cookies in an airtight container for up to 5 days. They’ll stay fresh and chewy – no one wants stale cookies, right?
- Substitute What You Can: Out of cake flour? Use all-purpose flour. No powdered sugar? Blend granulated sugar in a blender until fine. No chocolate chips? Use dark chocolate chunks – but make sure they’re chopped small!
Step-by-Step: Let’s Bake Those Lollipops!
Now, let’s get to the fun part – baking! I’ll walk you through each step, so even if you’re a baking newbie, you’ll be a pro by the end. Let’s start with the basics:
Prep: Gather & Set Up
Before you start mixing, make sure your ingredients are at room temperature. Room temp ingredients mix better, so your batter will be smooth (no lumps!). Also, preheat your oven to 180°C (350°F) – we’ll need that later. Trust me, your kitchen will smell like chocolatey heaven soon enough!

Pro tip: If you’re using a fine baking powder (the kind with no grit), you’re golden! Coarse baking powder might make tiny holes in the cookies, so check the packaging before you start. And grab your mini chocolate chips – they’re the secret to cuteness here!
Mix the Wet Ingredients
Take a clean mixing bowl and add the milk, egg whites, corn oil, and powdered sugar. Now, grab an egg whisk (or even a fork, no fancy tools needed!) and mix until everything is smooth. The powdered sugar might clump a bit, but keep whisking – it’ll dissolve in no time. You’ll know it’s ready when there are no white sugar lumps left.

Don’t overmix this part – we just want to combine the wet ingredients, not whip them into a meringue. Keep it gentle, and you’ll be good!
Mix the Dry Ingredients
In another clean bowl, add the cake flour, cocoa powder, and baking powder. Now, whisk them together – this is super important because we don’t want any clumps of cocoa powder. If you have a sieve, sift the dry ingredients first to make sure they’re evenly mixed. But even if you don’t, a good whisking will do the trick.

Pro move: Use a fork or whisk to break up any clumps. You want this to be as smooth as possible because smooth dry ingredients make for smooth batter.
Combine Dry & Wet: The Magic Happens Here
Now, it’s time to combine the dry and wet ingredients. Take the sieve and pour the dry mix into the sieve, then hold it over the wet ingredients. Sifting is key here – it keeps the batter smooth and prevents those annoying dry spots. If you don’t have a sieve, use a spoon to gently pour the dry ingredients into the wet mix, then whisk to break up any lumps.

Once you’ve sifted the dry ingredients, use an egg whisk to fold the dry mix into the wet batter. Fold from the bottom up, like you’re stirring a campfire – no circular motions! This keeps the batter light and fluffy. Continue folding until there are no more white specks of flour – you’ll know it’s done when the batter is smooth and creamy.

See how the sieve helps prevent dust? That’s a win-win – less mess in your kitchen, and faster baking! This step is all about patience and gentle mixing.
Add Chocolate Chips & Prepare the Batter
Now, it’s chocolate chip time! Add all 80g of chocolate chips to the batter. Use the egg whisk again to fold them in gently. You want the chocolate chips to be evenly distributed, so every bite has some melty goodness. If you’re using mini chips, they’ll stay in place better, but regular chips work too – just make sure to chop them if they’re big.

Pro tip: Fold the chocolate chips in carefully. If you stir too hard, the chips might break and turn your batter messy. Keep it slow and steady!
Get Piping: Let’s Shape the Lollipops
We’re almost there! Grab a large piping bag (or even a Ziploc bag with the corner cut off – no judgment if you’re resourceful!). Pour the batter into the piping bag, making sure it’s not too full (you don’t want it to spill everywhere). Now, hold the piping bag over a baking tray lined with parchment paper (or baking paper, as we call it in the UK). Squeeze the batter in a circular motion, starting from the outside and moving inwards to create that lollipop shape. Space them about 2 inches apart – kids will need their own space to eat, right?

Don’t worry if your lollipops aren’t perfect – they’ll still taste amazing! The key is to make them look like little lollipops, so keep the circles neat and about 1.5-2 inches wide. If you’re using a piping bag, make sure the tip is wide enough so the batter flows easily. And if you don’t have a piping bag, use a spoon to drop small portions of batter onto the tray – just shape them into circles with your spoon!
Bake & Enjoy the Chocolatey Aroma
Once your tray is lined with lollipop cookies, pop it into the preheated oven (180°C, 350°F) and set the timer for 12 minutes. While they’re baking, close your eyes and imagine the smell – cocoa, chocolate, and sweet vanilla. It’s like a hug for your senses!

When the timer dings, resist the urge to eat them immediately! Let the cookies cool for 5 minutes on the tray – they’ll be soft, and you don’t want to burn your tongue. Then transfer them to a cooling rack, and watch as they harden slightly (but stay chewy inside!).

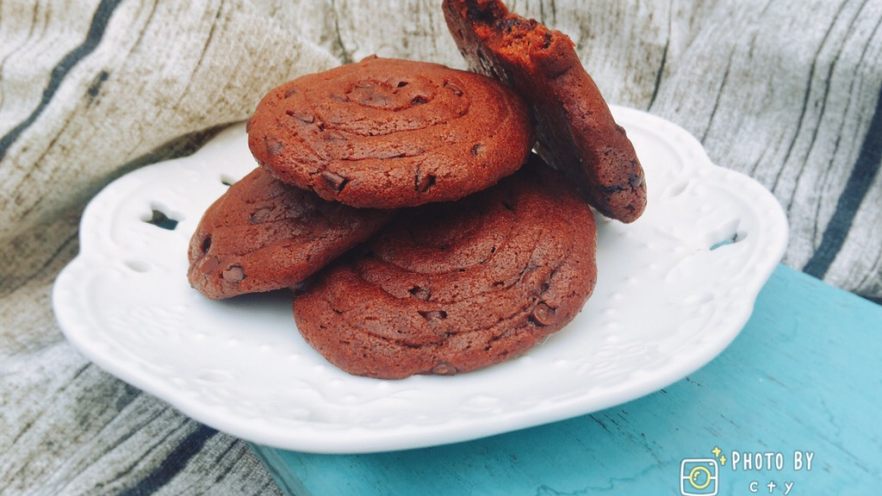
Look at that bottom! See the little swirls from the baking? It’s like a mini work of art. These cookies are crispy on the outside, soft on the inside, and they’re just begging to be eaten. My kiddo tried one before they were cool – oops, but it was worth it!

Pro tip: If you’re feeling fancy, use a colorful straw while the cookies are still warm to shape the lollipop stick hole. Just press the straw gently into the top – it’ll leave a perfect hole, and you can even add sprinkles if you’re extra! But even without that, these cookies are adorable.
Pro Tips: Make Your Lollipop Cookies Even Better
Now, let’s share some secrets to take your cookie game to the next level. These tips will help you avoid mistakes and make the best lollipop cookies ever:
Final Thoughts: Sweet Memories in Every Bite
These Lollipop Chocolate Chip Cookies aren’t just a recipe – they’re a trip down memory lane. Whether you’re making them for your kid on Children’s Day, sharing them with friends, or just treating yourself, these cookies bring joy. They’re easy, delicious, and so much fun to make. And hey, even if you mess up a lollipop shape, no one will care – because chocolate makes everything better!
So grab your ingredients, preheat that oven, and get ready to create some sweet memories. Tag me when you bake these – I’d love to see your lollipop cookies! Happy baking, and happy Children’s Day to all the kids (and kids at heart) out there!
 Recipe")


 – A Spicy Hunan Delight")

: A Kid-Favorite Recipe")
