


Why This Strawberry Jam Cake Roll Is My Go-To Breakfast Treat
Let’s be real—mornings can feel like a total drag sometimes. But nothing turns a “meh” morning around faster than a soft, sweet cake roll slathered with strawberry jam. I’ve tinkered with at least a dozen cake roll recipes over the years, swapping fillings from chocolate ganache to lemon curd, but this strawberry jam version? It’s the one my family begs for on repeat. There’s something about the bright, fruity jam paired with a light, fluffy sponge that just hits different. Plus, it’s way easier to make than it looks—promise!
What You’ll Need (Ingredients List)
No fancy ingredients here—just stuff you probably already have in your pantry. Let’s break it down:
- 72g cake flour (trust me, cake flour makes all the difference for that tender texture!)
- 4 large eggs (room temp is key—cold eggs won’t whip up as nicely)
- 1g salt (just a pinch to boost the sweetness)
- 60g granulated sugar (split into three parts for perfect meringue)
- 35g corn oil (or any neutral oil like canola—avoid olive oil, it’s too strong)
- 45g water (plain old tap water works fine)
- 7 drops lemon juice (helps stabilize the egg whites)
- 5 drops vanilla extract (for that warm, cozy flavor)
- Strawberry jam (use your favorite—homemade is extra special, but store-bought works too!)
Step-by-Step Instructions to Make the Perfect Cake Roll
Okay, let’s get baking! I’ve included step-by-step pics to make this foolproof—no guesswork here.
1. Whip the Egg Whites (The “Peak” Secret)
First up: separating the eggs. Make sure not a single drop of yolk gets into the whites—yolk has fat, which will kill your meringue. Trust me, I’ve messed this up before and had to start over! Once separated:

- Pop the egg whites in a clean bowl and beat on high speed for 30 quick strokes. You’ll see big, bubbly “fish eyes” start to form. Now add 30g of sugar—half the total!

- Beat another 50 strokes, then toss in 15g more sugar. Keep beating for another 50 strokes—suddenly the whites will get pale, fluffy, and way smoother. No more lumps!

- Add the last 15g of sugar and beat 50 more strokes. Stop when you pull up the mixer and see a stiff, upright peak—like a tiny white mountain! If it flops over, keep beating a little longer.
2. Make the Yolk Batter (Smooth, Not Lumpy)
Now let’s switch to the wet ingredients for the yolk batter. This part is super straightforward:

- Pour the corn oil and water into a bowl, add that tiny pinch of salt, and stir on low speed for 10-15 seconds. Just enough to mix them up—no need to go crazy.

- Sift the cake flour into the bowl (sifting is non-negotiable—lumpy flour = lumpy cake!). Stir for another 10-15 seconds until it turns into a thick, smooth paste. Think “pancake batter but thicker.”

- Throw in the egg yolks and vanilla extract—hello, flavor!

- Beat with the mixer first, then switch to a spatula to gently fold everything together. You want a creamy, uniform batter—no streaks of yolk left!
3. Fold the Batter (The Most Important Step!)
Here’s where the magic happens—combining the fluffy whites with the yolk batter without deflating all that air:

- Scoop 1/3 of the stiff egg whites into the yolk batter. Use a spatula to cut and fold (like you’re digging a hole and flipping the batter over) instead of stirring. Stirring will squish out all the air we worked so hard to get!

- Once that 1/3 is mixed in, pour the entire yolk batter back into the big bowl of egg whites. Fold another 50 or so times—stop when the batter is light, fluffy, and completely uniform (no white streaks!). You’ll feel like a pro, I swear.
4. Bake the Sponge (Crisp Top, Soft Inside)
Time to get this into the oven! Preheat your oven to 150°C (300°F) first—don’t skip preheating, or the cake will rise unevenly.

- Line a baking pan with parchment paper (I use a 9×13 inch pan—perfect size for rolling!). Pour the batter in and gently shake the pan a few times to pop any big air bubbles. Smooth the top with a spatula so it’s even.

- Stick it in the oven for 20 minutes. Set a timer—overbaking will make the cake dry and crack when you roll it! You’ll know it’s done when the top is golden and springs back when you touch it.
5. Roll It Up (The Warm Trick!)
This is the step everyone worries about, but I’ve got a hack to make it easy:

- As soon as the timer dings, take the pan out and flip it over onto a clean piece of parchment paper. Peel off the old parchment paper right away—if you wait, it’ll stick like glue!

- Let it cool for 5-10 minutes—just enough to not burn your fingers, but still warm. Here’s the biggest tip ever: Roll it while it’s still warm! If it cools all the way down, it’ll crack. Don’t ask me how I know…

- Spread a thin layer of strawberry jam all over the cake—don’t go overboard! Too much jam will ooz out when you roll it. I like a thin coat so the cake flavor still shines.

- Start rolling from one end, using the parchment paper to help you. Roll it tight but gentle—you don’t want to squish the cake. Once it’s rolled, wrap it in the parchment paper like a burrito and stick it in the fridge (or freezer, if you’re in a hurry) for 1 hour to set.
6. Slice and Serve (Pro Slicing Tip!)
The best part—eating it! But first, let’s slice it like a pro:
- Take the cake roll out of the fridge. Grab a sharp, serrated knife (a regular knife will squish it!) and run it under hot water for 10 seconds. Wipe it dry, then slice—you’ll get clean, smooth pieces every time! Reheat the knife between slices if needed.

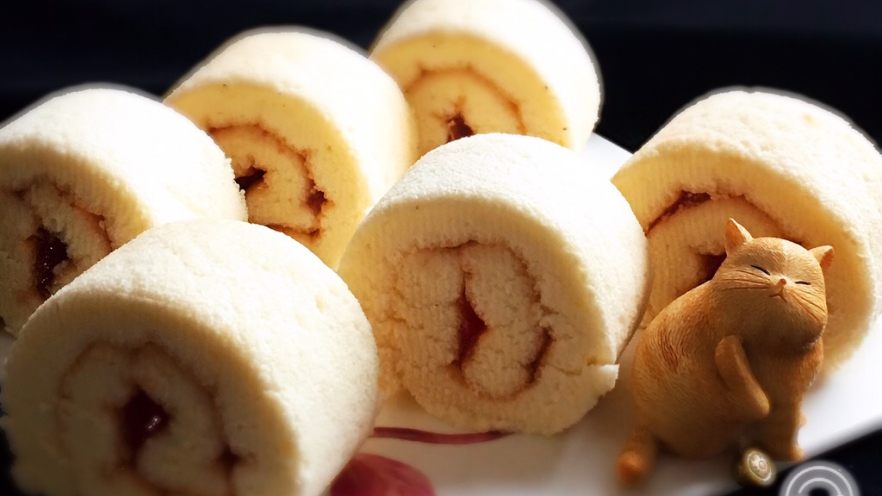
- Plate it up—maybe add a fresh strawberry on top for extra flair. It looks so fancy, no one will believe you made it at home!

- Enjoy it for breakfast with coffee, as an afternoon snack, or even as a light dessert. It’s sweet but not overpowering—perfect for any time of day!
My Top Pro Tips for No-Fail Cake Rolls
I’ve made my share of lumpy, cracked, or unrollable cake rolls—so here are the lessons I learned the hard way:
- Warm cake = easy roll: This is non-negotiable! If the cake cools completely, it’ll crack when you try to roll it. Trust me, I’ve cried over a cracked cake roll before—don’t be me.
- Sift the flour: Lumpy flour makes lumpy batter, which makes a lumpy cake. Take 30 seconds to sift it—your future self will thank you.
- Don’t overmix the batter: After adding the egg whites, fold gently! Overmixing deflates the air, and you’ll end up with a dense, flat cake instead of a fluffy sponge.
- Hot knife for slicing: A cold knife squishes the cake. Run it under hot water, dry it, and slice—clean cuts every time.
- Room temp eggs: Cold eggs don’t whip up into stiff peaks as easily. Take them out of the fridge 30 minutes before baking, or put them in a bowl of warm water for 5 minutes to speed it up.
Final Thoughts: Why This Recipe Works
This strawberry jam cake roll is my go-to because it’s simple, delicious, and foolproof once you know the tricks. The fluffy sponge pairs perfectly with the bright strawberry jam, and it’s versatile enough to eat any time of day. Whether you’re making it for a lazy Sunday breakfast, a potluck, or just because, it’s sure to be a hit.
So grab your mixer, some eggs, and your favorite strawberry jam—let’s bake! And if you mess up the first time? Don’t worry—I did too. Just try again, and remember: the warm roll trick is everything.
 – Perfect for Snacks or Breakfast")


")
 Recipe – Easy, Nutritious, and Versatile!")


