


Hey there, fellow dessert fanatics! If you’re anything like me—obsessed with that earthy, slightly bitter kick of matcha and the creamy tang of yogurt—you’re in for a treat. Today, I’m sharing my go-to recipe for matcha yogurt mousse: a light, refreshing dessert that’s so easy to make, even if you’re new to mousse. Trust me, once you take that first bite of the velvety matcha layer paired with the zesty yogurt layer? You’ll be hooked.
Why This Matcha Yogurt Mousse Works
Let’s be real: some mousse recipes are fussy. They require fancy equipment or ingredients you can only find at specialty stores. But this one? Nope. It uses basic stuff you probably already have in your kitchen, and the steps are straightforward. Plus, the two-layer combo hits all the right notes—rich matcha, bright yogurt, and just the right amount of sweetness. It’s perfect for a weeknight treat, a potluck, or even a fancy dinner party (your guests will think you spent hours on it).
Ingredients You’ll Need
First, let’s gather our supplies. I like to split this into two parts: the matcha mousse layer and the yogurt mousse layer. No complicated tools—just a few bowls, a whisk, and a blender (or a hand mixer, if you’re feeling fancy).
For the Matcha Mousse:
- 10g matcha powder (use good quality—this makes all the difference!)
- 30g sugar (for the matcha mixture)
- 120ml heavy cream
- 12g sugar (for the heavy cream)
- 120ml milk
- 15g gelatin sheets (or 1.5 tbsp gelatin powder, if you prefer)
For the Yogurt Mousse:
- 180g plain Greek yogurt (full-fat is best for creaminess)
- 100ml heavy cream
- 40g sugar
- 15g gelatin sheets (same as above)
Step-by-Step Instructions
Okay, let’s dive in! I’ll walk you through each step with tips to avoid common mistakes (like lumpy matcha—yikes).
Prep: Soak the Gelatin

First things first: gelatin needs to bloom (soak in cold water) to work properly. Grab your gelatin sheets and submerge them in a bowl of cold water. Let them sit for about 5 minutes—they’ll get soft and squishy. Don’t skip this step! If you use unbloomed gelatin, your mousse will be grainy.
Make the Matcha Mousse Layer

Start with the matcha base. In a small bowl, mix the matcha powder and 30g sugar together. This helps prevent clumps later—trust me, you don’t want a matcha mousse with little lumps of powder.

Next, heat the milk in a small saucepan over low heat. You don’t want it to boil—just warm enough that you can dip your finger in without burning it (about 120°F/50°C). If it gets too hot, it might cook the gelatin too quickly.

Now, slowly pour the warm milk into the matcha-sugar mixture, whisking constantly. Do this in small batches! If you dump all the milk in at once, the matcha will clump up. Once it’s smooth, add the bloomed gelatin sheets (squeeze out any excess water first) and stir until they’re completely melted. Take the pan off the heat and let it cool to room temperature—you don’t want hot liquid to melt your whipped cream later.

While the matcha mixture cools, let’s whip the heavy cream. In a large bowl, add 120ml heavy cream and 12g sugar. Use a hand mixer (or a whisk, if you’re feeling strong) to whip it until it’s at “soft peak” stage—this means when you lift the mixer, the cream forms a peak that bends over. Don’t overwhip it! If it gets too thick, it’ll be hard to mix with the matcha.

Once the matcha mixture is cool, gently fold it into the whipped cream. Fold, don’t stir—this keeps the mousse light and fluffy. If you stir too hard, you’ll deflate the cream, and your mousse will be dense. Then, strain the mixture through a fine-mesh sieve to get rid of any tiny lumps. This step is optional, but it makes the mousse super smooth.
Now, grab your 6-cavity silicone mold (I use a Boule Mec silicone mold—they’re perfect for individual portions). Pour the matcha mousse into each cavity until they’re about 50% full. Smooth the tops with a spatula, then cover the mold with plastic wrap and pop it in the fridge for at least 2 hours. You want the matcha layer to set firm so the yogurt layer doesn’t mix into it.
Make the Yogurt Mousse Layer

While the matcha layer chills, let’s make the yogurt mousse. First, bloom another 15g of gelatin sheets in cold water (same as before).

Take 60g of your Greek yogurt and heat it in the microwave for 20-30 seconds (or in a small pan over low heat) until it’s warm. Add the bloomed gelatin (squeezed dry) and stir until it’s melted. Then, mix this warm yogurt mixture into the remaining 120g of cold yogurt—this prevents the cold yogurt from curdling.

Next, whip the 100ml heavy cream and 40g sugar until soft peaks form (same as the matcha layer). Gently fold the whipped cream into the yogurt-gelatin mixture until it’s smooth. Strain it if you want extra silkiness (I usually do—worth the 30 seconds).
Assemble and Chill

Take the matcha layer out of the fridge—it should be firm to the touch. Pour the yogurt mousse over the matcha layer until each cavity is almost full (leave a little space at the top if you want to add a garnish later). Smooth the tops again, cover with plastic wrap, and put it back in the fridge for another 2 hours. For silicone molds, I like to freeze it for 30 minutes before unmolding to make it easier—more on that below!
Pro Tips for Success
- Use high-quality matcha: Cheap matcha can taste bitter or grassy. Spend a little extra on ceremonial-grade or culinary-grade matcha—your taste buds will thank you.
- Don’t overwhip the cream: Soft peaks are key. If you whip it to stiff peaks, the mousse will be heavy.
- Strain everything: This removes lumps and makes the mousse velvety. It’s a small step, but it makes a big difference.
- Unmolding hack: For silicone molds, just peel the mold away from the mousse—easy! For metal or glass molds, dip the bottom in warm water for 10 seconds, then flip it onto a plate.
Final Thoughts
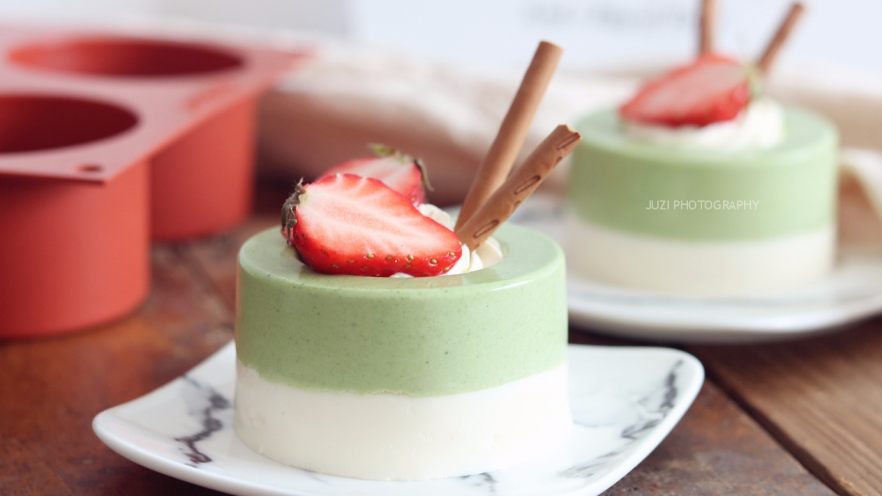
This matcha yogurt mousse is one of my favorite desserts to make because it’s versatile and delicious. You can serve it as-is, or add a garnish like fresh berries, a dusting of matcha, or a drizzle of honey. It’s light enough that you can eat two (no judgment) and fancy enough to impress. So grab your ingredients, and let’s make some mousse!


")

