
")


Let’s be real—nothing beats a scoop of icy, mango-packed goodness on a sweltering summer day. Store-bought versions? They’re okay, but they’re often loaded with weird additives and lack that fresh, juicy mango punch. That’s why I’m obsessed with making my own mango ice cream at home. It’s easier than you think, and the result? A creamy, dreamy treat that tastes like biting into a ripe mango straight from the tree. Trust me, once you try this, you’ll never go back to the store-bought stuff. Let’s dive in!
Why Homemade Mango Ice Cream Is Worth the Effort
First off, let’s talk about why homemade is better. Store-bought ice cream often uses mango flavoring instead of real fruit. That means you’re missing out on that bright, tangy sweetness that only fresh mangoes can give. Plus, homemade lets you control the sugar—no more over-sweetened sludge! And the best part? You can tweak it to your taste. Love extra mango? Throw in more fruit. Prefer a lighter texture? Adjust the cream. It’s all up to you.
Another win? Making ice cream at home is a fun activity. Whether you’re cooking with kids, hosting a summer BBQ, or just treating yourself, the process is satisfying. Watching the ingredients come together into a smooth, creamy base? It’s like magic. And when you take that first bite of your homemade creation? Pure joy.
Ingredients You’ll Need (No Fancy Tools Required!)
Before we start, let’s gather our ingredients. The best part? You probably have most of these in your kitchen already. Here’s what you’ll need:
- 150g fresh mango flesh (about 1-2 ripe mangoes—go for the sweetest ones you can find!)
- 200ml heavy cream (the higher the fat content, the creamier the ice cream)
- 40g powdered sugar (it dissolves easier than granulated sugar, so no gritty texture!)
- 2 egg yolks (room temperature works best—they mix better with sugar)
- A few drops of lemon juice (cuts the sweetness and keeps the mango from browning)
- 50ml milk (whole milk is ideal for richness)
Pro tip: Pick ripe mangoes. How do you know they’re ready? They should give a little when you squeeze them and smell sweet at the stem. If they’re too firm, let them sit on the counter for a day or two. Unripe mangoes will make your ice cream tart in a bad way.
Step-by-Step Guide to Making Creamy Mango Ice Cream
Okay, let’s get cooking. I’ll walk you through each step with photos to make it easy. No stress—take it slow, and you’ll nail it.
Step 1: Prep Your Ingredients

First things first: get all your ingredients out and ready. This is called “mise en place” (fancy French term for “get organized”) and it saves you from scrambling later. Measure out your mango flesh, cream, sugar, egg yolks, lemon juice, and milk. Make sure your egg yolks are at room temperature—if they’re cold, they won’t whip up as well.
Step 2: Prep the Mango Flesh

Now, let’s handle the mango. Wash the mangoes, then cut them into a “hedgehog” shape (you’ve seen this before: slice along the pit, then score the flesh into cubes without cutting the skin, then push the skin up to pop the cubes out). This makes it super easy to scoop out the flesh. If you’re not confident with the hedgehog method, just use a spoon to scoop out the flesh—no judgment!
Step 3: Blend the Mango into a Smooth Puree

Take your mango flesh and toss it into a blender or food processor. Blend until it’s completely smooth—no lumps allowed! If your mango is extra ripe, this will be a breeze. If it’s a little firm, you might need to blend for a few extra seconds. Set the puree aside—we’ll use it later.
Step 4: Mix the Egg Yolks, Sugar, and Lemon Juice

In a medium bowl, add the egg yolks, powdered sugar, and a few drops of lemon juice. The lemon juice isn’t just for flavor—it also helps stabilize the egg yolks when we heat them later. Give it a quick stir to combine the sugar and yolks before moving on.
Step 5: Whip the Egg Yolk Mixture

Now, grab an electric mixer (or a whisk if you’re feeling strong!) and whip the egg yolk mixture. Whip until it’s pale yellow, fluffy, and the sugar is completely dissolved. This should take about 2-3 minutes with a mixer. If you’re whisking by hand, it might take 5-6 minutes—arm day, anyone? The mixture should be thick enough that when you lift the mixer, it leaves a ribbon trail that fades slowly.
Step 6: Heat the Milk (Don’t Boil It!)

Pour the milk into a small saucepan and heat it over low heat. You want it to get warm enough that tiny bubbles form around the edges (this is called “scalding” the milk). Do NOT let it boil—boiling milk will make your ice cream base grainy. Keep an eye on it; this only takes a minute or two.
Step 7: Temper the Egg Yolks (The Most Important Step!)

Here’s the tricky part: adding hot milk to cold egg yolks without scrambling them. This is called “tempering.” Slowly pour the warm milk into the egg yolk mixture while whisking constantly. If you pour too fast or stop whisking, the hot milk will cook the eggs into lumps. Take your time—this step is crucial for a smooth base.
Step 8: Cook the Base Until Thickened

Pour the milk-egg mixture back into the saucepan and heat it over low heat. Stir constantly with a wooden spoon or spatula—make sure to scrape the bottom of the pan to prevent burning. Cook until the mixture thickens enough to coat the back of the spoon. What does that mean? Dip the spoon into the mixture, then run your finger across the back. If the line stays (instead of wiping away), it’s ready. This takes about 3-4 minutes. Remove it from the heat right away—overcooking will make it curdle.
Step 9: Let the Base Cool Down
Once the base is thickened, pour it into a clean bowl and let it cool to room temperature. You can speed this up by placing the bowl in a larger bowl of ice water (just don’t let the water get into the base!). Cooling it down is important because if we add the cream while it’s warm, the cream will melt and we’ll lose that fluffy texture.
Step 10: Whip the Heavy Cream

While the base is cooling, let’s whip the heavy cream. Pour it into a chilled bowl (chilling the bowl helps the cream whip faster) and use an electric mixer to whip it to “soft peaks.” That means when you lift the mixer, the peaks curl over at the top—don’t whip it to stiff peaks, or the ice cream will be too dense. This takes about 2-3 minutes.
Step 11: Fold the Cream into the Base

Now, gently fold the whipped cream into the cooled egg-milk base. Folding means using a spatula to cut through the middle, scrape the bottom, and bring the mixture up over the top. Do this slowly and carefully—we don’t want to deflate the cream (that’s where the fluff comes from!). Keep folding until everything is well combined.
Step 12: Add the Mango Puree

Pour the mango puree into the cream-base mixture. Fold it in just like you did with the cream. You want the puree to be evenly distributed, but don’t overmix—we want that bright mango color to shine through (plus, overmixing can make the ice cream less creamy).
Step 13: Freeze the Ice Cream

Pour the ice cream mixture into a freezer-safe container (a loaf pan works great). Smooth the top with a spatula, then cover it with plastic wrap (press the wrap directly onto the surface to prevent ice crystals from forming—ice crystals are the enemy of creamy ice cream!). Pop it into the freezer and let it freeze for at least 4 hours, or overnight for the best texture.
Step 14: Serve and Enjoy!

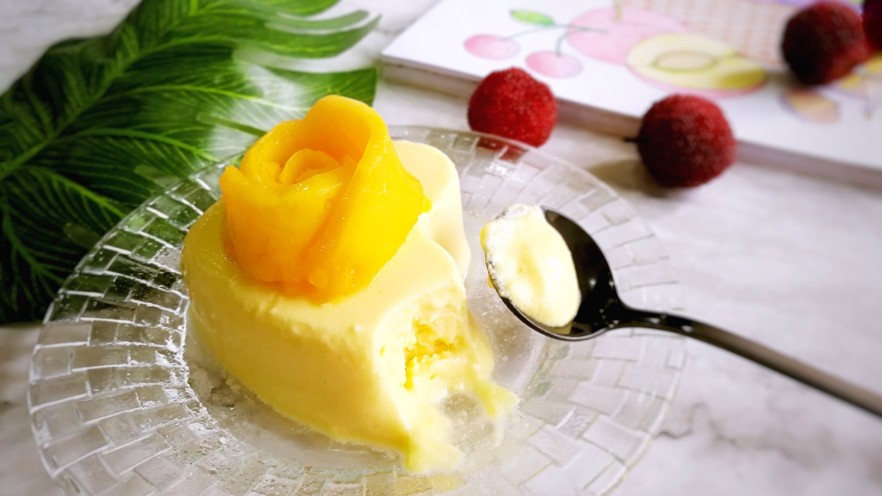
When you’re ready to eat, take the ice cream out of the freezer and let it sit for 5-10 minutes to soften (it’ll be rock hard straight from the freezer!). Scoop it into bowls, top with fresh mango slices, a sprinkle of coconut flakes, or a drizzle of chocolate sauce—whatever floats your boat. Then take that first bite and savor the creamy, mango-y goodness. You earned it!

Pro Tips for Perfect Homemade Mango Ice Cream Every Time
Want to take your ice cream to the next level? Here are some pro tips:
- Use ripe mangoes: This is non-negotiable. Unripe mangoes will make your ice cream tart and unpleasant.
- Don’t skip the tempering step: Tempering prevents scrambled eggs and ensures a smooth base.
- Chill the base before adding cream: A cold base helps the cream stay fluffy.
- Prevent ice crystals: Press plastic wrap directly onto the ice cream surface before freezing.
- Add mix-ins: Want extra texture? Toss in some chopped nuts, coconut flakes, or chocolate chips before freezing.
FAQs About Homemade Mango Ice Cream
Do I need an ice cream maker?
Nope! This recipe is no-churn, which means you don’t need any fancy equipment. Just a blender, mixer, and freezer.
Can I use frozen mango?
Absolutely! Frozen mango works great—just thaw it first and drain any excess liquid before blending.
How long does homemade mango ice cream last?
It will last in the freezer for up to 2 weeks. After that, it might start to get icy, but it’ll still taste good.
Can I reduce the sugar?
Yes! If you prefer less sugar, start with 30g of powdered sugar and adjust to taste. Just remember that sugar helps keep the ice cream creamy (it lowers the freezing point), so too little sugar might make it icy.
Final Thoughts
Making homemade mango ice cream is a summer must-do. It’s easy, fun, and the result is way better than anything you can buy at the store. Whether you’re cooling off after a day at the beach, hosting a BBQ, or just treating yourself, this recipe is sure to be a hit. So grab some ripe mangoes, roll up your sleeves, and get cooking. Your taste buds will thank you!
")


