


Almond Financiers: The Easy, Buttery French “Gold Brick” Cake You Can Bake At Home
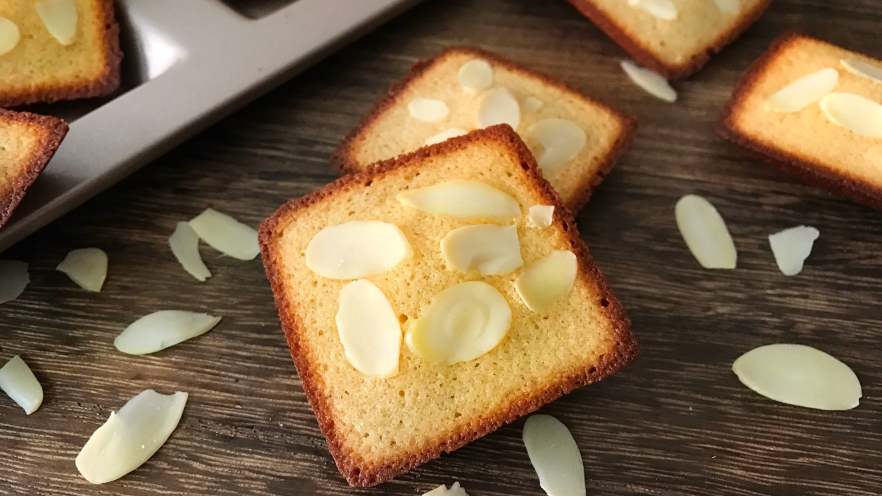
If you’ve ever walked into a fancy French bakery and spotted those tiny, perfectly shaped golden rectangles dusted with toasted almond flakes, you’ve met financiers—also lovingly nicknamed “gold bricks” thanks to their classic rectangular, block-like look. Let me let you in on a little secret: this iconic French pastry is way easier to make than you think, and today I’m breaking down the full beginner-friendly recipe step by step.
I first tried financiers at a tiny Parisian bakeshop near my apartment a few years ago, and I was hooked instantly. They’re not too sweet, have this deep, nutty buttery flavor that hits different than regular vanilla cake, and they’re totally portable—perfect for grabbing on your way to work or packing into a lunchbox. Plus, their backstory is so fun: this recipe was invented way back in the late 1800s by a pastry chef named Lasne, who wanted to create a quick, elegant treat for busy bankers (hence the name “financier,” get it?).
Whether you’re looking to impress your dinner guests, make a sweet snack for your kid’s next playdate, or just treat yourself to something fancy without spending a fortune at a bakery, this almond financier recipe is exactly what you need. Let’s dive in!
What You’ll Need For Almond Financiers
First things first: let’s gather all your ingredients. The best part about this recipe is that most of these items are probably already sitting in your pantry! No fancy specialty tools required, either—just a few basic baking staples.
- 20 grams all-purpose flour (low-protein cake flour works best if you have it, but regular AP flour is totally fine!)
- 20 grams blanched almond flour
- 50 grams egg whites (about 1.5 large egg whites, make sure they’re at room temperature!)
- 10 grams raw honey
- 40 grams granulated sugar
- 50 grams unsalted butter
- 12 grams sliced almonds for topping
Pro tip: If you don’t have almond flour, you can grind whole blanched almonds into a fine powder in a blender or food processor, just don’t overblend them or they’ll turn into almond butter!
Step-By-Step Almond Financier Recipe
Now let’s get baking! I promise this process is so straightforward, even if you’re a total baking newbie. I’ve broken each step down with photos to make it even easier, so you’ll have perfect gold bricks every single time.

Step 1: Prep all your ingredients first
I always like to get everything measured out and ready before I start mixing—this is called “mise en place,” and it saves so much time later when you don’t have to stop mid-recipe to dig for ingredients or spill flour all over the counter. Grab a small bowl for your dry ingredients, a bigger mixing bowl for your egg whites, and set out your butter, honey, and sugar.

Step 2: Combine egg whites, sugar, and honey
Add your room-temperature egg whites, granulated sugar, and honey to your large mixing bowl. Don’t worry about beating this until fluffy—we’re just going to mix them until the sugar and honey dissolve a little bit.

Step 3: Whisk until you see light, foamy bubbles
Grab your manual whisk and start stirring. You’ll notice the mixture start to get foamy after a minute or two—keep whisking until you see those small, rough bubbles form across the top. Don’t overwhisk this! We don’t need stiff peaks like we do for meringue cookies, just a light, frothy texture.

Step 4: Mix your dry ingredients together
While you’re whisking your egg white mixture, grab your small bowl and combine the almond flour and all-purpose flour. Stir them together with a spoon so they’re evenly mixed—this makes sure you don’t get any clumps of straight flour later on in the batter.

Step 5: Sift the dry ingredients into the wet mixture
This is a super important step! Sifting the dry ingredients into the egg white mix will prevent lumps from forming in your batter. Grab a fine-mesh sieve over your mixing bowl, pour in the flour and almond flour mixture, and gently stir until everything is just combined.

Step 6: Fold the batter until smooth
Use a silicone spatula to fold the dry ingredients into the wet mixture. Important note here: don’t stir this with a whisk or beat it with an electric mixer! Just gently fold the batter over itself until you can’t see any more dry flour streaks. Overmixing will make your financiers tough, so go slow and be gentle.

Step 7: Melt your butter slowly
Now it’s time for the secret ingredient that makes financiers taste so good: browned butter! Grab a small saucepan and add your unsalted butter. Turn the heat to low or medium-low, and let the butter slowly melt. Don’t walk away from this step! You want to keep an eye on it so it doesn’t burn.

Step 8: Wait for the butter to develop that nutty brown foam
After a few minutes, the butter will start to foam and turn a light golden brown. You’ll notice tiny brown specks starting to form at the bottom of the pan, and the butter will smell deeply nutty and toasty. Keep cooking until you see those dark brown, boiling foam bubbles start to pop on the surface—this is exactly what we want!

Step 9: Strain out the butter solids
Immediately turn off the heat and pour the browned butter through a fine-mesh sieve into a small bowl. This will catch all the crunchy brown butter solids, leaving you with a smooth, nutty golden butter that’s going to take your financiers to the next level.

Step 10: Mix the browned butter into the batter
Let the browned butter cool for just a minute or two—you don’t want it to be hot enough to cook the egg whites, but it should still be liquid. Pour it slowly into your financier batter, and gently fold it in until everything is fully combined. Again, don’t overmix here! Just stop as soon as the butter is evenly mixed in.

Step 11: Transfer the batter to a piping bag
Grab a piping bag and fit it with a round tip (a plain 1M tip works great, but you can even just snip the corner off a plastic bag if you don’t have a piping bag!). Pour your batter into the piping bag, or just spoon it in if you’re using a zip-top bag. Twist the top of the bag closed to keep the batter from spilling out while you pour.

Step 12: Pipe the batter into your molds
If you have a financier mold, this is the perfect time to use it! They’re cheap and easy to find online, but if you don’t have one, you can use a mini muffin tin too. Just pipe the batter into each mold or muffin cup until it’s about 80% full. Why 80%? Because the batter will puff up a lot while baking, and you don’t want it to spill over the sides.

Step 13: Top with sliced almonds
Grab your sliced almonds and sprinkle a few on top of each financier. This adds a nice crunchy texture and makes them look extra pretty, like the ones you see at fancy French bakeries. You can skip this if you don’t have almond flakes on hand, but I highly recommend adding them!

Step 14: Bake until golden brown
Preheat your oven to 190°C (375°F) before you start, and make sure your rack is in the middle of the oven. Place your filled molds on a baking sheet (this makes it easier to move them in and out of the oven) and bake for 8 to 10 minutes. You’ll know they’re done when the edges are a light golden brown and the top of the financiers look set. Don’t overbake them, or they’ll get dry!

Step 15: Cool and remove from the molds
Once they’re done baking, take the pan out of the oven and let the financiers cool in the molds for about 5 minutes. Then run a small knife around the edges of each one, and gently pop them out onto a wire rack to cool completely.
My Top Tips For Perfect Almond Financiers Every Time
I’ve made this recipe dozens of times by now, so I’ve picked up a few tricks that make sure my financiers turn out perfect every single time. Let me share them with you:
- Don’t overmix the batter: I can’t say this enough! Overmixing will develop gluten in the flour, which will make your financiers tough instead of soft and tender.
- Fill the molds only 80% full: Like I mentioned earlier, the batter will rise a lot while baking. If you fill it all the way to the top, it will spill over and make a mess in your oven.
- Use room-temperature egg whites: Room-temperature egg whites mix better with the other ingredients, and they’ll help your batter come together smoothly.
- Don’t skip the browned butter: This is what makes financiers taste different from regular almond cakes. The nutty, toasty brown butter flavor is the star of the show here!
- Store them properly: Financiers stay fresh for up to 3 days in an airtight container at room temperature. You can also freeze them for up to 2 months—just thaw them at room temperature before serving.
Ways To Mix Up This Classic Almond Financier Recipe
This base recipe is so versatile! If you want to switch things up, here are a few easy ways to customize your financiers:
- Add a teaspoon of vanilla extract or almond extract for extra flavor
- Top with a dusting of powdered sugar instead of almond flakes
- Stir in a handful of dark chocolate chips into the batter before piping
- Use pistachio flour instead of almond flour for a different nutty flavor
- Add a thin layer of raspberry jam in the bottom of each mold before piping in the batter for a sweet, fruity filling
Final Thoughts On Almond Financiers
Honestly, these little gold brick cakes are one of my favorite easy baking recipes ever. They’re impressive enough to serve at a dinner party, but simple enough to make on a weeknight when you just want a sweet treat. I love that they’re not overly sweet, so you can eat several without feeling guilty, and the browned butter and almond flavor is so comforting and delicious.
If you try this recipe, let me know how it goes! Tag me on social media if you post photos of your homemade financiers—I’d love to see them. And if you have any questions about the recipe, just leave a comment below and I’ll help you out. Happy baking!
: No Bitterness, Kid-Approved Recipe")


 at Home: A Step-by-Step Guide with Pro Tips")

")


