


 at Home: A Step-by-Step Guide with Pro Tips")
Let’s talk about egg yolk pastry—those flaky, buttery, sweet-and-savory treats that make you go “mmmmm” with every bite. I’ve heard people say you have to use a convection oven for these, and let me tell you, my CASO steam convection oven totally blew me away! The color was so even, 180°C for 25 minutes, and the layers? Crispy, distinct, and absolutely perfect. If you’ve ever wanted to nail homemade egg yolk pastry, this guide is for you—no fancy skills required, just a little patience and the right ingredients.
Ingredients You’ll Need
First, let’s break down the two key parts: the water-oil crust (flaky outer layer) and the oil pastry (buttery inner layer). Then we’ve got the filling—creamy red bean paste and salty duck egg yolks (the star of the show!). Here’s everything you need:
Water-Oil Crust (Outer Layer)
- 120g all-purpose flour
- 120g cake flour (low-gluten)
- 95g water (room temperature works best)
- 25g granulated sugar
- 70g lard (or unsalted butter if you don’t have lard—lard gives better flakiness though!)
Oil Pastry (Inner Layer)
- 180g cake flour (low-gluten)
- 90g lard (again, butter is a substitute, but lard = more flaky layers)
Filling & Finishing Touches
- 375g red bean paste (store-bought is fine—look for smooth, not too sweet)
- 15 salty duck egg yolks (yes, 15—we’re making 15 pastries!)
- 1 tbsp rum (or Shaoxing wine, for removing the “eggy” smell from yolks)
- 1 egg yolk (for brushing the top)
- 1 tsp water (to thin the egg yolk)
- Roasted white sesame seeds (for sprinkling—optional but adds crunch)
Step-by-Step Instructions to Make Egg Yolk Pastry
Okay, let’s dive in! I’ve got step-by-step photos to help, so follow along and don’t stress if things take a little time—good pastry needs to rest!

Step 1: Prep the Salty Duck Egg Yolks (Super Important!)
First, the yolks. They can have a strong “eggy” odor if you skip this step. Soak your 15 salty duck egg yolks in rum (or Shaoxing wine) overnight. Then, preheat your oven to 180°C (350°F) and bake them for 5 minutes. Let them cool completely—this makes them less runny and easier to wrap later.

Step 2: Make the Water-Oil Crust
Add all the water-oil crust ingredients to a bread machine (if you have one—total time-saver!) or a large bowl if you’re kneading by hand. If you’re hand-kneading, mix the dry ingredients first, then add water and lard, and knead until it’s smooth.

Step 3: Knead Until You Get a “Window Pane”
This is the secret to a flaky crust! Keep kneading the water-oil crust until you can stretch a small piece of dough thin enough to see light through it (that’s the “window pane” test). It might take 5-10 minutes by hand, or 3-4 minutes in a bread machine—don’t skip this step!

Step 4: Make the Oil Pastry & Let Both Doughs Rest
For the oil pastry, mix the cake flour and lard until it forms a smooth, non-sticky dough. Now, wrap both the water-oil crust and oil pastry in plastic wrap and let them rest for 30 minutes at room temperature. Resting relaxes the gluten so the dough is easier to roll later—trust me, don’t skip this!

Step 5: Divide the Doughs into Small Portions
After resting, divide both the water-oil crust and oil pastry into 15 equal small balls. I like to weigh them to make sure they’re all the same size (about 25g per water-oil ball and 18g per oil pastry ball)—this way every pastry is uniform.

Step 6: Wrap Oil Pastry in Water-Oil Crust
Take one water-oil crust ball, flatten it into a small circle with your palm, then place one oil pastry ball in the center. Pinch the edges of the water-oil crust up to wrap the oil pastry completely—make sure there are no gaps! Seal the bottom tightly and place it seam-side down on a plate.

Step 7: Roll & Fold (First Time)
Take one wrapped dough ball, flatten it with a rolling pin into a long oval (like a tongue!). Then roll it up tightly from the bottom to the top. Place it seam-side down on the plate, and repeat with all 15 doughs. Now wrap them in plastic wrap and let them rest for 20 minutes—this is crucial for the layers to form!

Step 8: Roll & Fold (Second Time)
After resting, take each rolled dough, flatten it again into a longer oval (this time it’ll be easier!). Roll it up tightly again, seam-side down, and let them rest for another 20 minutes. I know, more resting—but this is what gives the pastry those iconic flaky layers. Don’t rush it!

Step 9: Prep the Filling
While the dough rests, make the filling! Divide the red bean paste into 15 equal balls (25g each). Flatten a red bean paste ball, place one cooled salted egg yolk in the center, and wrap the paste around it until the yolk is completely covered. Roll it into a smooth ball—set these aside.

Step 10: Shape the Pastries
Take one rested dough ball, press the center with your finger to fold the two ends towards the middle (like closing a book!). Flatten it with your palm, then roll it into a circle (about 10cm wide) with a rolling pin—make sure the center is thicker than the edges (so the filling doesn’t leak out!).

Step 11: Wrap the Filling
Place one red bean paste-egg yolk ball in the center of the rolled dough. Pinch the edges up around the filling, twisting the top to seal it tightly. Flip it over so the seam is down—you’ve got a round pastry! Repeat with all 15 (pro tip: if you mess up one, don’t worry—just eat it as a “test” later!).

Step 12: Brush & Sprinkle
Preheat your oven to 180°C (350°F). Place the pastries on a baking sheet (I used my CASO golden baking pan—so shiny!). Mix the egg yolk with 1 tsp water, then brush a thin layer over each pastry. Sprinkle a few roasted white sesame seeds on top for extra crunch.

Step 13: Bake to Perfection
Bake for 25 minutes at 180°C (convection oven is best for even browning—my CASO oven did this perfectly!). Halfway through, you might want to rotate the pan if your oven has hot spots, but with convection, you probably won’t need to. Watch them turn golden brown—smell that? That’s the smell of success!

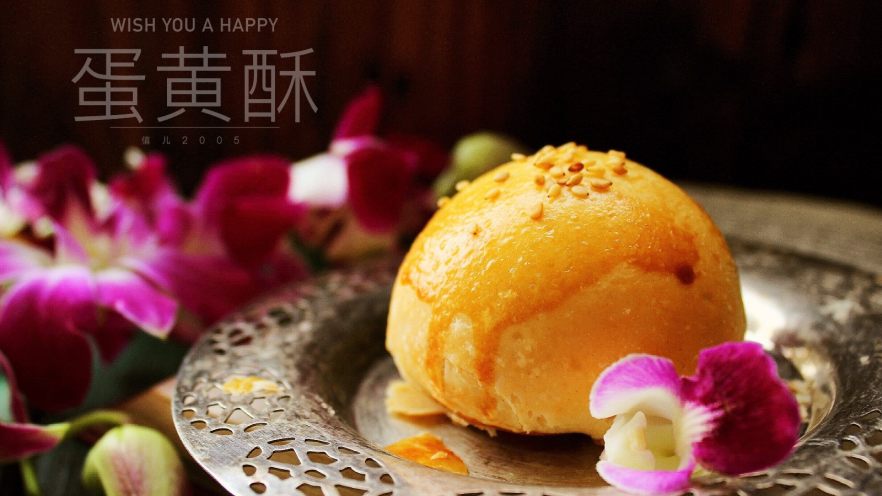
Step 14: Cool & Enjoy!
Let the pastries cool for 10-15 minutes before eating—they’re even better when they’re slightly warm! The crust will be crispy, the red bean paste sweet, and the egg yolk salty and creamy. It’s the perfect balance of flavors. Pro tip: Store leftovers in an airtight container for up to 3 days—reheat in the oven for 5 minutes to get the flakiness back.
My Pro Tips for Nailing Egg Yolk Pastry
- Use lard if you can: It has a higher melting point than butter, which creates better flaky layers.
- Rest the dough: Every resting step is non-negotiable—it relaxes the gluten and helps the layers form.
- Convection oven is key: It circulates hot air, so every pastry browns evenly (no burnt spots or pale sides).
- Don’t overfill: If you put too much filling, the pastry might burst open while baking—stick to 25g red bean paste per yolk.
- Soak the yolks: Rum or Shaoxing wine removes the fishy smell from the salted yolks—trust me, this makes a huge difference!
Final Thoughts
Making egg yolk pastry at home is easier than you think—yes, it takes a few steps, but the result is so worth it. My CASO steam convection oven made the baking part a breeze, but even if you don’t have one, a regular oven works (just rotate the pan halfway!). Whether you’re making these for a holiday, a snack, or to impress friends, this recipe will give you flaky, delicious pastries every time. So grab your ingredients, roll up your sleeves, and let’s bake—you’ve got this!
")
 – No Holes, Just Creamy Goodness")

")


