

 & Red Dates Pork Bone Soup Recipe | Nourishing Chinese Wellness Dish")


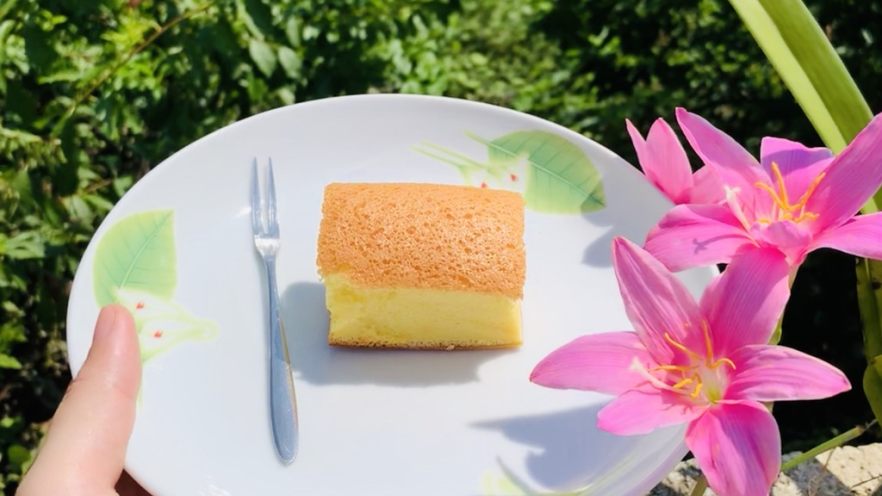
Old-Fashioned Taiwanese Cake: A Nostalgic, Soft & Fluffy Delight
Hey there, fellow food lovers! 👋 If you’re craving a cake that’s soft, tender, and packed with that classic homemade flavor, you’re in luck! This old-fashioned Taiwanese cake recipe is my family’s favorite—think of it as a warm hug in a slice. It’s not too sweet, super moist, and the texture? Absolute heaven. I’ve messed up more than a few times trying to get the consistency right, but with this guide, you’ll nail it every time. Let’s dive in!
What You’ll Need: Ingredients for the Perfect Cake
First, gather all your ingredients. No fancy tools needed—just your trusty mixing bowls, a whisk, and a pot. Here’s what you need:
- Eggs: 8 large eggs (about 430g total). Let them sit at room temperature for 30–60 minutes before starting—this is crucial for fluffiness!
- Sugar: 60g powdered sugar + 40g granulated sugar (I use a mix for a bit of crunch in the sweetness, but adjust to taste).
- Milk: 90g (whole milk works best, but any milk you have will do).
- Flour: 90g low-gluten flour (sifted, please! It helps avoid lumps).
- Oil: 80g vegetable oil (neutral, like canola or corn oil—no strong flavors here).
- Vinegar: 1g (about 1–2 drops) to stabilize the egg whites while whipping. A pinch of cream of tartar works too if you don’t have vinegar.
Let’s Get Started: Step-by-Step Baking
Alright, let’s roll up our sleeves! This recipe has a few key steps, so follow closely. I’ll share my best tips to avoid common mistakes and get that classic texture.

Step 1: Take your eggs out of the fridge and let them come to room temperature. I usually take them out in the morning if I’m baking in the afternoon—30 minutes is enough, but 1 hour is better. Trust me, room temp eggs = way fluffier cake!

Step 2: Prep your cake pan. Grease the bottom and sides with a bit of oil, then line the bottom with parchment paper. If you don’t have parchment, just grease really well—this cake is sticky, so you don’t want it sticking!

Step 3: Separate egg whites and yolks. First, crack one egg into a small bowl to check for any shells or leftover egg white in the yolk (no one likes gritty cake!). If all good, use that bowl to collect the egg whites, then separate the rest of the yolks into a big bowl. This way, you avoid accidentally getting egg white into the yolks—super important for the batter!

Step 4: Whisk the egg yolks in the big bowl. Just a quick stir—no need to over-whisk here. They’re ready to mix into the batter next.

Step 5: In a small pot, add the 40g sugar and 90g milk. Heat on low and stir gently. Then add the 80g oil. Keep stirring until everything’s mixed together.

Step 6: Now, turn the heat up slightly to low-medium and keep stirring. You want this mixture to heat up, but not boil too fast. Let it simmer slowly—burned sugar = grainy batter!

Step 7: Use a spatula or whisk to stir the sugar-milk-oil mixture. Keep it moving—don’t leave it unattended! You’ll know it’s almost ready when you see tiny bubbles.

Step 8: Once it starts bubbling (like little bubbles popping on top), turn off the heat. Now, stir it for about 30 seconds to cool it down a bit. If you let it boil too much, the sugar might crystallize—so patience is key!

Step 9: Sift the 90g low-gluten flour into the pot. Do this slowly—if the milk mixture is too hot, the flour will clump and harden. Wait until it’s warm but not burning your hand before sifting!

Step 10: Stir the flour into the milk mixture until there are no lumps. Use a whisk for smoothness—you want this batter to be super silky, like melted chocolate!

Step 11: Slowly pour the yolk mixture into the milk-flour batter. Mix gently with a spatula until everything is combined. No overmixing here—we want to keep that airiness!

Step 12: Now, your yolk batter is ready! It should be smooth and thick, like a creamy pudding. Set this aside while we whip the egg whites.

Step 13: Preheat your oven to 150°C (300°F) and let it sit for 10 minutes. While it’s preheating, fill a small pan with water and place it on the bottom rack—this creates a water bath, which helps the cake bake evenly and prevents the top from drying out.

Step 14: In a clean, dry bowl, add the egg whites (from Step 3) and a few drops of vinegar. Use an electric mixer (handheld is fine!) or a whisk to start beating them. Clean tools = stable peaks!

Step 15: Beat the egg whites until they form tiny bubbles (like fish eyes). Then add 20g of the powdered sugar. Keep beating—this helps the sugar dissolve into the whites and creates volume.

Step 16: Continue beating until the bubbles get smaller and more stable. Now add the remaining 40g powdered sugar. The whites should start to get thicker and whiter—almost like a meringue!

Step 17: Beat until you see soft peaks forming—when you lift the whisk, the tips curl over a bit. That’s the sign we’re almost there! Don’t overbeat, though—we want stiff peaks but still soft enough to fold.

Step 18: Finally, beat until the peaks are stiff but not dry. When you lift the whisk, the tip stands straight up or bends slightly. Perfect! Your egg whites are ready to fold into the batter.

Step 19: Now, fold the egg whites into the yolk batter. Take 1/3 of the egg whites and gently cut through the batter with a spatula (like slicing a cake, not stirring in circles!). This keeps all those air bubbles!

Step 20: Mix the 1/3 egg whites in until just combined—no need to overmix. The batter should still be thick and airy, like a fluffy cloud.

Step 21: Add the remaining egg whites to the yolk batter. Fold them in slowly, using the same cutting motion. You want to keep as much air in the batter as possible—this is what makes the cake rise!

Step 22: Keep folding until the batter is smooth and glossy. No streaks of egg white left—just one consistent mixture. It should look like liquid gold!

Step 23: Pour the batter into your prepared cake pan. From a few inches up, pour it in—this helps remove any air bubbles and levels the batter perfectly.

Step 24: Use a spatula to gently smooth the top. No pressing down—just spread it evenly. The batter is light, so it’ll settle nicely.

Step 25: Carefully place the pan into the preheated oven, on the middle rack. Cover the top with foil or a piece of parchment paper to prevent it from browning too much.

Step 26: Bake at 150°C (300°F) for 70 minutes. The first 60 minutes are with the foil on, and then remove the foil for the last 10 minutes. This keeps the top pale and the inside soft—no burnt edges!

Step 27: Let the cake cool on a wire rack for 10–15 minutes before removing from the pan. Patience is key—if you try to take it out too soon, it’ll crumble like a cookie!

Step 28: Once cool, slice it up! I love serving this with a cup of hot tea or coffee—so cozy for rainy afternoons or lazy Sundays.

Step 29: (Pro tip!) Next time, invest in a proper serrated knife to cut through the cake cleanly. Mine’s still sharp, but this cake is so soft it might crumble if you’re not careful! 😂
Pro Tips for the Perfect Old-Fashioned Cake
Here are my top tricks to avoid common mistakes and get that classic texture:
- Eggs: Room temperature eggs are non-negotiable! If you’re in a pinch, microwave them for 10 seconds on low power—but room temp is best for maximum fluff.
- Milk Mixture: Don’t boil the milk too long! A quick simmer until tiny bubbles form is enough—overcooking makes the batter grainy.
- Flour Sifting: Sift the flour twice to ensure no lumps—this magic step makes the cake super tender, like cotton candy!
- Egg Whites: Use a clean, dry bowl—no oil or water! And add vinegar at the start to help them whip faster and hold peaks.
- Baking Time: Ovens vary, so check at 60 minutes. If the top is golden, you’re good! If not, bake 5–10 more minutes.
Hope you loved this recipe! 🍰 If you try it, tag me in your photos—I’d love to see your old-fashioned cake creations! And if you have any questions or tips of your own, drop a comment below—let’s chat about baking adventures!


")

")