 Recipe for Lantern Festival")


: My Friend’s Request + 3 Easy Dishes You’ll Love")

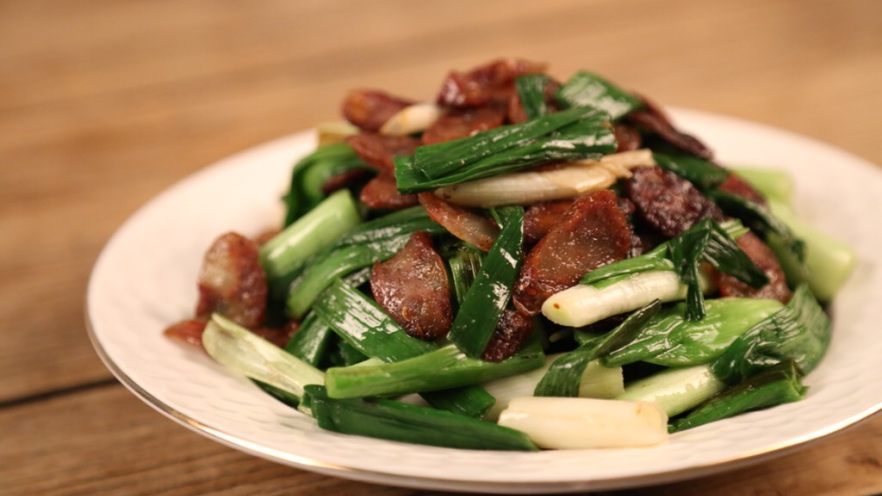
Why Chinese Sausage and Garlic Stir-Fry Is My Go-To Winter Dish
Let’s be real—when the temperature drops and the wind starts howling, nothing hits quite like a warm, savory stir-fry that’s ready in 15 minutes. I’ve been obsessed with this Chinese sausage and garlic combo lately, and honestly? It’s become my lazy winter dinner hero. A few weeks back, I hung up some homemade Chinese sausages to dry (yes, I finally tried that DIY trick I saw on TikTok), and when I tossed them with fresh garlic? The smell alone made my roommate run from the living room asking, “Is that dinner? Can I have seconds?” Spoiler: She did. And so did I.
What I love most about this dish is how minimal it is. No fancy sauces, no weird ingredients—just two stars that play so well together. The sausage is salty, slightly sweet, and packed with that umami depth that only cured meat has, while the garlic softens into this buttery, fragrant goodness. Plus, since the sausage is already seasoned, you barely have to add anything else. It’s perfect for those nights when you don’t feel like chopping a million veggies or following a 10-step recipe.
Ingredients You’ll Need (No Fuss, Promise)
Before we dive in, let’s talk ingredients. This is one of those recipes where you can probably grab everything from your fridge or the local Asian market (or even the international aisle at your grocery store). Here’s what you’ll need:
- 200g Chinese sausage (lap cheong)—look for the ones with a reddish-brown casing; they’re usually pre-cured and ready to cook
- 300g fresh garlic—yes, that’s a lot, but trust me, it’s not overpowering when stir-fried
- 1-2 tbsp cooking oil (I use canola or peanut oil, but vegetable works too)
- A pinch of black pepper (optional, but it adds a nice little kick)
Pro tip: If you can’t find fresh Chinese sausage, dried ones work too—just soak them in warm water for 10 minutes first to soften. And don’t skimp on the garlic! The more, the merrier here.
Step-by-Step: How to Make Chinese Sausage and Garlic Stir-Fry
Okay, let’s get cooking. This is so easy, even if you’re a beginner (I’m looking at you, my friend who burned toast last week). Just follow these steps, and you’ll have a delicious meal in no time.
Step 1: Prep the Chinese Sausage

First things first: Grab your Chinese sausage. If it’s tied with a cotton string (most are), you’ll need to remove that. Just snip it off with scissors—no biggie.

Next, slice the sausage into thin rounds. I like to slice mine about 1/4-inch thick so they cook evenly and get a little crispy on the edges. If your sausage is super firm, you can pop it in the microwave for 10 seconds to soften it up first—it makes slicing way easier.


Once you’ve sliced all the sausage, set it aside in a bowl. You’re halfway done with prep already—see? Easy.
Step 2: Prep the Garlic

Now for the garlic. Start by washing the garlic bulbs under cold water to get rid of any dirt. Then, peel off the outer papery layers—this is the only slightly tedious part, but it’s worth it.

Here’s a trick I learned: For the white part of the garlic (the bulb), use the flat side of your knife to gently smash it. This not only loosens the skin (so you can peel it off faster) but also releases more flavor when cooking. Then, cut the smashed garlic into 1-inch long segments.

Set the cut garlic aside—you’re almost ready to cook!
Step 3: Stir-Fry Time!

Heat a wok or a large skillet over medium-high heat. Add your cooking oil—you want enough to coat the bottom of the pan, but not so much that it’s swimming in oil.

Once the oil is hot (you’ll see a little shimmer), add the sliced sausage. Stir it around with a spatula and let it cook for 2-3 minutes until it starts to turn golden brown and release some of its fat. The sausage will get a little crispy on the edges—this is where the magic happens.


Now, add the cut garlic to the pan. Stir everything together and cook for another 2-3 minutes. You want the garlic to soften and turn a light golden color—don’t let it burn, though! Burnt garlic is bitter, and we don’t want that.


Sprinkle a pinch of black pepper over the top (remember, the sausage is already salty, so no need for extra salt!). Give it one last stir to combine.

Cook for 1 more minute, just to make sure the garlic is tender, then turn off the heat.

That’s it! Serve it hot with steamed rice, and enjoy. I promise, the smell will fill your kitchen, and every bite will be warm and satisfying.
My Top Tips for Perfect Chinese Sausage and Garlic Stir-Fry
Before you go, let me share a few quick tips to make this dish even better:
- Don’t add salt! Chinese sausage is already cured and salty, so adding more salt will make it too salty. Trust me—I made this mistake once, and it was not fun.
- Use fresh garlic. Old garlic is dry and doesn’t have as much flavor. Fresh garlic will give you that bright, fragrant taste that makes this dish pop.
- Cook on medium-high heat. You want the sausage to get crispy and the garlic to soften without burning. If the pan gets too hot, turn it down a little.
- Serve with rice. This dish is perfect with steamed white rice—it soaks up all the delicious oil and flavors from the sausage and garlic.
Final Thoughts: Why This Dish Is a Winter Must-Make
Let’s recap: This Chinese sausage and garlic stir-fry is easy, fast, and packed with flavor. It’s the kind of dish that makes you feel warm from the inside out, which is exactly what you need on a cold winter night. Whether you’re cooking for yourself, your family, or a friend, this recipe is sure to impress.
I’ve made this dish at least 5 times in the past month, and each time it’s a hit. My roommate even asked me to teach her how to make it—high praise, considering she usually sticks to frozen pizza. So go ahead, grab some Chinese sausage and garlic, and give this recipe a try. You won’t regret it.
And hey, if you make it, tag me on Instagram—I’d love to see your version! Happy cooking, and stay cozy this winter.


