

 & Red Dates Pork Bone Soup Recipe | Nourishing Chinese Wellness Dish")


Strawberries are my absolute favorite fruit—sweet, vibrant, and just so joyful to eat. But here’s the thing: I always feel a little sad when strawberry season starts wrapping up. I mean, I’ve had my fill of smoothies, strawberry shortcake, and even snacking on them straight from the fridge, but there’s something about preserving their flavor that feels like a love letter to the season.
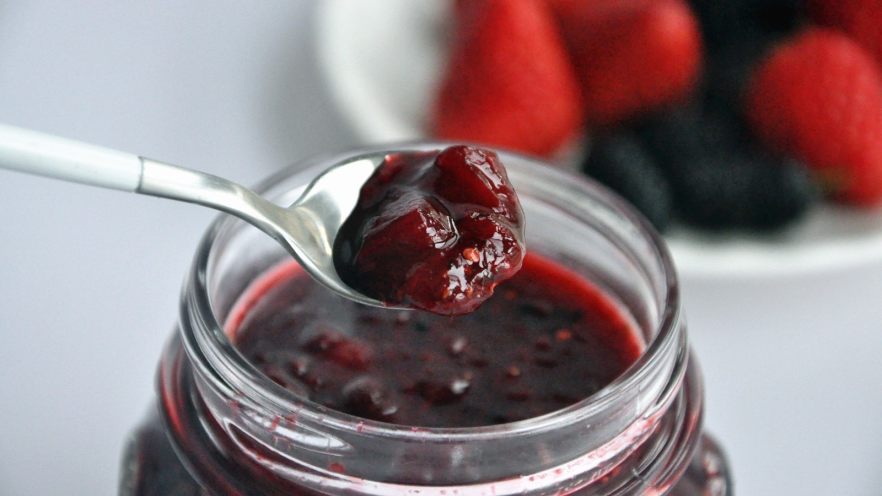
Then, at the farmers’ market, I saw these plump, deep-purple mulberries. My kids (or honestly, me) are obsessed with them—they’re like tiny, sweet bursts of summer. So I thought, Why not combine the two? That’s how this strawberry mulberry jam was born, and let me tell you, it’s become my go-to way to savor the last bits of strawberry season while adding a fun twist with mulberries. The ratio? 6 parts strawberries to 1 part mulberries—this ensures the strawberry flavor shines without the mulberries overpowering it. Trust me, it’s a game-changer for balance!
Ingredients You’ll Need (Makes ~4-5 Jars)
- 600g fresh strawberries (hulled and cut into small chunks—keep them a little chunky for texture!)
- 100g fresh mulberries (rinsed and stems removed)
- 140g granulated sugar (or use a mix of sugar and rock sugar, like I did)
- 80g rock sugar (optional, but adds a richer sweetness)
- Half a lemon (for juice—no seeds, please!)
- A small handful of flour (for cleaning the fruit)
Step-by-Step: How to Make This Jam (No Fuss!)
First, let’s talk about cleaning the fruits. I’m super paranoid about pesticides and dirt, so this step is non-negotiable for me!
Step 1: Prep the Fruit & Clean Thoroughly
Start by rinsing the strawberries and mulberries under running water for a few minutes to get rid of any surface dirt. Then, pop them into a large bowl and add a splash of water with 1-2 tablespoons of flour. Let them soak for 10 minutes—the flour acts like a natural magnet to lift away stubborn residue or pesticides. After soaking, rinse them again under fresh water to get that flour residue off. Pro tip: This method works way better than just scrubbing with your hands!

Step 2: Cut, Mix, and Marinate
Once clean, hull the strawberries (twist off the green tops) and cut them into small chunks—aim for about 1cm pieces so you can still taste the fruit but it blends well. For the mulberries, simply snap off the tiny stems (they’re super easy to remove!) and rinse again. Toss both into a big bowl, sprinkle on the sugar, and stir to coat. Let them marinate for at least 3 hours—longer is okay too (even overnight!)—until they start releasing that sweet, juicy liquid. I swear, that liquid is the key to a smooth, flavorful jam!

Step 3: Let the Magic Happen (Marination = Flavor!)
After marinating, you’ll notice the strawberries and mulberries have “wept” a little—don’t worry, that’s the sugar working its preservative magic! This is when you know they’re ready to move to the next step. The fruit will be softer and the liquid will be syrupy—so satisfying to look at!

Step 4: Into the Bread Machine (Or Stovetop!)
Pour all that juicy goodness (fruit + liquid) into your bread machine. If you don’t have a bread machine, don’t panic—I’ll share stovetop tips later! For now, trust the machine: it’ll stir and cook the jam automatically, which is a lifesaver when you’re busy with other things. Just make sure the machine is clean and ready to go.

Step 5: Add Sugar & Rock Sugar (Tweak to Taste!)
Next, add the sugar (and rock sugar if using). Now, here’s a pro tip: the general ratio for jam is 2 parts fruit to 1 part sugar. Since my strawberries and mulberries were extra sweet this time, I cut back on the sugar a bit (you can always add more if you want it sweeter). Stir this in until the sugar dissolves into the fruit liquid. Taste the mix: if it’s too tart, add a bit more sugar. If it’s too sweet, add a splash more lemon juice to balance!

Step 6: Lemon Juice = Jam Perfection
Half a lemon’s worth of juice goes in here, and trust me, you don’t want to skip this! Why? The lemon juice does three things: it cuts through the sweetness to balance the flavor, it acts as a natural preservative, and it adds a bright, fresh scent that makes the jam taste restaurant-worthy. Plus, it helps the jam stay glossy and beautiful—no dull, gray jam here!

Step 7: Cook It Up (Bread Machine vs. Stovetop)
Cover the bread machine with a piece of foil to prevent any splatters (your kitchen will thank you later!). Then press the “Jam” button—my machine takes 1 hour and 15 minutes, but check your model’s instructions. If you’re doing this on the stovetop, transfer the fruit mixture to a heavy-bottomed pot, bring to a simmer over medium heat, then reduce to low and cook for 30-45 minutes, stirring occasionally until thickened.

Step 8: Can & Seal (Vacuum Magic!)
Once the jam is thick and glossy (test by dropping a spoonful—if it doesn’t spread right away, it’s done!), spoon it into sterilized jars. Let it cool for 10 minutes, then immediately flip the jars upside down for 30 minutes. This “inversion” creates a vacuum seal, so your jam stays fresh for months in the fridge! (No fancy canning equipment needed—just sterilize jars in boiling water first.)

Step 9: Store & Enjoy!
Let the jars cool completely, then label them with the date. Store in the fridge—unopened, it’ll last 6 months; once opened, eat within 2 weeks for the best flavor. Slather it on toast, pair it with yogurt, or use it as a filling for pastries. I’ve even been known to dip pretzels in it—life-changing combo!

Final Thoughts: Why This Jam Works
Honestly, this strawberry mulberry jam is such a happy accident of flavor. The mulberries add a deep, earthy sweetness that complements the strawberries perfectly, and the 6:1 ratio ensures you’re not overwhelmed by either fruit. Plus, the lemon juice and sugar ratio make it just sweet enough—no overpowering cloying taste here. It’s like summer in a jar!
Pro tip: If you’re new to jam-making, start small. This recipe is beginner-friendly, and the bread machine takes the stress out of stirring for hours. Even if you don’t have a bread machine, the stovetop method works—just watch the heat so it doesn’t burn!
Oh, and if you’re a fan of antioxidants, this is your jam! Mulberries are packed with anthocyanins (the purple pigment that gives them that deep color), and strawberries are vitamin C powerhouses. So not only is it delicious, it’s good for you!

So, grab those last-season strawberries and mulberries, and let’s get jammin’! Trust me, you’ll be making this again and again—especially when you see how quickly it disappears on toast and ice cream. Happy cooking, everyone!


")


