

 & Red Dates Pork Bone Soup Recipe | Nourishing Chinese Wellness Dish")


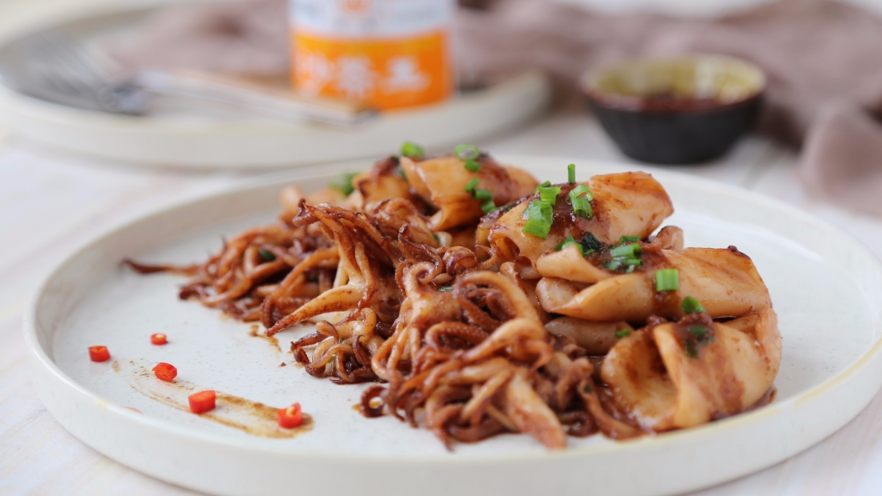 Squid with Satay Sauce isn’t just another seafood dish—it’s a flavor explosion wrapped in tender, juicy squid and a rich, aromatic satay sauce. If you’ve never tried Chaoshan cuisine before, this is your sign to dive in! Originating from the coastal Chaoshan region (spanning parts of Guangdong and Fujian provinces), this dish blends the best of fresh seafood with the bold, savory-sweet profile of traditional satay sauce. Whether you’re a seafood lover, a home cook looking to impress, or just someone who wants a quick, satisfying meal, this recipe is going to become your new favorite. Let’s break it down step by step, starting with understanding what makes the sauce so special.
What is Satay Sauce, Anyway?
Satay sauce is the star here, and it’s not just any sauce—it’s a culinary masterpiece born from the coastal Chaoshan region. Let’s start with its roots: while “satay” might sound like an Indonesian term (and it originally was!), the version we use in Chinese cooking is a delicious twist on that. Traditional Indonesian satay was all about grilled meat skewers with a spicy, savory marinade, but when it hit Chaoshan, the locals adapted it into a thick, flavorful paste perfect for stir-fries and dipping. Now, it’s a staple in Cantonese and Fujianese kitchens too—you’ll find it in everything from noodles to seafood dishes!
Origin of Satay Sauce
The story goes that Chaoshan chefs took the bold flavors of Indonesian satay and transformed it into a versatile condiment. Instead of meat skewers, they focused on the sauce itself, mixing ingredients like ground peanuts, garlic, onion, dried shrimp, and soy sauce to create a rich, umami-packed base. Over time, it evolved into the creamy, slightly spicy, and sweet paste we know today—no skewers required, just pure deliciousness!
What’s in Satay Sauce? (Spoiler: It’s a Flavor Party!)
Let’s talk about the magic ingredients: this sauce is a symphony of garlicky goodness, nutty peanuts, briny dried shrimp, and a hint of sweet soy. Here’s the breakdown:
- Garlic & Onion: For that sharp, aromatic base that makes your kitchen smell amazing.
- Roasted Peanuts: Ground into a smooth paste for creaminess and nuttiness.
- Dried Shrimp: Adds a briny, ocean-like umami that elevates every bite.
- Soy Sauce: For salty-sweet depth that balances the other flavors.
- Chili & Sugar: A subtle sweet-spicy kick that keeps you reaching for more.
The result? A thick, dark brown paste that clings to every bite of squid, making each mouthful a burst of flavor. No wonder it’s so addictive!
Ingredients You’ll Need (No Fancy Stuff, Just Goodies)
Before we start cooking, let’s gather the essentials. Most ingredients are pantry staples, so no need to panic if you’re missing one or two—we’ll note substitutes!
- Fresh Squid: 600 grams (look for firm, bright-eyed squid at the market; avoid slimy or cloudy ones—freshness is key!).
- Satay Sauce: 2 large tablespoons (the thicker, the better for that rich texture).
- Soy Sauce: 8 grams (low-sodium works too if you’re watching salt, but regular adds more depth).
- Ginger: 2 grams (minced, not too much unless you’re a ginger fanatic—start small!).
- Garlic: 2 grams (minced fresh—preferred, but jarred works in a pinch).
- Chili: A small handful (adjust to your spice level; we’ll use a little for a kick, not overpowering).
- Green Onions: A few, sliced (for garnish and extra freshness).
- Peanut Oil: 2–3 tablespoons (adds that signature Chinese stir-fry aroma; regular vegetable oil works if you don’t have peanut oil).
Step-by-Step: Making Squid with Satay Sauce (It’s Easier Than You Think!)
Cooking squid can seem intimidating, but this recipe is beginner-friendly. Let’s go through each step carefully—no mistakes, I promise!
Step 1: Prep the Squid (Cleaning is Key!)
First, grab your fresh squid. Rinse it under cold water to remove any surface slime. Then, carefully peel off the thin, translucent outer skin—it’s like peeling a glove, and it leaves the squid cleaner and less chewy. 
Step 2: Remove the Ink Sac (No Black Mess!)
Next, cut a small slit near the top of the squid (where the eyes are) and gently pull out the ink sac. It’s a small, dark pouch—if you squeeze it, it’ll make a huge mess, so be gentle! Trust me, you don’t want black ink all over your hands or pan. 
Step 3: Get Rid of the Sand Sac (Squid’s “Stomach”)
Then, find the sand sac near the center of the squid—it’s a hard, sometimes yellowish-brown sac full of grit. Use your fingers or a small knife to carefully cut it out. This ensures your squid is clean and not gritty—super important for texture! 
Step 4: Gather Your Seasonings (Quick Prep!)
While the squid cleans, mince the ginger and garlic, slice the chili, and chop the green onions. Keep them separate in small bowls—this way, you’ll have everything ready when the pan heats up. 
Step 5: Blanch the Squid (Tenderizing Magic!)
Blanching is crucial to keep squid tender, not rubbery. Bring a pot of water to a boil, then drop the cleaned squid in. Let it boil for 30 seconds (no longer!)—overcooking is the enemy here. Use a slotted spoon to drain and pat dry with a paper towel. 
Step 6: Heat the Pan & Sauté Aromatics (Flavor Base Time!)
Heat a pan with peanut oil until it shimmers. Add the minced ginger, garlic, and sliced chili. Stir-fry for 30 seconds until fragrant—you’ll smell the ginger and garlic hit your nose, and that’s a good sign! 
Step 7: Add the Satay Sauce (The Hero Ingredient!)
Pour in the 2 tablespoons of satay sauce. Stir quickly to coat the aromatics—this is where the sauce starts to release its nutty, garlicky magic. You’ll notice it thickening and getting glossy. 
Step 8: Stir-Fry the Sauce (Make It Shiny!)
Stir constantly for 1 minute until the sauce is smooth and glossy—no lumps, no burning! If it’s too dry, add a splash of water, but the squid’s moisture later will balance it out. 
Step 9: Combine with Squid (Squid + Sauce = Magic!)
Add the blanched squid to the pan. Toss it with the sauce so every piece gets coated. Stir-fry for 1 minute until the squid turns a beautiful golden-brown. 
Step 10: Pour in Soy Sauce (Umami Boost!)
Drizzle in the 8 grams of soy sauce. This adds that salty-sweet depth we love. Stir everything together for 30 seconds until evenly coated. 
Step 11: Garnish & Serve (Finishing Touch!)
Sprinkle green onions over the top and stir once more. Cook for 30 seconds more to wilt the onions slightly, then turn off the heat. 
Step 12: Enjoy Immediately (Hot & Fresh!)
Plate it up and dig in while it’s hot! The steam and aroma will make your taste buds dance—trust me, you’ll want to eat every bite before it cools down. 
Pro Tips for the Perfect Satay Squid
Let me share some secrets to make this dish even better:
- Adjust the sauce: If you’re not a spice fan, reduce the chili or add more sugar. If you want it spicy, throw in a couple of extra chili flakes!
- Freshness matters: The squid should feel firm, not slimy. Avoid any with a strong “fishy” smell—it’s not fresh.
- Blanching time: 30 seconds is the sweet spot! I’ve left it in for a minute before… shudders—it turns rubbery. Not good.
- Extra umami hack: Add a splash of oyster sauce if you love that briny flavor. It’s optional but adds a nice layer!
Why You’ll Love This Dish
This Squid with Satay Sauce recipe is a flavor bomb with minimal effort. The rich satay sauce coats every bite of tender squid, and the sweet-spicy kick keeps you reaching for more. It’s perfect for a weeknight dinner, a party appetizer, or even a lazy weekend lunch. I’ve made this for friends, and they’re always shocked at how easy it is—no fancy tools, just good ingredients and a little patience.
So, grab your squid, fire up the pan, and get ready to impress yourself (and everyone else) with this Chaoshan classic. You won’t regret it! Let me know how it turns out in the comments—I’d love to hear your thoughts.

 | Delicious & Quick Dinner")
")

")


 at Home")
