

 & Red Dates Pork Bone Soup Recipe | Nourishing Chinese Wellness Dish")


Let’s get real—French macarons look so fancy, right? Those glossy, ruffled shells with the perfect “feet” that make you go “aww” on Instagram… but who knew they could be total nightmares to make? 😅 I’ve burned through so many batches trying to get that “crisp outside, chewy inside” texture. But today? I’m sharing a ZERO-FAILURE recipe that even total newbies can nail. No weird tools, no secret hacks—just simple steps and pro tips to make those Instagram-worthy macs at home. Let’s dive in!
Ingredients You’ll Need (Measured in Grams!)
First, grab these staples. Accuracy is key here—skip the guesswork!
- 43g blanched almond flour (fine texture is a must; if it’s coarse, sift it first!)
- 43g powdered sugar (confectioners’ sugar, no lumps!)
- 1 large egg white (room temperature, please! Cold egg whites won’t whip properly)
- 30g granulated sugar (for the meringue)
- Food coloring (gel or powder only! Liquid messes with moisture—trust me, I’ve cried over that mistake)
Step-by-Step: Let’s Bake Those Macarons!
Let’s start with the basics. I’ll walk you through each step, and I’ve even marked where to place the images so you don’t get confused.
Step 1: Prep Your Ingredients

First, gather everything! Line up your almond flour, powdered sugar, egg white (room temp!), sugar, and food coloring. No last-minute scrambling—this makes a huge difference. Also, check your tools: a stand mixer or hand mixer (if you’re old-school), a fine sieve, and a piping bag.
Pro tip: If your egg white is cold, let it sit out for 30 minutes. Cold whites = stubborn meringues. Not fun.
Step 2: Sift & Mix Almond Flour + Powdered Sugar

In a bowl, combine the almond flour and powdered sugar. Sift them together—twice if needed! This removes lumps and ensures your shells are smooth, not gritty. Think of it as giving your macarons a silky “face lift.” 😊 Mix them gently with a spoon until evenly blended.
Step 3: Whisk the Meringue (The Secret to No-Fail Shells!)

Now, the meringue! In a clean, dry bowl (no moisture allowed!), add the egg white and start whisking on low speed. Slowly pour in the granulated sugar one tablespoon at a time (that’s 30g total, remember?). Whisk on medium speed until the meringue forms soft peaks.
Why split the sugar? It helps the meringue hold its shape better. If you dump all sugar at once, you’ll get a grainy mess. Yikes.
Step 4: Add Food Coloring (Gel/Powder Only!)

Once the meringue is at “soft peak” stage, add a tiny drop of gel food coloring (or a pinch of powder). Use a toothpick to mix it in—start with one drop, then add more if needed. Too much color = neon disaster. Trust me, I’ve seen it.
Critical note: Liquid food coloring = bad news. It adds extra moisture, which makes your shells crack. Stick to gel/powder for consistency.
Step 5: Fold the Meringue into the Almond Mixture

Now, this is where the “macaron magic” happens! Take your sifted almond-sugar mix and pour it into the meringue bowl. Use a spatula to fold them together—like you’re folding a blanket over a sleeping cat. Don’t stir in circles! That traps air and makes hollow shells. Instead, use a gentle, cutting motion (like slicing a cake).
You’ll know it’s ready when the batter looks thick and flows slowly. Lift the spatula: the batter should fall in a thick ribbon and disappear into itself. If it’s too runny, you overmixed. If it’s too stiff, add a drop more almond flour (sifted, of course!).
Step 6: Pipe the Batter Onto the Tray

Transfer the batter to a piping bag fitted with a round tip (Wilton 12 or 10 works!). Hold the bag straight, and pipe small circles onto a baking sheet lined with parchment paper. Aim for 1.5-inch wide shells—they’ll spread a bit as they bake.
Pro tip: Pipe slowly and steadily. Uneven circles = uneven baking.
Step 7: Tap to Release Air Bubbles

After piping, gently tap the baking sheet on the counter 3-4 times. This pops any air bubbles hiding in the batter. If you skip this, your shells will have holes or hollow spots. Think of it like “massaging” the batter to make it smooth.
Step 8: Dry the Shells (No Oven Yet!)

Now, the most important step: drying! Place the piped shells in a cool, dry spot. If you live in a humid area, use a fan (1 meter away!) to speed up drying. Let them sit for 20-30 minutes. How do you know they’re ready? Touch the surface lightly—if it doesn’t leave a fingerprint and feels dry, you’re good.
Warning: If you rush this, the shells will crack or fail to form “feet” (that ruffled edge we all love). Patience, my friend!
Step 9: Bake to Perfection

Preheat your oven to 160°C (320°F). Critical: Place another empty baking sheet on the lower-middle rack to act as a heat shield. This prevents hot spots that cause uneven baking.
Bake for 15 minutes at 160°C, then check. If your oven runs hot, try 155°C for 15 minutes. Every oven is different—my friend’s oven runs 20°C hotter, so she uses 140°C. Adjust as needed!
Step 10: Cool Before Filling

Once baked, don’t open the oven right away! Let the shells cool for 10 minutes inside the oven. Then, carefully transfer them to a wire rack. If they stick to the paper, gently lift with a spatula. Perfect shells should have a smooth top and a “foot” (that ruffled edge) along the bottom.
Step 11: Fill & Chill for Magic

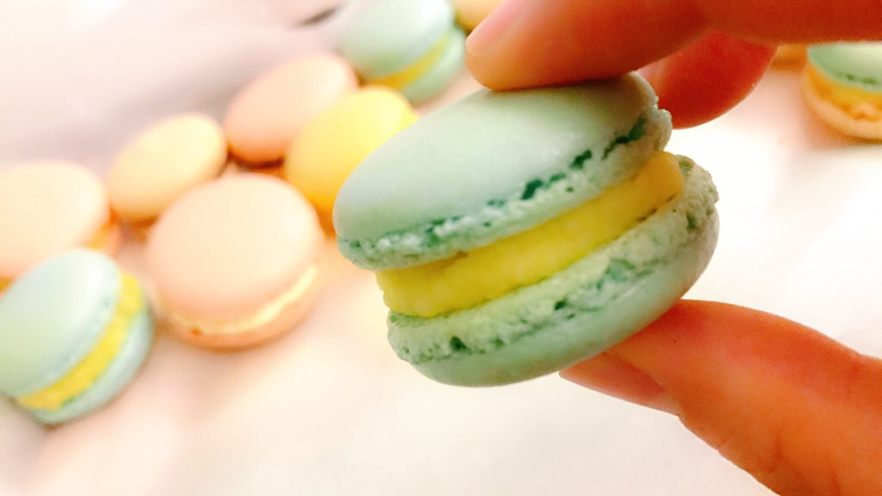
Now, the best part: filling! I use lemon curd or vanilla buttercream, but feel free to get creative. Spread a small amount on one shell, then press two shells together to make a sandwich.
Pro move: Refrigerate the filled macarons for 2-3 days. This is when the magic happens! The shells soften into a chewy texture, and the filling soaks into the cookies. Trust me, waiting makes them way better.
Pro Tips to Avoid Macaron Fails
- No feet? You didn’t dry the shells long enough, or your oven temp was too low.
- Cracks on top? Overmixed batter or too much food coloring.
- Hollow shells? Under-mixed batter or not enough air popped during tapping.
- Sticky bottoms? Your parchment paper wasn’t greased (but don’t grease too much!).
Final Result: Crisp, Chewy, Instagram-Worthy Macarons!
After chilling, bite into one: the shell should be crisp but not breakable, and the inside soft and chewy. The filling should be creamy, not runny. If yours are still a bit hard, chill them longer—patience is key!
So there you have it! A zero-failure recipe for beginners. Tag me in your macarons—my feed is begging for your creations! 🥰


 – Easy Recipe for Soft, Chewy Treats")

: A Step-by-Step Guide with Tips")
")
