

 & Red Dates Pork Bone Soup Recipe | Nourishing Chinese Wellness Dish")

 – Perfect Winter Side Dish to Pair with Rice Porridge")
Hey food lovers! Let me tell you about the winter dish that’s been my go-to lately—this crispy sweet & sour pickled radish! 🥰 I know, winter veggies can sometimes feel… well, a bit boring, right? But trust me, this one’s a game-changer. It’s crunchy, tangy, sweet, and the perfect side for cold winter mornings with a steaming bowl of rice porridge. Plus, it’s super easy to make at home—no fancy kitchen gadgets needed! Let’s dive in!
Why This Pickled Radish?
First off, white radish is a winter MVP. It’s packed with vitamins, helps with digestion, and is so versatile—you can fry, boil, or pickle it. But pickling it into this sweet & sour version? That’s when it gets chef’s kiss status. The salt and sugar soak tenderize the radish, while the vinegar and soy sauce add that zesty, umami punch. And the best part? It’s crunchy even after pickling—no soggy mess here!
Ingredients You’ll Need
Let’s get the ingredients together. I’ll list them with measurements, but don’t stress if you don’t have exact cups/spoons—just use common kitchen tools!
- White radish: 500g (about 1 large radish, scrubbed clean—no need to peel, we’ll keep the skin on for extra crunch!)
- Salt: 1 tablespoon (15ml, remember 1 tbsp = 15ml!)
- White sugar: 2 tablespoons (plus extra if you’re a sweet tooth)
- Rice vinegar: 10ml (this is key for the tangy flavor—if you don’t have rice vinegar, apple cider vinegar works too, but stick to rice vinegar for that authentic taste!)
- Light soy sauce: 3 tablespoons (for saltiness and umami)
- Dark soy sauce: 1 tablespoon (to give it that rich, deep color—you can skip it if you want lighter color, but it adds a subtle depth)
- Cold boiled water: 200ml (helps the pickling process and keeps the radish crisp)
Step-by-Step: How to Make This Crispy Pickled Radish
Let’s walk through the process step by step. It’s super straightforward, and I promise it’s way easier than it looks!
Step 1: Prep the Radish (Don’t Skip the Skin!)
First, scrub your white radish thoroughly under running water. Then slice it into thin rounds—about 0.5cm thick. Important: Keep the skin on! The skin has natural fibers that make the radish extra crunchy when pickled. If you peel it, it’ll turn mushy. Trust me, I’ve tried peeling before… regret it every time.

Step 2: Salt It to Release Moisture
Grab a big bowl (glass or ceramic works best—plastic can retain smells). Line the bottom with a layer of the sliced radish. Sprinkle a good pinch of salt over this layer. Pro tip: Don’t skimp on the salt here! It’s what draws out the radish’s excess moisture, which is crucial for that crispy texture later.

Step 3: Salt Again & Let It Sit
Add another layer of radish slices on top of the salted layer. Sprinkle more salt—aim for 1 total tablespoon of salt, divided into two layers. Now, let it sit for 15 minutes. You’ll see water start to pool at the bottom—that’s the radish’s natural moisture being squeezed out. Patience, grasshopper! This step is non-negotiable for crispiness.

Step 4: Sugar Soak (Twice for Extra Sweetness!)
After 15 minutes, drain all that watery liquid (don’t save it—we’re done with that!). Now, add 1 tablespoon of white sugar to the radish. Use your hands to mix it in well, so every slice gets coated. Let it sit for another 15 minutes.
Drain again! This sugar soak helps the radish absorb sweetness and softens it just enough without making it mushy. If you’re short on time, you can skip the second sugar soak, but doing it twice gives that perfect balance of sweet and tangy.

Step 5: Rinse & Squeeze the Radish
Rinse the sugar-salted radish with cold boiled water to wash off excess salt and sugar. Then, squeeze every bit of water out of the radish slices. Use a clean kitchen towel or your hands—get as much water out as possible. The drier the radish, the crispier it’ll be when pickled!

Step6: Add the Tangy & Savory Flavors
Now, it’s time to add the magic! In the bowl, add 10ml of rice vinegar—this is where the tangy flavor comes from. If you’re sensitive to vinegar, you can reduce it to 5ml, but I love the zing, so 10ml is my sweet spot.

Step7: Soy Sauce for Umami
Next, pour in 3 tablespoons of light soy sauce and 1 tablespoon of dark soy sauce. The light soy sauce adds the salty base, while the dark soy sauce gives it a rich, deep color and a hint of sweetness. Stir everything together so the soy sauce coats the radish evenly.

Step8: Cold Boiled Water to Cover
Pour in 200ml of cold boiled water to cover all the radish slices. This water is important because it dilutes the salt and sugar slightly, so the flavors aren’t overpowering. Plus, using boiled water is safer for pickling (no weird bacteria vibes!).

Step9: Final Sweetness Adjustment
Add 1 more tablespoon of white sugar. Taste as you go—if you like it sweeter, add more! If you’re not a sugar fan, you can skip this, but trust me, a little sugar balances the tangy vinegar perfectly. Stir everything until the sugar dissolves.

Step10: Refrigerate & Let It Marinate
Cover the bowl tightly with plastic wrap (make sure it’s sealed so no air gets in). Pop it in the fridge for 2 days. This waiting time is the hardest part—trust me, I’ve stared at the fridge door, tempted to taste it early! But patience is key for the flavors to meld.
If it’s freezing cold outside (like -10°C!), you can leave it at room temperature for 1-2 days instead, but fridge is safer for food safety.

Step11: Enjoy Your Crispy Pickled Radish!
After 2 days, your pickled radish is ready! The texture will be perfection—crunchy, slightly sweet, and tangy. Serve it with rice porridge, noodles, or just eat it straight from the bowl. It’s the ultimate winter comfort food!

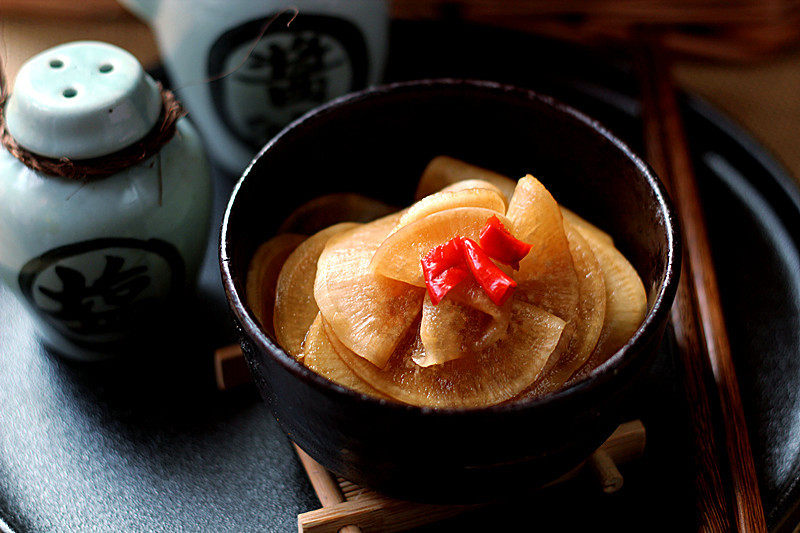
Step12: The Finished Product
Look at that beautiful, glossy radish! Each slice is coated with the sweet & sour sauce, and the crunch is chef’s kiss. This is the kind of dish you’ll want to make in bulk because it’s so addictive.

Pro Tips for the Best Pickled Radish
- Spice it up: If you love heat, add a few sliced red chili peppers during the sugar soak step. They’ll infuse the radish with a spicy kick!
- Measurements: Remember, 1 tablespoon = 15ml. If you don’t have measuring spoons, use a standard table spoon (the ones you eat with!).
- Adjust to taste: If you want more tang, add 5ml more rice vinegar. If you want less sweet, reduce the sugar to 1.5 tablespoons. It’s your dish—customize it!
- Storage: Store leftover pickled radish in an airtight container in the fridge for up to 1 week. It’ll stay crunchy longer if you store it properly.
So there you have it! A simple, delicious, and crispy pickled radish recipe that’s perfect for winter. Whether you’re pairing it with congee, noodles, or just snacking, this dish is sure to brighten up your meals. Let me know how it turns out in the comments—I’d love to hear your tips! Happy cooking, and stay warm! ❄️🍽️
")


: A Spicy, Tangy Winter Comfort Food You Need to Try")
 Recipe: Spicy, Tender, and Perfect for Winter")