

 & Red Dates Pork Bone Soup Recipe | Nourishing Chinese Wellness Dish")

")
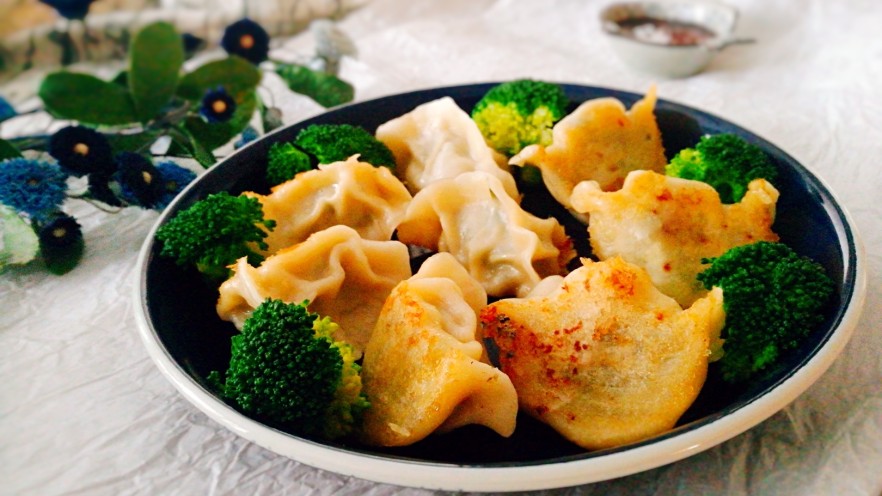
Let’s be real—some days, the last thing I want to do is stand over a hot pan flipping potstickers, worrying about burning the bottoms or splattering oil everywhere. That’s why I stumbled on this genius hack: making pork and chives potstickers in an electric rice cooker. Yep, you read that right. Your trusty rice cooker (the one you only use for white rice? Shame!) can whip up crispy, juicy potstickers with zero fuss. Let me walk you through how I did it—spoiler: it’s way easier than you think.
Why Use an Electric Rice Cooker for Potstickers?
First, let’s talk about the perks here. My rice cooker is basically a set-it-and-forget-it wizard. No need to adjust heat, no need to hover. It does all the work for you. Plus, cleanup is a breeze—just wipe the inner pot (if it’s non-stick, which most are) and you’re done. Perfect for lazy weeknights, busy mornings, or when you just don’t feel like dealing with multiple pans.
Ingredients You’ll Need (For About 20-25 Potstickers)
Let’s keep this simple—no weird specialty ingredients here. Just stuff you probably already have in your fridge or pantry:
- 250g ground pork (I use 80/20 for extra juiciness—lean pork works too, but it might be a little drier)
- 250g fresh chives (make sure they’re bright green—wilted ones taste sad)
- 3-4 shiitake mushrooms (dried works too, just rehydrate them first!)
- 1 small onion (or a handful of green onions, if you prefer)
- 1 small piece of ginger (about the size of your thumb)
- 1 egg (binds the filling together—game changer)
- 250g dumpling wrappers (store-bought is fine! Homemade is great too, but who has time for that?)
- 1 tbsp soy sauce (low-sodium if you’re watching salt)
- 1 tsp salt (taste first—soy sauce is salty!)
- A pinch of white pepper (black pepper works in a pinch, but white is milder)
- 1 tbsp vegetable oil (for the rice cooker)
- ½ cup water (for steaming)
Step-by-Step: Making the Filling
The filling is the star here—juicy, savory, with a hint of umami from the mushrooms. Let’s get mixing!
Prep the Pork Base

First, take your ground pork and pop it in a big bowl. Add the chopped onion (or green onions) here—they add a nice sweetness.

Next, grate the ginger. I hate chopping ginger, so a microplane is my best friend here. If you don’t have one, just mince it super fine—you don’t want big chunks of ginger in every bite.

Add a pinch of salt…

…and a splash of soy sauce. Stir that around with a fork or your hands (wash them first!)

Now, the secret to juicy filling: mix it until it gets sticky! I stir in one direction for about 2 minutes—you’ll feel it thicken up. That’s the protein in the pork working its magic.
Add the Mushrooms & Chives

Chop those shiitake mushrooms into tiny pieces. The smaller, the better—you want them to blend into the filling, not be big chunks.

Toss the mushrooms into the pork mixture. Stir it up until they’re evenly distributed.

Now, the chives! Wash them really well—they tend to trap dirt in the leaves. Pat them dry with a paper towel (wet chives will make the filling soggy—no thanks).

Chop the chives into ½-inch pieces. Don’t overchop—you want a little texture.

Add the chives to the bowl, then crack in the egg. Stir everything together one last time—make sure the egg is fully mixed in.
Pro tip: Taste the filling before wrapping! Cook a tiny bit in the microwave or a pan to check the seasoning. Add more salt or soy sauce if needed.
Wrapping the Potstickers (No Stress!)
Wrapping dumplings can be intimidating, but here’s the thing: they don’t have to be perfect. As long as they’re sealed, they’ll work. I use store-bought wrappers because they’re thin and easy to handle.

Take one wrapper and place a small spoonful of filling in the center (don’t overfill—you’ll regret it when it oozes out!). Dip your finger in a little water and run it around the edge of the wrapper—this helps it stick.
Fold the wrapper in half to make a half-moon shape. Pinch the top edge closed, then pleat one side (or just crimp it with your fingers—no one’s judging!). Place the wrapped potsticker on a plate dusted with flour to prevent sticking.

Keep going until all your filling is used up. If you have extra wrappers, freeze them for next time! Extra filling? Use it for meatballs or stir-fry—don’t waste it.
Cooking in the Rice Cooker (The Easy Part!)
Okay, this is where the magic happens. Your rice cooker is about to become your new favorite potsticker tool.

First, brush the inner pot of your rice cooker with a little vegetable oil. This is key for crispy bottoms! Don’t skip this step—unless you want your potstickers to stick like glue.
Press the “Cook” button on your rice cooker. Let it heat up for 1-2 minutes—you should smell the oil (but it shouldn’t be smoking!).

Once the rice cooker switches to “Warm” (that means it’s hot!), arrange the potstickers in the pot. Make sure they’re not touching each other—leave a little space between them so they can cook evenly.
Press the “Cook” button again. Let them cook for 2-3 minutes—you should hear a faint sizzle (that’s the crispy bottom forming!).

Now, add ½ cup of water to the pot. Be careful—it will steam a lot! Close the lid immediately.
Let the rice cooker do its thing. It will cook for a few minutes, then switch to “Warm” again. Don’t open the lid yet—let it steam for 5 more minutes. This ensures the filling is fully cooked.

After 5 minutes, open the lid. If there’s still water in the bottom, press “Cook” again and let it cook until the water is gone. You want the bottom of the potstickers to be golden brown and crispy.

Use a spatula to carefully lift the potstickers out (they should be crispy on the bottom!). Serve them hot with soy sauce, vinegar, or chili oil—whatever you like!
My Lazy Day Tips for Success
- Freeze extra potstickers: If you make a big batch, freeze them on a baking sheet (so they don’t stick) then transfer to a bag. Cook them straight from the freezer—just add an extra 2 minutes of steaming time.
- Use different fillings: This recipe works with chicken, beef, or even tofu! Just adjust the seasoning—tofu needs a little more soy sauce for flavor.
- Don’t overfill: I learned this the hard way. Too much filling means the potstickers break open and the juice leaks out. Keep it small—about 1 tsp per wrapper.
- Check the water: If your rice cooker has a small pot, use less water. You don’t want the potstickers to be submerged—just enough to steam them.
Final Thoughts
This rice cooker potsticker hack has saved me so many lazy nights. The potstickers are crispy on the bottom, juicy on the inside, and take almost no effort. My roommate even asked if I ordered takeout—win! Give it a try this week. You’ll wonder why you ever used a pan.

 – Perfect Winter Side Dish to Pair with Rice Porridge")


 with Direct Dough Method")

 – Crispy, Juicy, No Oven Required!")


