")


Introduction
Hey there, dessert lovers! 🍓 If you’re craving something sweet this summer but don’t want to derail your healthy goals, this Refreshing Vanilla Fruit Cake is exactly what you need! 🎂 It’s naturally sweet (thanks to dates and fresh fruit), totally sugar-free, and packed with zesty vanilla and juicy fruit flavors that scream “summer breeze.” Plus, it’s surprisingly easy to make—no fancy baking skills required, just a bit of patience (mostly for soaking those cashews, but we’ll get to that!).
Let me be real: At first glance, it might look like a fancy pastry, but trust me, it’s way simpler than it seems. I’ve broken down every step with photos (because who likes guessing what “flatten with a spoon” means, right? 😅) so you can follow along without stress. And the best part? No weird additives, just good-for-you ingredients like oats, cashews, and fresh produce. Perfect for summer gatherings, post-workout treats, or even a lazy afternoon snack that won’t make you feel guilty later.
Ingredients
First, let’s gather all the goods. Measure everything out before you start—trust me, it saves time! Here’s what you’ll need:
- 1 cup rolled oats (about 240ml) – the base of our cake, so make sure it’s not instant oats!
- 1/3 cup coconut oil + 40ml extra (we’ll use this for binding and extra moisture)
- 1/2 teaspoon salt – just a pinch to enhance flavors
- 1/2 cup shredded coconut (unsweetened, if possible)
- 12 pitted dates or Medjool dates – these are our natural sweeteners, so make sure they’re pitted! (If you can’t find dates, try dried figs as a substitute, but dates are the best here for texture.)
- 1 1/3 cups raw cashews – soaked, remember? This makes the cake creamy and smooth.
- 10-15 fresh rose petals – for flavor and decoration (optional, but they add a nice floral touch! You can buy pre-ground rose powder if you’re short on time.)
- 1/3 cup honey – natural sweetener, or maple syrup if you want to keep it vegan
- 10ml vanilla extract – the star for that classic vanilla taste
- 1 lemon – for fresh citrus zing
- 2 fresh peaches – juicy and summery, perfect for topping
- 5-10 strawberries – sliced for that pop of red color
- 10-15 raspberries – more berries = more flavor!
- 1/2 lime – for tartness to balance the sweetness
- Shredded coconut (for dusting on top) – optional, but adds crunch
Prep Time & Soaking Cashews
Before diving into the steps, let’s get the cashews ready! Soaking them is crucial for a smooth, creamy texture. Here’s how:
- Place the cashews in a bowl and cover with water. Let them soak for at least 2 hours – the longer, the better (I usually do overnight if I’m not short on time). Soaking removes the “gritty” texture and makes the cashews blend into a rich paste.
- While the cashews are soaking, gather all your ingredients, measure them out, and line a baking pan with parchment paper (or grease it lightly) for the base layer. Pro tip: Preheat your oven to 130°C (265°F) if you’re using it for the base layer, but wait—actually, the base layer doesn’t need baking, but we’ll cover that in the steps later!
Step-by-Step Baking Instructions
Base Layer: Oat & Date Crust
Okay, time to make the first layer! This is like the “crust” of the cake, sweet and nutty. Here’s how:

 First, grab your blender or food processor. Let’s start with the dry ingredients: add 1/2 cup shredded coconut and 1 cup rolled oats to the blender. Pulse until they’re well combined and a bit powdery. (See? Already easy!)
 Now, add the 12 pitted dates to the blender. Dates are naturally sticky, so they’ll help bind everything together. Blend until the mixture starts to clump when you press a spoon against the sides – that means it’s ready!
 Next, add 40ml of the coconut oil. Blend again – if the mixture is too dry (it should stick together but not be crumbly), add a little more coconut oil until it’s smooth and malleable. (Pro tip: I use my hands to check sometimes – if it sticks to my fingers, it’s good.)
 Now, transfer this oat-date mixture to your prepared baking pan. Use a spoon or the back of your hand to press it down firmly and evenly. This base layer should be about 1-2 cm thick – aim for consistency, not perfection! 😊
 Pop this into the preheated oven at 130°C (265°F) for 10 minutes. This bakes it just enough to firm up the base without drying it out. Then, take it out and let it cool completely – we’ll work on the next layer while it cools!
Filling Layer: Cashew & Vanilla Cream
Now the creamy middle layer! This is where the vanilla flavor really shines. Let’s get blending:
 Drain the soaked cashews and rinse them quickly. Add them to the blender (you can use the same blender as before, just clean it first!).
 Add the remaining 1/3 cup coconut oil, 1/3 cup honey, 10ml vanilla extract, and the 10-15 rose petals (or rose powder if using). Blend this until it’s super smooth – the longer you blend, the creamier it gets! If it’s too thick, add a splash of water; if too thin, blend longer.
 Transfer this creamy mixture onto the cooled base layer in the pan. Spread it evenly with a spoon – try to make it about the same thickness as the base layer for consistency.
 Cover the pan and refrigerate for at least 30 minutes. This helps the layers set and makes the cake easier to handle later. While it’s chilling, let’s prep the fruit topping!
Fruit Topping Layer
Fresh, juicy, and colorful – the fruit topping is where the “refreshing” part comes in! Let’s chop and blend:
- Wash all the fresh fruit: strawberries, peaches, and raspberries. Slice the peaches into small chunks, quarter the strawberries, and leave the raspberries whole or halve them (whatever you like). Set aside a few whole strawberries and raspberries for garnish later.
 Add all the chopped fruit to the blender (or a food processor) along with the juice from half a lime. Blend until it’s a smooth puree – it should be thick but spreadable, not too watery. (If it’s too watery, drain some of the liquid or add a bit more fruit.)
- Take the pan out of the fridge and pour the fruit puree over the vanilla cream layer. Use a spatula to spread it evenly. Then, pop it back into the fridge for at least 1 hour – this is the longest part, but it’s worth it for the firm, sliceable cake!
Final Decoration & Serving
Almost done! Just a few finishing touches to make it Instagram-worthy (and delicious):
- Take the cake out of the fridge after 1 hour. Run a warm, damp cloth around the edges of the pan to loosen the cake – this makes it easier to remove from the pan without breaking.
 Use a sharp knife to gently loosen the cake from the sides of the pan. Then, carefully flip the pan over onto a serving plate (you might need to tap the pan gently to release it).
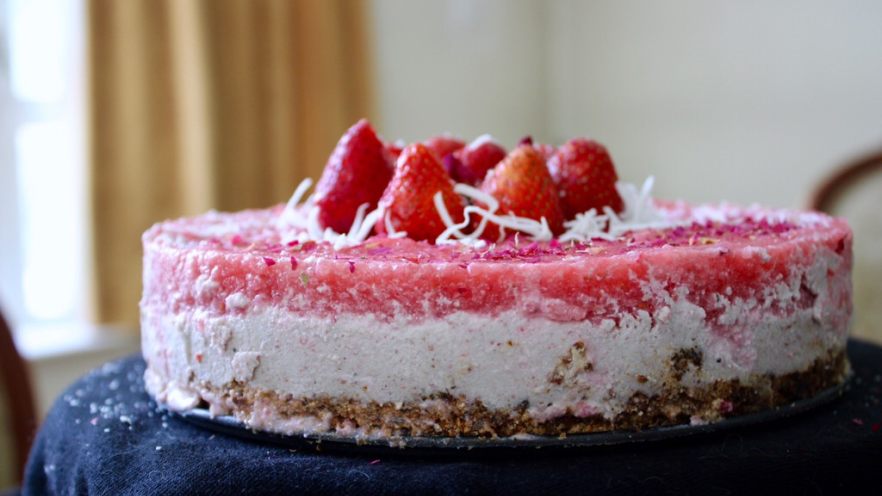
 Dust the top with a bit of shredded coconut and rose powder (or extra rose petals if you saved them). Arrange the reserved whole strawberries, raspberries, and peach slices on top for a pretty, fresh look.
 Slice and serve! Keep the cake refrigerated until ready to eat, and take it out 30 minutes before serving to let the flavors meld and the texture soften slightly.
Pro Tips for the Perfect Refreshing Vanilla Fruit Cake
- Soak the cashews properly: The longer you soak them (at least 2 hours, preferably overnight), the smoother the filling will be. If you’re short on time, soak them for at least 30 minutes, but 2 hours is ideal for that creamy texture.
- Base layer optional baking: The base layer doesn’t need to go in the oven, but baking it for 10 minutes makes it crispier. If you’re short on time or want a softer crust, skip the oven and just press the oat-date mixture firmly into the pan.
- Fruit flexibility: Swap out the fruits based on what’s in season! Blueberries, mango, kiwi, or even pineapple would work great. If you’re not into fresh fruit, try a layer of Greek yogurt or coconut cream for a creamy twist.
- Portion control: This cake is rich in flavor, so a small slice goes a long way! The natural sweetness from the dates and fruit means you’ll feel satisfied without overindulging.
- Storage: Keep leftovers in an airtight container in the fridge for up to 5 days. It might harden a bit, but letting it sit at room temperature for 10 minutes softens it back up.
Why This Cake is a Summer Must-Try
Let’s recap! This Refreshing Vanilla Fruit Cake is the ultimate summer dessert: it’s sugar-free, uses simple, healthy ingredients, and tastes amazing. Whether you’re trying to eat cleaner, craving something sweet, or just want to enjoy a homemade treat, this cake checks all the boxes. Plus, it’s pretty enough to serve at gatherings but easy enough to make for a solo night in. No fancy equipment needed—just a blender, a baking pan, and a little patience. So what are you waiting for? Grab your ingredients, follow the steps, and enjoy a slice of summer in every bite! 🍰✨


")