")


Let’s talk about one of my all-time favorite healthy snacks—homemade beauty red date cake! If you’re into treats that taste amazing and actually do your skin a favor, this is the recipe for you. No fancy ingredients, no complicated steps—just warm, sweet, jiggly goodness that’s perfect for a midday pick-me-up or a post-dinner dessert. Trust me, once you make this, you’ll never buy store-bought again (plus, you’ll know exactly what’s in it—win-win!).
Why Red Date Cake Is a Game-Changer for Your Skin & Taste Buds
First off, let’s gush about red dates (also called jujubes). These little powerhouses are packed with iron, vitamin C, and antioxidants—all the good stuff that helps your skin stay glowing and your body feel energized. And when you turn them into a soft, chewy cake? It’s like a hug for your taste buds and your complexion. No weird additives, no artificial sweeteners—just pure, natural sweetness. What’s not to love?
Ingredients You’ll Need (No Fancy Shopping Trips Required!)
Before we dive in, let’s round up the ingredients. I promise you can find most of these at your local grocery store—no specialty markets needed. Here’s what you’ll grab:
- 500g red dates (the plump, dried ones work best—avoid the super wrinkly, hard ones)
- 200g rock sugar (or white sugar if you don’t have rock sugar—just adjust to taste)
- 250g water chestnut starch (this is the secret to that jiggly texture! If you can’t find it, tapioca starch is a close second, but water chestnut starch is better for that light, bouncy feel)
- 1300g water (split into 800g and 500g—we’ll use them in two steps)
Pro tip: If your red dates are extra dry, soak them in warm water for 10 minutes first—they’ll soften up faster when you cook them.
Step-by-Step Guide to Making Perfect Beauty Red Date Cake
Okay, let’s get cooking! This recipe is super straightforward, but I’ll walk you through each step so you don’t mess up (I’ve made my share of lumpy cakes—learn from my mistakes!).
Step 1: Cook the Red Dates Until Soft & Juicy

First, grab your red dates and remove the pits. This is the most tedious part, but hey—no one wants a date pit in their cake! Once they’re pitted, pop them into a pot with 800g of water. Bring it to a boil, then turn the heat down to low and let it simmer for 30 minutes. You’ll know they’re done when they’re super soft and the water turns a rich, dark brown.
Pro hack: Use a wooden spoon to mash a few dates against the side of the pot while they cook—this will make the date flavor even stronger!
Step 2: Make the Sweet Date Syrup

Once the dates are cooked, strain the mixture through a fine sieve into another pot. You want to get all the smooth date juice—no lumps allowed! Now add the rock sugar to the strained juice and turn the heat back on. Stir until the sugar is completely melted—this should take 2-3 minutes. Don’t let it boil too hard, or the sugar might crystallize.
Quick note: If you like your cake less sweet, reduce the sugar by 50g. I’m a sugar lover, so I stick to 200g, but adjust to your taste!
Step 3: Mix the Starch Slurry (The Key to Jiggly Texture)

Now for the starch part! In a bowl, mix 500g of water with 250g of water chestnut starch. Stir it really well—like, arm workout well—until there are no lumps left. If you see any clumps, use a whisk to break them up. This slurry is what makes the cake set into that perfect bouncy texture, so don’t skip this step!
Here’s a mistake I made once: I added the starch directly to the hot date syrup without mixing it with water first. It turned into a lumpy mess. So trust me—mix the starch with cold water first!
Step 4: Steam the Cake (Layer by Layer for Perfection)

Now the fun part—steaming! First, fill a large pot with water and bring it to a rolling boil. Grease a square or rectangular pan (I use a 9×9 inch pan) with a little oil so the cake doesn’t stick. Then, slowly pour the starch slurry into the hot date syrup while stirring constantly. Keep stirring until the mixture thickens a bit—this should take 1-2 minutes.
Pour a thin layer of the mixture into the greased pan and put it in the steamer. Steam for 5-7 minutes until the layer is set (you can touch it gently—if it doesn’t stick, it’s done!). Then add another thin layer and steam again. Repeat this until all the mixture is used up (usually 3-4 layers). The layering makes the cake look pretty, but it also ensures it cooks evenly—no raw spots!
Let It Cool & Enjoy (The Hardest Part Is Waiting!)
Once you’ve steamed all the layers, take the pan out of the steamer and let it cool completely at room temperature. Then pop it in the fridge for at least 2 hours (or overnight) to set. When it’s ready, cut it into squares with a knife (dip the knife in cold water first to prevent sticking) and dig in!
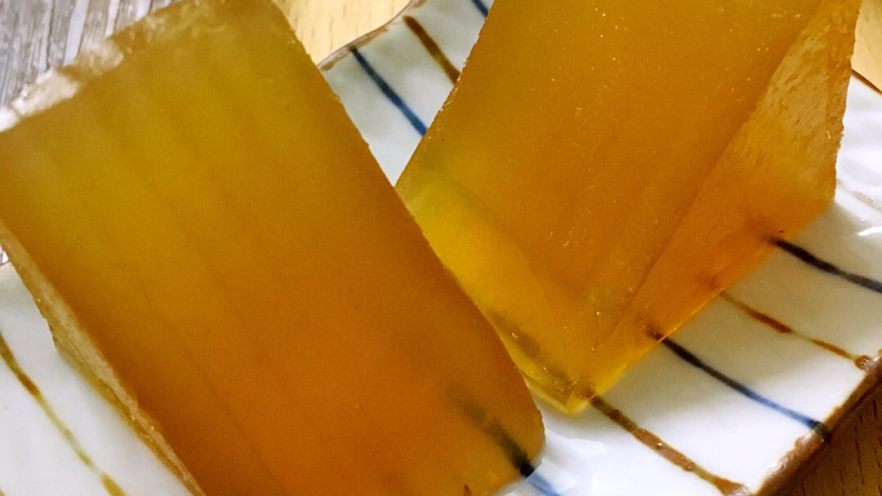
The texture is so soft and jiggly—like a cross between jelly and cake. The date flavor is sweet but not overwhelming, and it’s just the right amount of chewy. I love eating it cold from the fridge—so refreshing!
Pro Tips for Making the Best Red Date Cake
Want to take your cake to the next level? Here are a few tricks I’ve learned:
- Add a handful of goji berries to the date mixture for extra nutrition and a pop of color.
- If you don’t have a steamer, use a large pot with a rack—just make sure the water doesn’t touch the bottom of the pan.
- Store the cake in an airtight container in the fridge for up to 3 days. It gets even better the next day as the flavors meld!
- For a fun twist, drizzle a little honey on top before serving—yummy!
Final Thoughts: Why You Should Make This Cake Today
Homemade beauty red date cake is more than just a snack—it’s a way to treat yourself without feeling guilty. It’s healthy, it’s delicious, and it’s so easy to make. Whether you’re looking for a skin-boosting treat or a sweet snack to share with friends, this recipe has you covered.
So what are you waiting for? Grab your ingredients, put on some music, and start cooking. I promise you won’t regret it—your taste buds (and your skin) will thank you!
")


 – Easy Recipe for Soft, Chewy Treats")

: A Step-by-Step Guide with Tips")
")


