


")
Introduction: Why Sponge Cake Isn’t Boring (Stop Believing the Myths!)
Oh no, here’s the tea! I’ve heard so many new customers in my bakery sigh and say, “Pass on the sponge cake—I don’t like it; it’s dry and tasteless!” But wait… sponge cake is actually delicious—it’s just that most people are making it wrong! 😤
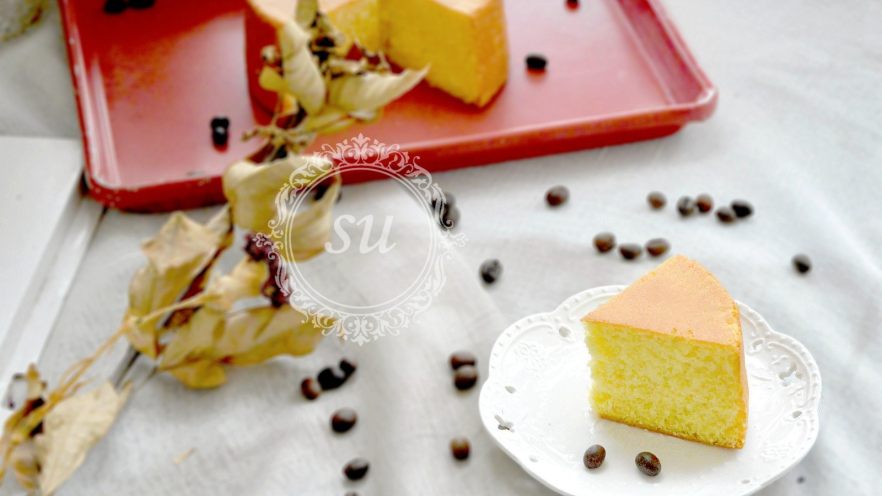
If you’ve never had a properly made sponge cake, let me change your mind. Think about it: soft, pillowy texture that melts in your mouth, with that rich, buttery egg aroma that screams “homemade goodness.” It’s not dry at all—when done right, it’s moist, airy, and satisfying. So let’s put those wrong assumptions to rest and make a Kojima-style sponge cake that’ll make even chiffon haters convert!
Ingredients for 6-inch Kojima Sponge Cake
This recipe is perfect for a 6-inch springform pan (non-stick works best, but parchment paper helps with release). Here’s what you need:
Material A (Milk-Butter Base):
- Butter: 17g (unsalted, softened to room temp)
- Milk: 27g (whole milk or any milk works, I like 2% fat for richness)
Material B (Egg-Sugar-Flour):
- Whole eggs: 100g (about 2 large eggs; bring to room temp first!)
- Granulated sugar: 78g (don’t skimp here—sugar = structure + moisture! Reduce by 5g only if you must)
- Low-gluten flour: 67g (cake flour, sifted 2x for fluffiness)
Step-by-Step: Making the Perfect Sponge Cake
Baking sponge cake is all about technique—patience, mixing speed, and temperature control. Let’s go step by step, with pro tips to avoid common mistakes!
Step 1: Prepare Material A (Milk + Butter Base)

First, melt the butter and milk together. In a small saucepan, heat the milk on low until it’s warm (not boiling!), then add the butter. Stir until the butter melts completely—no lumps! Once combined, set it aside to cool to room temp. This prevents the hot butter from scrambling the eggs later.
Step 2: Whisk the Whole Eggs with Sugar (The “Magic Base”)

Crack the whole eggs into a mixing bowl and gently stir with a fork to break up any yolks. Add all 78g sugar—don’t skimp! Sugar is crucial here: it dissolves into the eggs, helps trap air during whisking, and keeps the cake moist. Mix the sugar and eggs with a fork first to dissolve a bit, then switch to the electric mixer on high speed.
Step 3: First Whisking—Watch Those Big Bubbles

Start whisking the egg-sugar mixture at high speed. You’ll see coarse bubbles forming immediately—that’s the eggs incorporating air! This is the first stage, so keep going—don’t stop here. Think of this as “waking up the eggs” before the magic happens.
Step 4: Water Bath Whisking (The Secret to Fluffiness)

Now, the critical part: the water bath. Bring a pot of water to a boil, then turn off the heat. Place a clean kitchen towel on the bottom of your mixing bowl (to prevent slipping), then set the bowl on the hot water. This “double boiler” keeps the eggs warm without overheating them, making the proteins stretch and trap more air. Continue whisking on high speed here—don’t pause!
Step 5: Breaking Down Bubbles with Heat

As you whisk, you’ll notice the big, frothy bubbles get smaller and disappear. That’s a good sign! The heat helps the egg proteins denature (break down) and form a stable foam. Keep whisking until the mixture starts to look smooth and pale—this is when the air begins to lock in.
Step 6: Switch to Low Speed for Even Aeration

Once the egg mixture is pale white and mostly bubble-free, switch the mixer to low speed. This is to prevent over-whisking (which would deflate the cake) and ensure every part of the batter gets air. You’ll feel the batter thickening slightly—this is the “ribbon stage” forming!
Step 7: Final Whisk Check—No Bubbles Allowed

Whisk on low for 1-2 minutes, turning the bowl occasionally so the sides and bottom get equal attention. Pro tip: Don’t let the whisk touch the bowl bottom or walls—this causes a metallic taste from friction! Aim for a glossy, thick mixture with no visible bubbles.
Step 8: How to Check If Eggs Are Whisked Perfectly

Lift the whisk: the batter should “puddle” slowly off the whisk, not drip immediately. If it’s too runny, you over-whisked. If it’s too stiff, you need more time. Alternatively, stick a toothpick into the batter—if it stands upright at 1-1.5 cm and doesn’t wobble, you’re golden! Preheat the oven to 180°C while you check.
Step 9: Sift & Fold in the Flour (The “Anti-Crumb” Step)

Sift the low-gluten flour twice (no shortcuts here!). Sifting removes lumps and adds air to the flour, which is vital for a light cake. Add the sifted flour in one go to the egg mixture, then fold with a spatula—cut through the center, scrape the bottom, and fold over. Stop when no dry flour remains—don’t over-mix!
Step 10: Mix in the Milk-Butter Mixture (Bring It All Together)

Pour the cooled milk-butter mixture into the batter. Gently fold it in—this adds moisture without deflating the air bubbles. Think of it like giving the batter a “hug”—smooth, slow, and careful. The batter should now be thick and creamy, holding its shape when you lift the spatula.
Step 11: Check the Batter’s Flow (No Sink, No Splatter)

Hold the spatula horizontally and let the batter fall off. If it’s a smooth, slow ribbon that stays together, you’re good. If it’s too thin (like lava), you over-mixed. If it’s too thick and clumpy, under-mixed. Aim for a “slow waterfall” consistency—this is your cake’s “height potential”!
Step 12: Pour & Tap the Mold (Remove Air Bubbles)

Pour the batter into a parchment-lined 6-inch springform pan (line the sides, not the bottom!). Tap the mold firmly on the counter 2-3 times to release big air bubbles. Then, use a spatula to smooth the top—no need to spread too hard; gentle is key.
Step 13: Baking Time & Temperature (Perfect Height, No Cracks)

Bake at 150°C for 30 minutes, then switch to 160°C for 10 minutes. Pro tip: For larger ovens, place on the middle rack; smaller ovens use the lower-middle rack to avoid uneven baking. The top should turn a beautiful golden-brown before removing.
Step 14: Cool & Release (The “No-Crack” Trick)

Once baked, drop the mold from 20 cm height 2-3 times to release steam bubbles. Then invert onto a cooling rack with the parchment paper still on. Let it cool completely—this is why patience is key! Cracks are normal, but if you want a flawless top, lower the temp to 140°C and extend baking time by 5-10 minutes.
Step 15: Demold & Enjoy (The Final Glow-Up)

After cooling, gently peel off the parchment paper. Slice with a sharp knife—no sawing! For extra fluff, measure the cake height (it should be around 4-5 cm tall if done right). Store in an airtight container at room temp for 2-3 days, or refrigerate for up to a week.
Pro Tips for Sponge Cake Success
Why Sugar Matters (Don’t Reduce It!)
The 78g sugar isn’t just for sweetness—it’s the backbone of the cake’s structure. Sugar dissolves in the eggs, forms bonds that trap air, and creates a moist crumb. If you cut it, the cake might be dry or collapse. If you must reduce, try 73g and note the texture change!
Alternative Flavors: Matcha & Chocolate

Want a twist? Replace 5g of the low-gluten flour with high-quality matcha powder or cocoa powder (unsweetened). Sift the powder with the flour to avoid lumps, then follow the same steps. For matcha, add a pinch of cream of tartar to stabilize the color—your kitchen will smell amazing!
Common Mistakes to Avoid
- Overmixing: Leads to dense, flat cake. Fold gently until no dry flour remains.
- Not Sifting Flour: Causes clumps and uneven texture—always sift twice!
- Under-Whisking Eggs: Result in a dense cake. Aim for pale, thick, ribbon-like batter.
- Opening the Oven Too Early: Temperature drops cause the cake to sink. Wait until the top is firm before checking.
Final Verdict: Why This Sponge Cake Is a Game-Changer
So, is sponge cake “bad”? No way! With the right method, it’s light, fluffy, and infinitely better than the dry versions you’ve tried. This Kojima-style recipe uses her signature techniques to ensure maximum airiness and flavor. Whether you’re making it for a tea party or just because, you’ll be shocked at how easy it is to make something restaurant-worthy at home.
Now go grab your ingredients, preheat the oven, and let’s make a cake that’ll make even chiffon lovers say, “Wow, this is better!” 🎂


")


 Recipe: A Light Twist on a Classic Dish")


