


Let me start by confessing: I’ve become a bit of a mung bean cake snob. Not because I’m fancy, but because my husband’s obsession with this sweet treat has turned me into a home chef on a mission. Picture this: his childhood summers, filled with the scent of simmering mung beans and the sight of his mom dishing out golden-brown mung bean cakes. Now, he demands it every summer, so I’ve spent the last year tweaking recipes until I got exactly what he remembers. Spoiler: This version has a little extra honey, a touch less sugar, and a texture so smooth, you’ll swear it’s magic.
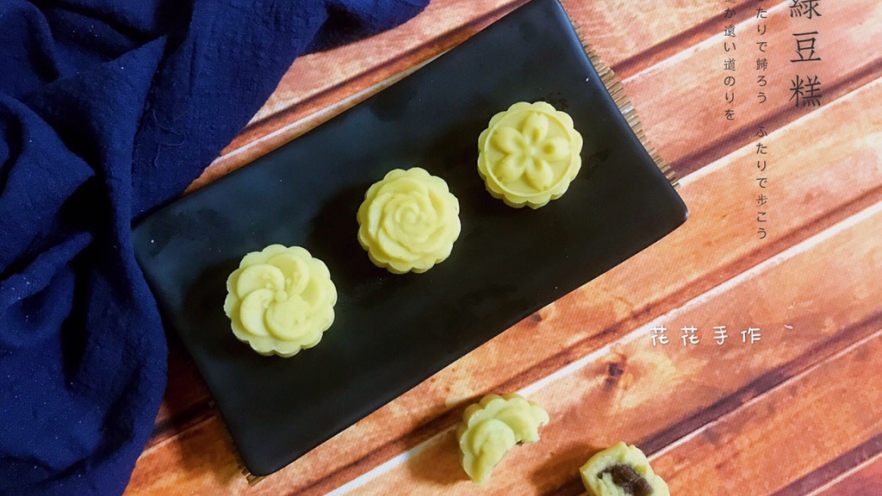
If you’ve never tried mung bean cake, let me paint you a picture: it’s like biting into a cool cloud of summer. The mung beans provide a subtle earthy flavor, the honey adds a sweet kick, and the buttery richness from the butter makes it melt in your mouth. No heavy cream, no weird preservatives – just simple ingredients that taste like childhood. And yes, it’s totally Instagrammable. My feed’s been blowing up with photos of these little gems since I shared my first batch last summer.
Why This Mung Bean Cake Is a Game-Changer for Summer
Let’s get real: summer desserts can be hit-or-miss. Too much sugar, too heavy, or just plain boring. But mung bean cake? It’s the anti-boring summer hero. Here’s why:
- Cooling & Refreshing: Mung beans are known in traditional Chinese medicine for their cooling properties, perfect for beating the heat.
- No-Fuss Ingredients: You probably already have most of these in your pantry: mung beans, sugar, butter, honey, and red bean paste.
- Kid-Friendly: My 5-year-old nephew calls these “magic balls” – he’ll eat three in a row, no complaints.
- Customizable: Swap honey for maple syrup, red bean paste for lotus seed paste, or even add a pinch of salt for a savory-sweet twist.
Okay, enough gushing. Let’s get to the good stuff: how to make this yourself. I’ll walk you through every step, from soaking the beans to pressing the final mold. And don’t worry – even if you’re a kitchen newbie, this is doable. I burned my first batch (don’t ask), but I’ll share my mistakes so you don’t make them!
Ingredients You’ll Need (and Why I Use Each One)
Before we dive in, let’s list out what you need. I’ve tested this recipe with store-bought and homemade ingredients, so I’ll tell you which ones matter most:
- 300g Peeled Mung Beans: I swear by peeled mung beans for that silky-smooth texture. If you can’t find them, regular mung beans work, but you’ll need to soak longer (4+ hours) and peel them by hand – a bit tedious, but doable. I buy mine online or at Asian grocery stores.
- 135g Sugar: This is the sweet part! Adjust to taste: if you like it less sweet, use 100g; if you’re a sugar fiend, 150g works.
- 55g Butter: I use unsalted butter to control the saltiness. Vegetable oil works too, but butter gives that extra buttery flavor kids love.
- 60g Honey: This is my secret weapon! It adds a floral sweetness that sugar alone can’t replicate. Maple syrup or agave work if you’re out of honey, but honey is traditional here.
- Red Bean Paste (to taste): This is optional, but so worth it. I use store-bought red bean paste for convenience, but homemade is even better.
Step-by-Step: Making Mung Bean Cake Like a Pro
Let’s break this down into easy steps. I’ll include pro tips for each part to avoid common mistakes.
Step 1: Soak the Mung Beans (The Secret to Perfect Texture)

First, you need to soak the mung beans. Why? Because soaked beans cook faster and taste better. Here’s how:
- Place your 300g peeled mung beans in a bowl.
- Cover with water by 2 inches (about 600ml).
- Let them soak for 2 hours if you’re using a pressure cooker or rice cooker.
- If you’re using a stovetop, soak 4 hours (or overnight for extra softness).
- Pro tip: Drain and rinse once after soaking to remove any loose skins. Trust me, you’ll thank me for that later!
Step 2: Cook the Mung Beans Until They’re Tender

Now, cook the beans until they’re soft enough to mash with a fork. Here are three methods to choose from:
- Pressure Cooker (Fastest!): Add 1.5 cups of water to the soaked beans, lock the lid, and set to high pressure for 25 minutes. Let natural pressure release for 10 minutes, then open.
- Rice Cooker: Add 1.5 cups water, set to “cook” mode. It’ll take 45-60 minutes. The rice cooker’s steam makes the beans super tender.
- Stovetop: Simmer on low heat for 45 minutes, stirring occasionally. Add more water if they start to dry out.
Pro tip: Taste a bean before moving on – it should squish easily between your fingers. If it’s still hard, cook 5 more minutes.
Step 3: Mash the Beans into a Smooth Paste

Once cooked, you need a smooth paste. Here’s how I do it:
- Transfer the beans to a food processor or blender. Pulse until they’re almost smooth – a few tiny chunks are okay, but no big lumps!
- If you’re old-school, use a potato masher. I’ve done this and it works, but the food processor saves time.
- Pro tip: Don’t over-blend – you want a creamy texture, not liquid soup. If it’s too watery, spread it on a plate and let it sit for 10 minutes to drain excess moisture.
Step 4: Cook the Mung Bean Mixture (This is Where the Magic Happens!)

Now, it’s time to cook the mixture with sugar, butter, and honey. This is the most critical step – don’t rush it!
- Heat a non-stick pan over medium-low heat. Add the mashed mung beans, sugar, butter, and honey.
- Stir constantly with a wooden spoon. The sugar will start to melt, and the butter will foam up.
- Keep stirring for 10-15 minutes. The mixture will thicken and turn from runny to… well, let’s say “sticky but manageable.”
- Pro tip: If you’re using a regular pan, stir every 30 seconds to prevent burning. I’ve charred a mung bean batch before – not fun!
Step 5: Achieve the Perfect Consistency

After 10 minutes, the mixture should start to look less like soup and more like a thick paste. Here’s how to check if it’s ready:
- Take a small spoonful and let it drip off. It should fall slowly and not spread out like water.
- Lift the spoon – the mixture should stick to the spoon but not slide off in a mess.
- Pro tip: If it’s too wet, cook 2-3 more minutes. If it’s too dry, add 1 tsp honey and stir. This took me 3 tries to get right – patience is key!
Step 6: Cool the Mixture Before Shaping

Once the mixture is thick and dry, remove it from the heat and let it cool. This is non-negotiable – if you try to shape it warm, it’ll stick to your hands and mold.
- Spread the mixture on a plate or bowl and let it cool for 30 minutes at room temperature.
- Pro tip: If you’re in a hurry, pop it in the fridge for 15 minutes. Just take it out 5 minutes before shaping to avoid condensation.
Step 7: Prepare the Filling (Optional but Delicious!)

Now, if you’re adding red bean paste (which I highly recommend!), prep it now:
- Grab a small bowl and add 2-3 tbsp of red bean paste. You can buy this at Asian grocery stores or make your own (here’s a shortcut: mix 1 cup cooked red beans, 2 tbsp sugar, and 1 tsp honey).
- Set it aside – you’ll need it for the next step.
Step 8: Shape the Mung Bean Cakes

Time to get creative! Here’s how to make your cakes:
1. Pinch off a golf-ball sized piece of the cooled mung bean mixture (about 20-25g per cake).
2. Roll it into a smooth ball with your palms.
3. Flatten the ball into a small disc, then place 1 tsp of red bean paste in the center.
4. Gather the edges of the mung bean mixture over the filling, pinching to seal.
5. Roll it back into a smooth ball.
6. Pro tip: If you’re not using filling, skip steps 3-4 and just roll the mung bean mixture into balls!
Step 9: Press into Molds for That Classic Look

Now, get those beautiful shapes! I use simple square or round molds from my kitchen drawer, but you can use anything:
- Place the shaped mung bean ball into the mold.
- Press firmly with your palm until it’s flush with the mold’s edge.
- Gently tap the mold on the counter to release the cake.
- Pro tip: If you don’t have a mold, use a small cookie cutter or even a drinking glass!
Step 10: Let Them Set and Enjoy!

Arrange your mung bean cakes on a plate or platter. They’re ready to eat immediately, but I like to chill them for 30 minutes first – it makes them extra firm and refreshing.
Pro tip: Store leftovers in an airtight container in the fridge for up to 7 days. They’ll stay fresh and sweet, and the texture will only get better as they sit.
My Best Tips for Mung Bean Cake Success
Let me share the mistakes I’ve made so you don’t have to:
- Peeling Mung Beans: If you can’t find peeled mung beans, soak them for 2 hours, then rub the skins off with your fingers. It’s tedious, but worth it for the smooth texture.
- Pressure Cooker Shortcut: My Instant Pot is a lifesaver! 300g beans + 1.5 cups water = 25 minutes on high pressure. No babysitting required.
- Texture Fixes: If your mung bean paste is too dry, add 1 tsp honey and stir. If it’s too sticky, cook 2 more minutes.
- Honey Substitutes: No honey? Swap with maple syrup, agave, or even 1/2 cup extra sugar + 1 tbsp water.
- Butter vs. Oil: Butter makes it richer, but vegetable oil works if you’re vegan. Just skip the butter and add 1 more tbsp honey.
Why This Recipe Beats Store-Bought
I’ve tried the fancy ones at Chinese bakeries, and let me say: homemade mung bean cake is better. Here’s why:
- Fresher Ingredients: You know exactly what’s in it – no weird additives.
- Customizable: Want less sugar? Add less. Prefer salted honey? Go for it!
- Nostalgic Flair: My version tastes like my husband’s childhood, which is priceless.
Plus, it’s way cheaper than buying from a bakery. For under $5, you can make 30+ cakes that’ll impress everyone.
So, there you have it! My family’s summer staple, now yours too. Tag me in your photos if you make it – I’d love to see your mung bean cake creations. And if you have a twist of your own, share it below! Remember: cooking is about love, and this recipe is full of it. Enjoy your sweet, cool summer treat!


 Recipe")


 – A Spicy Hunan Delight")

: A Kid-Favorite Recipe")
