I’m obsessed with making soft bread—it’s like biting into a fluffy cloud! My kids beg for these cute little guys every time, and using a bread machine to knead the dough? Total lifesaver for my busy hands. Shoutout to Sister S for this amazing recipe—she’s a genius with dough!
Why This Bread Works (and Why You’ll Love It)
First off, the texture is unreal. These breads are so soft they almost melt in your mouth, with just the right amount of sweetness. Plus, the cute shape? Perfect for Instagram-worthy photos or just making breakfast feel special. No fancy skills needed—even beginners can nail this with a bread machine!
Ingredients You’ll Need (Makes 10 Cute Buns)
Let’s gather the goods! You’ll need:
- 350g high-gluten flour (bread flour works best for that stretchy, fluffy texture)
- 175ml warm milk (about 35°C—too hot kills the yeast, too cold slows rising)
- 60g granulated sugar (adds sweetness and feeds the yeast)
- 3g fine salt (enhances flavor and strengthens the dough)
- 30g unsalted butter (softened, not melted—this keeps it tender)
- 1 large egg (brings moisture and helps the dough hold its shape)
- 5g instant active dry yeast (make sure it’s “high-sugar tolerant” for sweet doughs!)
Step-by-Step: How to Make the Softest Buns
Let’s dive in! Each step has a little tip to help you out—trust me, these tricks make all the difference.

Step 1: Prep Your Bread Machine
Add all ingredients to the bread machine bucket in this order: milk first, then flour, sugar, salt, egg, butter, and finally yeast on top (never mix yeast with salt directly!).

Step 2: First Knead (15 mins + Rest)
Set the machine to the “dough knead” cycle for 15 minutes. When it beeps, let it rest for 10 minutes. This rest helps the gluten relax so the next knead works better.

Step 3: Second Knead (22 mins + Proof)
Start the knead cycle again for 22 minutes. When done, the dough should be smooth and elastic—like a balloon you can stretch without breaking! Let it proof (ferment) for 40 minutes until it’s doubled in size.

Step 4: Check Fermentation
Poke the dough with your index finger. If the hole stays (no collapse, no immediate fill-in), it’s ready! Time to deflate (release air bubbles).

Step 5: Relax the Dough
Press the dough to release air, then shape into a ball. Cover with plastic wrap and let it rest for 15 minutes. Pro tip: If you forget to take a photo here, no worries—just trust the process!

Step 6: Unwrap & Prep for Shaping
After 15 minutes, the dough should look bigger and puffier. Uncover it—so satisfying to see that growth!

Step 7: Divide the Dough
Use a bench knife or scissors to split the dough into 10 equal pieces. I weigh mine to make sure they’re all 70g each (about 1.5 cups total dough divided evenly).

Step 8: Roll the First Layer
Take one dough ball, flatten it with your palm, then roll it into an oval with a rolling pin. Aim for a long, thin oval—this helps with the cute shape later!

Step 9: Left Fold
Fold the left third of the oval over the middle. This is like giving the dough a little hug!

Step 10: Right Overlap
Fold the right third over the left fold. Now you have a little “sausage” shape with a slight fold—so cute already!

Step 11: Roll Flat (Top & Bottom)
Roll the dough gently from top to bottom until it’s a long, even rectangle. This stretches the layers to make the bread fluffy.

Step 12: Top Roll
Roll the top half down toward the center. Keep it smooth and even—no cracks!

Step 13: Bottom Roll
Do the same with the bottom half—roll up from the bottom to the center. Now you have a little “pretzel” shape!

Step 14: Flip & Shape
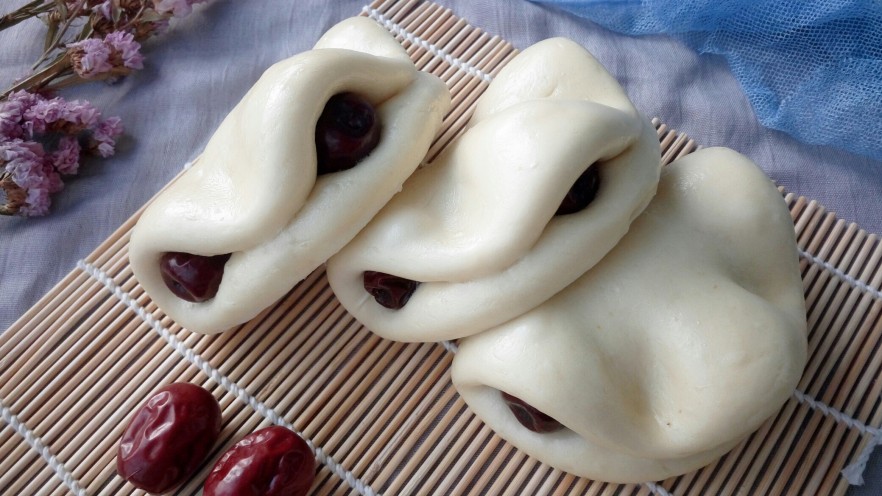
Flip the dough over so the seam is on the bottom. Look at that cute little shape! You’re almost there—just 2 more steps!

Step 15: Second Proof (Dough Rising)
Place the shaped dough on a baking tray lined with parchment paper. Put a shallow tray of water at the bottom of your oven to create humidity. Let it proof at 38°C for 40 minutes until it’s puffed up like a little cloud.

Step 16: Prepare for Baking
After proofing, use a sharp knife to slash decorative lines (optional—just makes it look fancy!). Brush the top lightly with egg wash for a golden shine.

Step 17: Bake to Perfection
Preheat oven to 180°C. Bake for 20–25 minutes. If the top browns too fast, cover loosely with foil. The bread is done when it sounds hollow when tapped!

Step 18: Cool & Enjoy
Let the bread cool on a wire rack for 10 minutes before slicing. Patience is key—this makes the crust nice and crisp on the outside, soft on the inside.

Step 19: Pose for the ‘Gram
Arrange them neatly and take photos—these little cuties deserve to be on Instagram! My kids always ask for “bread selfies” now.

Step 20: Check the Texture
Look at those stretchy, fluffy strands! The “pull apart” texture is what makes this bread so magical.

Step 21: The Finished Product
See that perfect golden crust? And the inside? Chef’s kiss. This bread is so soft, you can even use it for French toast or sandwiches—no crumbs, just pure fluff.

Step 22: Final Taste Test
Take a bite—your taste buds will thank you! The sugar and butter create such a sweet, tender crust, and the inside is like biting into a cloud. I swear, my kids eat these instead of candy now. Win-win!
Pro Tips for Flawless Results
- Oven temp is CRUCIAL: 180°C max—any higher, and your bread will turn out dry and tough.
- Water in the oven: That humidity trick is why these have such a soft crust. Don’t skip it!
- Knead time: The bread machine does most of the work, but 15+22 minutes is perfect for gluten development.
- Shape gently: Avoid overworking the dough—keep it relaxed for the fluffiest results.
If you try this recipe, tag me—I’d love to see your cute breads! Trust me, once you make these, you’ll never buy store-bought bread again. Happy baking!