


 – Easy Recipe for Summer")
 – Easy, Nutritious Homemade Bread Recipe")
Why Cheese Toast (Bread Machine Version) Is My Go-To Lazy Day Bread
Let’s be real—who doesn’t love a warm, cheesy slice of homemade bread? But kneading dough by hand for hours? No thanks, not on my busy days. That’s where my bread machine comes in, and this cheese toast recipe? It’s a game-changer. Cheese is basically fermented milk (fancy, right?) and packed with nutrients, so this bread isn’t just tasty—it’s actually good for you too. Plus, it’s so easy even a beginner can nail it. Let’s dive in!
Ingredients You’ll Need
For the Bread Dough
- 350g high-gluten flour (trust me, this gives the best texture)
- 40g granulated sugar (just enough to balance the cheese)
- 190g milk (whole milk is creamier, but skim works too)
- 40g egg liquid (save a little for brushing later!)
- 50g cream cheese (the star of the show—soften it first!)
- 30g unsalted butter (room temp, so it mixes smoothly)
- 3g salt (don’t skip this—it enhances all the flavors)
- 4g instant yeast (make sure it’s fresh, or your bread won’t rise)
For Decoration
- Some extra egg liquid (for that golden crust)
- Some almond slices (adds a nice crunch)
Step-by-Step Instructions
Okay, let’s get baking! Follow these steps, and you’ll have fresh bread in no time.
1. Prep All Ingredients First

First things first—grab all your ingredients. The most important thing here? Make sure your butter is softened to room temperature. If it’s too hard, it’ll mess up the dough. Trust me, I’ve made that mistake before!
2. Add Milk to the Bread Machine

Start with the wet ingredients. Pour the milk into the bread machine’s bucket. This is the base of our dough, so make sure it’s at room temp (not cold—cold milk slows down yeast activity).
3. Pour in the Egg Liquid

Next, add the egg liquid. Just crack an egg into a bowl, whisk it a little, and pour 40g into the machine. Save the rest for later—we’ll use it to brush the top of the bread for that perfect golden color.
4. Add Salt and Sugar Diagonally

Here’s a pro tip: don’t put salt and sugar next to each other! Salt kills yeast if it touches directly, so add them on opposite sides of the bucket. That way, they mix in evenly without ruining the yeast.
5. Sift the Flour Into the Machine

Sifting the flour might seem like a hassle, but it removes lumps and makes the dough smoother. Just dump the flour over the wet ingredients—it should cover them completely.
6. Make a Small Hole for the Yeast

Take your finger and make a tiny hole in the center of the flour (don’t go all the way to the wet ingredients!). Pour the yeast into this hole. Why? Because yeast needs to stay dry until the machine starts mixing—if it gets wet too early, it won’t work as well.
7. Add Cream Cheese and Start Kneading

Now, add the softened cream cheese. Close the bread machine lid and select the first kneading program. It usually takes about 25 minutes. Let the machine do its thing—no need to stir or check (I know it’s hard, but resist!).
8. Add Butter and Knead Again Until Smooth

After the first kneading, the dough should be smooth. Now add the softened butter and start the second kneading program (around 20 minutes). How do you know it’s done? Take a small piece of dough and stretch it—if you can pull a thin, transparent film (called the “windowpane test”), you’re golden! That means the gluten is developed perfectly.
9. Let the Dough Rest

Take the dough out, shape it into a ball, and cover it with a damp cloth or plastic wrap. Let it rest for 15 minutes. This relaxes the gluten, so it’s easier to roll later. You can also just leave it in the bread machine if you’re feeling lazy—no judgment here!
10. Roll and Shape the Dough

Flatten the dough with a rolling pin into an oval shape. Flip it over, then roll it up tightly like a burrito. Let it rest for another 10 minutes—this helps the dough keep its shape when rising.
11. Second Rise in the Bread Machine

Put the rolled dough back into the bread machine bucket (seam side down). Select the “rise” program, or just let it sit with the lid closed for about 1 hour. The dough should double in size—when you press it gently, it should spring back slowly.
12. Brush With Egg Liquid

Once the dough has risen, take it out (or just leave it in the machine) and brush the top with the leftover egg liquid. This gives the bread that shiny, golden crust we all love.
13. Sprinkle Almond Slices and Bake

Add a sprinkle of almond slices for some crunch. Then select the “bake” program—usually 40 minutes. The house will start smelling amazing, I promise!
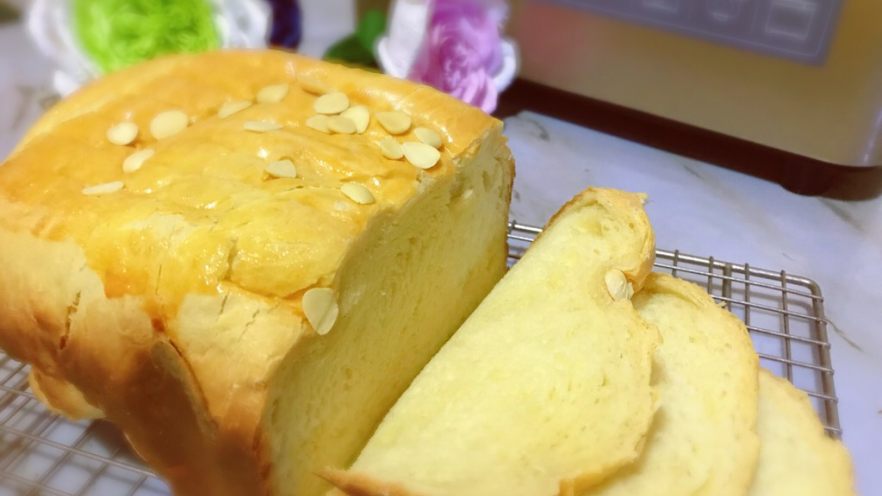
14. Let It Cool Before Slicing

When the bread is done, it should be a beautiful golden brown. Take it out of the machine and let it cool on a wire rack for at least 30 minutes. I know it’s tempting to slice it right away, but cutting it while it’s hot will make it gummy. Be patient—you’ll thank me later!
15. Slice and Enjoy!

Finally, slice the bread and dig in! It’s perfect for breakfast with a cup of coffee, as a snack, or even as a side for soup. The cheese adds a subtle, creamy flavor that’s not too overpowering—just delicious.
My Top Tips for Perfect Cheese Toast
Want to make this recipe even better? Here are a few tricks I’ve learned:
- Use fresh yeast: Old yeast won’t make the bread rise, so check the expiration date!
- Soft butter is key: If your butter is too hard, cut it into small pieces first.
- Don’t skip the windowpane test: This ensures your bread is fluffy and not dense.
- Let it cool completely: I know, I know—but it’s worth it for the perfect texture.
Final Thoughts
This cheese toast (bread machine version) is my favorite recipe for a reason—it’s easy, delicious, and healthy. Whether you’re a beginner or a pro, you’ll love how simple it is to make. So grab your bread machine, gather the ingredients, and let’s bake some bread! You won’t regret it.


")


 Recipe")