
Why Chocolate Soufflé Is Worth the Hype (And The Tiny Bit of Stress)
Let’s be real—when someone says “chocolate soufflé,” what do you picture? A fancy French dessert that deflates if you so much as look at it wrong? Yeah, me too. But here’s the thing: it’s not as scary as it sounds. In fact, once you nail the basics, it’s one of the most satisfying desserts to make. The best part? That first bite—warm, fluffy, with that perfect balance of sweet and bitter chocolate. The bitterness is what makes it feel grown-up, right? No cloying sugar here—just rich, deep cocoa flavor that lingers in the best way.
I used to avoid soufflés like the plague. I thought you needed a pastry chef’s diploma or a magic whisk. But guess what? I made one last weekend, and it didn’t collapse (okay, maybe a little after 10 minutes, but still!). If I can do it, you can too. Let’s break this down step by step, no fancy jargon, just real talk.
What You’ll Need (Ingredients List)
First, let’s gather your stuff. You don’t need any weird gadgets—just basic baking tools and ingredients you probably already have in your pantry. Here’s the lowdown:
- 20g all-purpose flour (plain flour works too)
- 15g cocoa powder (go for good quality—this is where the flavor lives!)
- 30g granulated sugar (plus a little extra for coating the ramekins)
- 2 large eggs (separated—egg whites and yolks need their own jobs here)
- 2 tsp powdered sugar (for dusting at the end)
- 40ml milk (whole milk is best for creaminess, but skim works in a pinch)
- 30g unsalted butter (plus extra for greasing the ramekins)
- 2g white vinegar (or lemon juice—this helps stabilize the egg whites)
Pro tip: Make sure your eggs are at room temperature. Cold egg whites are harder to whip into that fluffy peak we need. Trust me, I’ve tried both ways.
Step-by-Step Chocolate Soufflé Instructions
Okay, let’s get cooking. I’ll walk you through each step with photos to make it easy. No stress—we’ve got this!
Step 1: Gather All Your Ingredients

First things first: lay out everything you need. This is called “mise en place” in fancy chef terms, but I just call it “not running around the kitchen like a headless chicken.” Measure your flour, cocoa, sugar—all that good stuff. Having it ready will save you so much time later.
Step 2: Prep Your Ramekins (The Secret to Rise)

Take your ramekins (those little ceramic bowls—you can use 1 large one or 2 small ones) and grease the inside with butter. Be thorough—cover every inch, even the top edge. Then, sprinkle granulated sugar inside and twist the ramekin around so the sugar coats the butter. Dump out any extra sugar. Why? This gives the soufflé something to “grab onto” as it rises. No sugar coating = sad, flat soufflé. Don’t skip this step!
Step 3: Make the Chocolate Base

In a medium bowl, add the milk, egg yolks, and 30g of butter. Whisk them together until they’re smooth and creamy. No lumps here—take your time. The butter should melt a little from the warmth of the milk, but if it doesn’t, you can pop the bowl in the microwave for 10 seconds (stir after!).
Step 4: Add the Dry Ingredients

Now, sift the cocoa powder and flour into the milk mixture. Sifting is important—no one wants a lumpy soufflé. If you don’t have a sifter, just use a fine mesh strainer and tap it gently. Once sifted, stir everything together until it’s a thick, smooth paste. It should look like chocolate pudding batter—yummy!
Step 5: Let the Base Rest (Quick Break)

Set that chocolate base aside for a minute. We’re going to work on the egg whites next. This is the part that makes the soufflé fluffy, so pay attention!
Step 6: Whip the Egg Whites (The Fluffy Magic)

Take your egg whites (make sure there’s NO yolk in them—even a tiny bit will ruin the fluff) and put them in a clean, dry bowl. Add the vinegar (or lemon juice) and 30g of sugar. Now, whip them with an electric mixer (or a hand whisk if you’re feeling strong) until they form stiff peaks. What’s a stiff peak? When you lift the whisk, the peak stands straight up without flopping over. This usually takes 3-5 minutes. Don’t over-whip—you don’t want grainy egg whites!
Step 7: Fold the Egg Whites into the Chocolate Base

Here’s the tricky part: folding. You don’t want to stir the egg whites into the base—stirring will deflate all that fluffy air we just created. Instead, take a big spoonful of egg whites and mix it into the chocolate base to lighten it up. Then, gently fold the rest of the egg whites into the base using a rubber spatula. Fold from the bottom up, like you’re turning a page in a book. Be slow and gentle—this is where patience pays off.
Step 8: Make Sure It’s Well Combined (But Still Fluffy)

Keep folding until there are no white streaks left, but don’t overdo it. The batter should be light and airy, not dense. If it looks like chocolate cloud, you’re doing it right!
Step 9: Pour the Batter into Ramekins

Take your prepped ramekins and fill them with the batter. Fill them almost to the top—leave a little space for rising. Smooth the top with a spatula if you want, but it doesn’t have to be perfect.
Step 10: Bake It (Don’t Open the Oven!)

Preheat your oven to 200°C (400°F). Put the ramekins on a baking sheet (for easy handling) and pop them in the oven. Now, here’s the golden rule: DO NOT open the oven door for the first 25 minutes. Every time you open the door, you let out heat, and that can make your soufflé collapse. I know it’s hard to resist peeking, but trust me—wait!
Step 11: Check for Doneness

After about 30 minutes, your soufflé should be puffed up 1-2 cm above the ramekin. It should be golden brown on top and feel firm when you tap it gently. If it’s still jiggly in the middle, give it 2-3 more minutes. But don’t overbake—it will get dry.
Step 12: Dust with Powdered Sugar

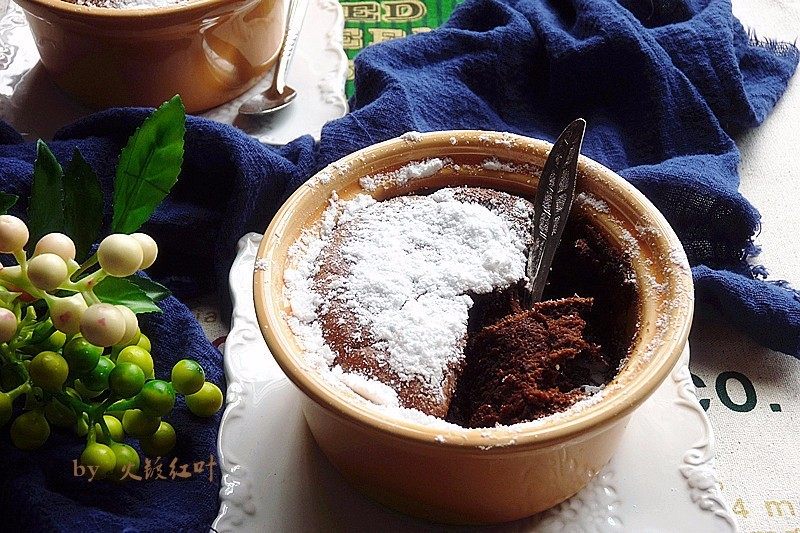
Take the soufflé out of the oven (finally!) and let it cool for 1-2 minutes. Then, dust the top with powdered sugar. Be generous—who doesn’t love a little extra sweetness?
Step 13: Serve Immediately (Before It Deflates!)

Here’s the thing about soufflés: they deflate fast. Like, really fast. So serve it right away. Grab a spoon and dig in—warm, fluffy, chocolatey goodness. The inside should be soft and creamy, with that perfect bitter-sweet chocolate flavor. Mmm, so worth it!
Common Mistakes to Avoid (I Learned These the Hard Way)
Let’s talk about the mistakes I made so you don’t have to. Trust me, these are easy to fix:
- Not prepping the ramekins: I skipped the sugar coating once, and my soufflé stuck to the bowl. Not fun.
- Over-whiping the egg whites: I once whipped them until they were grainy, and the soufflé was dense. Oops.
- Opening the oven door: I peeked at 20 minutes, and my soufflé collapsed a little. Lesson learned—patience is key.
- Using cold eggs: Cold egg whites don’t whip as well. Let them sit out for 30 minutes before using.
Final Thoughts: You’ve Got This!
Making a chocolate soufflé is all about balance—balance between sweet and bitter, fluffy and creamy. It’s not as hard as it looks, and the reward is so worth it. Whether you’re making it for a date night, a dinner party, or just because you deserve a treat, this recipe will impress everyone (including yourself).
So go ahead, grab your ingredients, and give it a try. And if it doesn’t turn out perfect the first time? That’s okay—practice makes perfect. I’ve made a few duds, but the good ones make up for it. Happy baking!