
Easy Homemade Fried Dough Sticks (Soft & Crispy for Kids!)
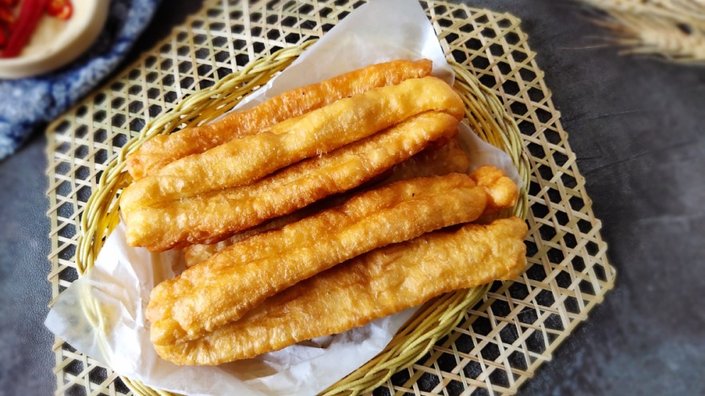
Okay, let me tell you—finding a fried dough sticks recipe that’s actually good for kids (and quick to make!) was a struggle until now. I’ve tried so many versions, and nothing hit the mark until I kept it simple: just a basic dough with the right rise, and boom! These are soft on the inside, crispy on the outside, and smell like warm, toasty heaven. My kids devour them, and honestly, I do too. Trust me, this is the one you need to save!
Ingredients You’ll Need
No fancy stuff here—just pantry staples! Grab these:
- 500g all-purpose flour (or high-gluten if you want extra stretch)
- 6g active dry yeast (instant works too, just adjust timing!)
- 5g baking powder (this makes them fluffy)
- 2g baking soda (adds a tiny lift)
- 280ml warm water (not hot, just warm—like bath water temp)
- Enough cooking oil for frying (vegetable or canola is perfect)
Step-by-Step Guide: How to Make These Magic Sticks
Let’s get started! These are so easy, even if you’re a beginner. Let’s roll up our sleeves!

Step 1: Activate the Yeast
First, dissolve the yeast in warm water. I use a small bowl, pour in the water, sprinkle the yeast, and stir. Let it sit for 5 minutes—you’ll see little bubbles form. That means your yeast is happy and ready to work!

Step 2: Mix the Dry Ingredients
In a big bowl, mix all the dry stuff: flour, baking powder, baking soda. Sift them together (this makes the dough super smooth—no lumps!). Trust me, sifting is a game-changer here.

Step 3: Knead Until Smooth
Pour the yeast water into the dry mix. Stir with a spoon until it forms a shaggy dough—like, the kind that looks messy but sticks together when you press it. Then, knead by hand for 5-7 minutes. Keep kneading until it’s smooth, not sticky, and elastic. If it’s too sticky, add a tiny bit more flour. You’ll feel it get nice and stretchy!

Step 4: Rise Time! (Be Patient!)
Cover the dough with a clean towel or plastic wrap and let it rise in a warm spot. I put mine in a draft-free corner, or even in a turned-off oven with the light on (keeps it cozy). Let it double in size—this took about 1 hour for me. To check: poke a finger in. If it bounces back slowly, it’s ready!

Step 5: Roll It Out
Once risen, press the dough gently to deflate it. Then roll it out into a thin rectangle—about ¼-inch thick, like a big tortilla. Use a rolling pin for evenness. Don’t over-roll; just get it thin enough so the strips cook evenly.

Step 6: Cut into Strips
Use a sharp knife to cut the dough into long, thin strips. I aim for strips about 1 cm wide and 10-15 cm long (for big ones) and shorter for the kids’ bites. The thickness doesn’t matter too much, but try to keep them uniform so they fry evenly.

Step 7: Prep the Kid-Friendly Size
I cut some smaller strips for my little one—they’re easier to hold and less messy. Perfect for after-school snacks or breakfast! Just cut them to about 5 cm long or whatever your kiddo prefers.

Step 8: Twist the Strips
Take two strips of the same length. Pinch them together at one end, then use a chopstick to press down the middle. Twist them gently to make that classic “twisted” look. This helps them puff up nicely in the oil—so satisfying to watch!

Step 9: Heat the Oil
Now, heat the oil in a deep pan or pot. I use a candy thermometer to keep it at 350°F (175°C)—this is the sweet spot for crispy, not burnt, goodness. Test with a tiny piece of dough: if it sizzles and rises quickly, you’re good to go!

Step 10: Fry the Big Ones First
Gently place the big twisted strips into the hot oil. Fry for 2-3 minutes per side until they’re golden brown. Use a slotted spoon to flip them—they’ll float right up! Don’t overcrowd the pan; fry in batches if needed.

Step 11: Fry the Little Ones Too
For the tiny strips, repeat the process! Drop them in the oil and fry until golden. They’ll cook faster, maybe 1-2 minutes total. Watch them closely—they go from golden to burnt in seconds!

Step 12: Cute Little Ones = Happy Kids
Look at these little guys! They’re plump, golden, and perfect for tiny hands. I swear, my kiddo’s eyes light up when she sees these. They’re crispy outside and still soft inside—heaven!

Step 13: Big vs. Small Texture
Hot off the pan, the big ones are crispy and loud—like, you can hear the crunch when you bite. But once they cool, they get so soft. It’s the best texture combo! I love that they’re not rock-hard; even my picky kid can eat them without complaints.

Step 14: Inside Look = Airy Goodness
Check out the inside! Those air pockets mean softness, not dryness. No weird textures here—just light, fluffy dough that melts in your mouth. It’s like biting into a cloud… but crispy on the outside.

Pro Tip: Batch Cooking Saves the Day
One batch disappears in one day—I’m not even kidding. My family eats these for breakfast, snacks, and sometimes dinner. They’re that addictive. Make a double batch, trust me.

Final Result: Crispy, Soft, & Done!
There you have it! Easy, quick fried dough sticks that anyone can make. No fancy tools, no complicated steps—just a little patience and these crispy, soft treats. My kids beg for them, and honestly, I don’t blame them.
Pro Tips for Perfect Dough Every Time
1. Fermentation is key: If the dough doesn’t rise enough, it’ll be dense. If it rises too much, it’ll collapse. Let it double in size, then proceed!
2. Water adjustments: Flour absorbs water differently. Aim for 250-280ml water. If your dough is dry, add a splash more warm water; if sticky, add a bit more flour.
3. Oil temp: Keep it steady at 350°F (175°C) for crispy, not burnt. If oil is too hot, the outside burns before the inside cooks.
4. Double the fun: Roll out extra dough for leftovers—they’re great toasted in the morning!
I hope you love this recipe as much as my family does! Tag me if you try it—I’d love to see your crispy, soft fried dough sticks. Happy frying!