


")
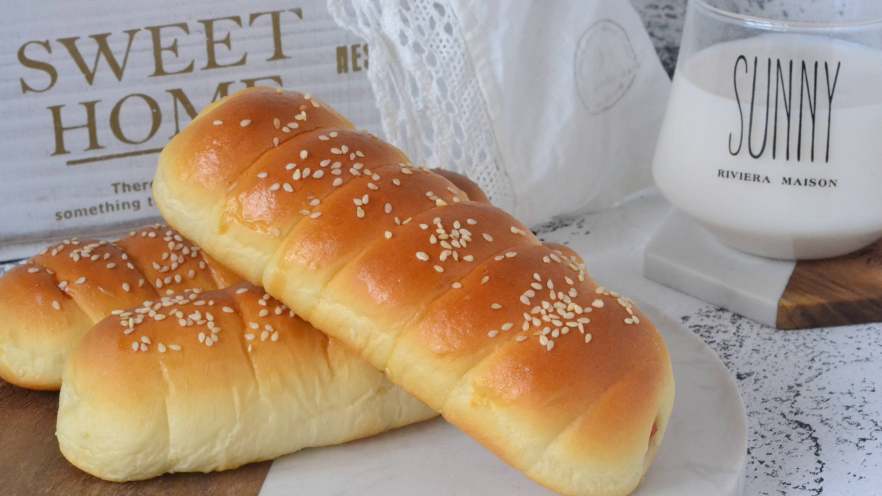
Homemade Hot Dog Buns: Soft, Fluffy, & Totally Worth the Effort!
Okay, let’s be real—who doesn’t love a warm, chewy hot dog bun? Those store-bought ones just don’t hit the same, right? Dry, crumbly, and way too plain. But trust me, making your own is easier than you think. Today, I’m sharing a simple zhongzhong method (that’s a fancy way of saying “sponge dough technique”) that gives these buns an unbeatable softness. They’re perfect for breakfast, snacks, or even a lazy weekend lunch. Let’s dive in!
Why This Recipe Works (Spoiler: It’s All About the Zhongzhong Method!)
The secret here is the cold fermentation step. By letting the dough sit in the fridge overnight, we break down starches and create a super tender, open crumb. No, you don’t need to wake up at 3 AM—just prep it before bed, and it’s ready in the morning! Plus, the process is straightforward, even if you’re new to baking. Let’s get started!
Ingredients You’ll Need (Makes 6 Buns)
Let’s grab everything first—you probably have most of these in your pantry! I’m listing measurements in grams for accuracy (baking is science, after all):
- High-gluten flour: 200g (bread flour works best; all-purpose is a backup)
- Milk: 110ml (warm is key for yeast activation! 30-35°C is ideal)
- Sugar: 30g (sweetness + yeast food)
- Salt: 1g (balances sweetness, enhances flavor)
- Egg: 20g (about half a large egg; adds richness)
- Active dry yeast: 2g (instant yeast works too, just skip the proofing step)
- Butter: 15g (softened, not melted! Unsalted is safer for control)
- Hot dogs: 6 (I use classic pork, but chicken/veggie works too)
- Toppings: Sesame seeds (for crunch and looks) + extra egg for brushing

Step 1: Make the “Zhongzhong” Sponge Dough
First, let’s create the “sponge” that makes our buns so fluffy. In a bowl, mix 140g of the high-gluten flour, 110ml milk, and 2g yeast with a chopstick until it’s a shaggy mess (no need to knead yet!). Cover tightly with plastic wrap and let it rest… wait, no—stick it in the fridge!
Pro tip: Letting this sit in the fridge for 24 hours is the secret to that melt-in-your-mouth softness. If you’re in a rush, 12 hours is doable, but 24h is better. Just make sure the dough is covered so it doesn’t dry out.

Step 2: Cold Fermentation (The “Wait, 24 Hours?!” Step)
Now, the most important part: patience! Pop that covered bowl into the fridge and forget about it for 24 hours. When you come back, the dough should look bubbly (and maybe a little “fallen” back), which means the yeast did its job. Take it out and let it sit at room temp for 30 minutes to warm up—it’ll be more responsive now.
Why this works: Cold fermentation slows down yeast activity, breaking down gluten and making the bread stretchier when baked. Think of it as “training” the dough to be soft and airy.

Step 3: Combine with the Main Dough
After 30 minutes, add the remaining 60g flour, egg, sugar, and salt to the Zhongzhong. Now, knead this until the dough starts to form a “windowpane”—stretch a tiny piece between your fingers; it should be thin enough to see light through without tearing. That means gluten is developing!
If using a stand mixer, use the dough hook on low for 8-10 minutes. By hand? 10-15 minutes. Stop when the dough doesn’t stick to your hands anymore—it’ll feel smooth and elastic.

Step 4: Add Butter for Fluffiness
Now, add the 15g softened butter. Mix on low until it’s fully incorporated—you’ll notice the dough gets smoother and less sticky. Keep kneading until you can do the windowpane test again. This time, the film should be stronger—no holes, no tearing!
Common mistake: If butter is too cold, it won’t mix in well, leaving the dough dry. Soften it at room temp first (30 mins) or microwave for 5 seconds (don’t overdo it!).

Step 5: Divide & Roll Dough Strips
Divide the dough into 6 equal pieces (about 33g each). Roll each piece into a long, even cylinder—15cm long, like a snake. Use a bench scraper or sharp knife to cut if needed, and dust your hands with flour to prevent sticking.
Pro tip: Keep your work surface floured but not too much—you don’t want lumps in the dough!

Step 6: Wrap Dough Around Hot Dogs
Place one hot dog in the middle of a dough strip. Bring the ends up to meet on top of the sausage, like wrapping a blanket around it. The goal? The dough should cover the sausage evenly, with no gaps.

Step 7: Seal the Ends Tightly
Pinch the ends together firmly to seal. This prevents the hot dog from poking out during baking! If the dough is tricky to seal, wet your fingers lightly (no, not soak them!) to help the dough stick.

Step 8: Final Shaping & Rest
Place each wrapped “sausage” on a parchment-lined baking sheet, spaced 2 inches apart. Let them rest for 10 minutes to relax the dough—this helps with even rising later. Think of it as giving the dough a “stretch break.”

Step 9: Proof Until Double Size
Cover the buns with a clean towel and let them rise in a warm spot (like near an oven or with a bowl of warm water) for 45-60 minutes. They’re ready when you press the top gently—it springs back slowly, like a gentle touch.
Pro tip: If your kitchen is cold, use a proofing setting (if your oven has one) or turn the oven on for 10 seconds, then turn it off. The residual heat will keep the dough cozy!

Step 10: Bake to Golden Perfection
Preheat oven to 170°C (340°F). Brush the risen buns with egg wash, then sprinkle sesame seeds. Bake for 20 minutes—check after 10 minutes; if the top is browning too fast, cover loosely with foil.
Let them cool on a rack for 5 minutes before eating—this stops the steam from making them soggy!

Step 11: Eat & Enjoy (No Mess, Guaranteed)
These buns are meant to be handheld! Grab one and bite straight into the warm, fluffy goodness. No utensils needed—just pure, messy joy.

Step 12: Fancy Option – Sliced & Sophisticated
Want to impress guests? Slice the bun in half, add mustard, ketchup, or even guacamole, and eat with a fork (no judgment if you still want to hold it!). Perfect for brunch or a picnic—these buns travel well too!
Pro Tips for Flawless Buns
- Zhongzhong Shortcut: If 24h is too long, use 12h fermentation. The longer the better, but 12h works for busy mornings!
- Yeast Hack: If dough won’t rise, check yeast freshness (older yeast = no rise!). Use warm milk (not hot!) to activate it.
- Storage: Leftovers stay fresh in an airtight container for 3 days. Freeze extras for up to a month—thaw and toast for crispy crust!
Final thought: These buns are way better than store-bought—soft, flavorful, and totally customizable. Whether you’re a kid or a kid at heart, these will be your new go-to snack. Tag me in your creations—I’d love to see your golden, sesame-topped buns!


")

 – A Classic Cantonese Home-Cooked Dish You Need to Try")