

 & Red Dates Pork Bone Soup Recipe | Nourishing Chinese Wellness Dish")


Kiwi Matcha Yogurt Cup: A Refreshing Summer Treat You’ll Want to Make Again & Again
Hey there, fellow foodies! 👋 Summer is in full swing, and let me tell you—nothing cools me down faster than a light, creamy dessert that doesn’t weigh me down. If you’re tired of heavy ice cream or complicated baked goods, this Kiwi Matcha Yogurt Cup is your new go-to! It’s bright, tangy, and so easy to throw together, even if you’re a kitchen newbie. Plus, it’s naturally sweet (thanks to kiwi and yogurt) and has that perfect balance of creamy and slightly bitter matcha flavor. Let me walk you through how to make this absolute gem—trust me, you’ll be hooked after the first bite!
Ingredients You’ll Need (No Fancy Stuff, Just What You Need!)
Let’s start simple—you probably already have most of these ingredients at home. Here’s the list:
- 300ml yogurt: I recommend a fermented, unsweetened type (like plain Greek yogurt or thick cup yogurt). The tangy, creamy texture is key here! If you can’t find unsweetened, just use the plainest option you have—no sugar added is best to keep it light.
- 1 kiwi: Ripe but not mushy! Aim for a kiwi that’s firm but gives a little when pressed. Too soft, and the slices will fall apart; too hard, and they’ll be tough. Perfect balance = happy kiwi slices.
- 3g matcha powder: Uji Matcha powder is my top pick (specifically the “Isuzu” grade from my favorite brand). It’s bright green, has that authentic umami matcha flavor, and pairs beautifully with the sweet kiwi. If you’re on a budget, any good-quality matcha will work, but cheaper ones might taste grassy or bitter.
Step-by-Step Instructions: Let’s Make This Cup Shine!
Okay, let’s get started! No baking, no stress—just a few simple steps. Let’s go!

Step 1: Gather & Prep All Ingredients
First, clear a counter space and lay out everything. Grab your yogurt, kiwi, matcha powder, a large mixing bowl, a small bowl (for the matcha sauce), a knife, and a whisk (or even a fork works!). This prep step saves so much time later—no scrambling for tools mid-recipe!

Step 2: Mix the Base Yogurt
Pour the 300ml yogurt into the large bowl. This is your creamy base—simple enough, right? If your yogurt is super thick, you might want to stir it a bit first to loosen it up, but no need to overdo it.

Step 3: Make the Matcha Yogurt “Sauce”
Take the small bowl and scoop out 20ml (about 2 tbsp) of yogurt from the large bowl. Add the 3g matcha powder here—this will be your vibrant green star of the show!

Step 4: Whisk Until Smooth
Grab your whisk (or fork) and mix the matcha into the yogurt vigorously. Keep whisking until there are zero lumps—this is crucial! If there are clumps, your sauce will be grainy, and we want that creamy, smooth finish. It should look like a thick, glossy green paste.

Step 5: Check Your Matcha Sauce
Give the matcha yogurt a final stir. It should be thick enough to hold its shape but still pourable. If it’s too runny, add a splash more yogurt; if too thick, a tiny bit of water (but honestly, I’ve never needed that!).

Step 6: Mix Matcha into the Main Yogurt
Now, pour the entire matcha sauce into the large bowl of plain yogurt. Gently stir with a spoon until everything is evenly mixed. You’ll get a marbled green-and-white yogurt base—so pretty! Keep 1-2 tbsp of this matcha yogurt aside for later decoration.

Step 7: Combine Thoroughly
Take your time mixing—you want the matcha to be evenly distributed but not over-mixed (we want those pretty green streaks!). Set this aside while we prep the kiwi.

Step 8: Slice the Kiwi Perfectly
Peel the kiwi with a spoon or your fingers (easy peasy!). Then, slice it horizontally into thin, even slices (about 1-2mm thick). Even thickness is key here—this way, the kiwi sticks neatly to the cup walls and looks professional. If you’re not great at slicing, use a sharp knife and go slow!

Step 9: Start Layering in the Cup
Grab a tall, wide-bottomed cup (clear glass is best to show off the layers!). Pour a small amount of the matcha yogurt into the bottom—just enough to cover the base. This will hold the kiwi slices in place.

Step 10: Attach Kiwi Slices to the Cup
Now, carefully press the kiwi slices against the inside of the cup, starting from the bottom and working your way up. Overlap them slightly but keep it neat—this creates that beautiful green border! If a slice tears, just use another one; it’ll still look great.

Step 11: Fill the Cup & Add Toppings
Pour the rest of the matcha yogurt into the cup, filling it almost to the top. Then, sprinkle on some kiwi chunks (from the leftover kiwi after slicing—save those!). Finally, drop a few dollops of the reserved matcha yogurt sauce on top—this is our “decoration cream”!

Step 12: Add the Final Decorative Touch
Take a toothpick and gently drag it through the matcha yogurt sauce on top, creating swirly patterns. It’s like magic! No artistic skills needed—just a continuous line, and you’ll get those cool, marble-like designs. So easy and so satisfying!

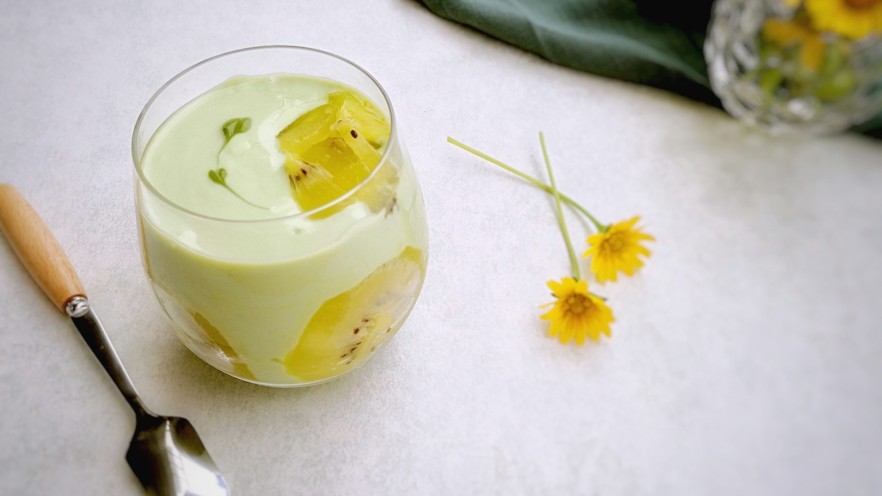
Step 13: Enjoy Your Masterpiece!
Ta-da! Your Kiwi Matcha Yogurt Cup is ready to drink (or eat!) in style. It’s so pretty, so creamy, and that perfect mix of sweet, tangy, and slightly bitter matcha. I swear, this is the ultimate “lazy summer dessert”—no baking, no mess, and you’ll feel like a pro chef! 🍵🥝
Pro Tips for Perfection: These Make All the Difference!
Okay, let’s spill my secrets to making this cup 100% perfect every time. I’ve made this recipe a hundred times, so these are all hard-earned wisdom! 😊
- Matcha Quality Wins
Uji Matcha powder is a game-changer! The “Isuzu” grade has that bright green color and complex flavor that makes the yogurt cup pop. If you’re on a budget, look for “Wakunada” or “Amano” matcha—still good, just a bit milder. Avoid cheap, grocery-store matcha (it’s usually dyed or has a weird aftertaste).
- Yogurt = Creaminess + Tang
Use fermented, unsweetened yogurt (like Greek yogurt or plain cup yogurt). It’s thicker and tangier, which helps the layers stay together and adds that zesty kick. If you use sweetened yogurt, you’ll end up with a cloyingly sweet cup—yikes! If making your own yogurt, add a pinch of sugar if you want (but kiwi is sweet enough!).
- Kiwi: Not Too Soft, Not Too Hard
A ripe kiwi is key! If it’s too soft, the slices will crumble when you press them to the cup. If it’s too hard, they’ll be tough and chewy. Pick kiwis that give slightly when pressed but aren’t mushy—you’ll get the best texture for slicing.
- Even Slices = Happy Layers
When slicing the kiwi, aim for 1-2mm thick slices (use a sharp knife!). Even thickness ensures the kiwi sticks evenly to the cup walls, so your cup looks neat and Instagram-worthy. If you’re messy with slicing, just use the leftover kiwi as a topping—still delicious!
- Prep Ahead & Store Smart
If you want to make this ahead, layer it up to 24 hours before eating and keep it in the fridge. The kiwi might soften a bit, but the matcha yogurt will stay fresh. Add a fresh dollop of matcha sauce before serving to refresh the top layer!
There you have it—your go-to summer dessert! Whether you’re treating yourself after a long day, impressing friends at a BBQ, or just craving something cool, this Kiwi Matcha Yogurt Cup is the answer. It’s low-calorie, high in protein, and tastes like a million bucks. Let me know in the comments how it turns out—I’d love to see your creations! Happy sipping (or eating)! 🍵🥝
kiwi matcha yogurt cup, summer dessert recipe, easy no bake dessert, healthy summer snack, uji matcha powder, fermented yogurt, homemade yogurt cup, refreshing kiwi dessert, matcha yogurt recipe, no sugar dessert
 – Fluffy, Moist, and Easy to Make")


 – Easy Recipe for Soft, Chewy Treats")

: A Step-by-Step Guide with Tips")
")

