


Introduction: Why These Cookies Are a Winter Must-Have
Oh my gosh, winter is here, and my stomach is already screaming for snacks! There’s nothing cozier than curling up with a cup of hot cocoa and something sweet, right? I’ve tried all sorts of winter treats, but two-tone apple jam cookies? They’re next-level. The crispy outside, the soft, buttery inside, and that burst of apple jam in every bite? Total game-changer. I swear, once you make these, you’ll be hooked – they’re gone in seconds at my place! Let’s get into how to make them (and trust me, it’s easier than you think).
Ingredients: Let’s Gather the Goods
First, grab your ingredients. I’ve listed them below with my personal notes to make it easy (no guesswork here!):
- 170g all-purpose flour (low-gluten flour works best for that crumbly texture – skip if you don’t have it, but all-purpose is fine!)
- 75g unsalted butter – softened, not melted! Soft butter creams better, making the dough fluffy. Pro tip: If it’s freezing, leave it out for 30 mins or soften in a bowl over warm water (but don’t melt it!)
- 60g granulated sugar (adjust if you’re not a sweet-tooth, but 60g is just right for me)
- 40g whole egg – I used 2 small eggs (about 50g with shells), so measure your eggs if they’re big or small!
- 1g red yeast rice powder – this gives the pink color! If you don’t have it, use a pinch of red food coloring (but natural is better, in my opinion)
- 80g apple jam – homemade is so much better! I’ll share a quick jam recipe later, but store-bought works too if you’re in a rush.
Step-by-Step: Let’s Bake Those Cookies!
Okay, let’s get our hands dirty (in a good way)! Follow these steps carefully, and you’ll be munching in no time. I’ve added little pro tips in bold – you don’t want to skip these!
Step 1: Prep Your Ingredients
First, measure everything out. The eggs: if yours are small, 2 eggs with shells might be ~50g, so weigh them to be safe. If you’re using a scale, great! If not, just grab a mixing bowl and get ready to cream butter and sugar.

Step 2: Cream the Butter and Sugar
Softened butter is key here! Pop that butter into a bowl and beat it with the sugar (by hand or mixer – mixer is faster, but hand-beating works too, just take a minute). Beat in 2 batches of sugar: first half, mix, then the second half. Keep going until it’s pale, fluffy, and smooth – no gritty sugar left! Trust me, this step makes the cookies crispy later.

Step 3: Add the Egg
Now, add the egg in 2 parts. Mix well after each addition – you want the egg to fully incorporate into the butter-sugar mixture. It should get nice and fluffy, almost like a light mousse. If it looks curdled, don’t panic – just mix more. This makes the dough tender, promise!

Step 4: Split the Flour and Add Red Yeast Powder
Take the flour and split it into 2 equal parts. In one part, add the red yeast powder and mix it in until smooth. Sift both flours (if you’re fancy) or just mix by hand – no need for sifting, but it helps the dough be extra smooth. This is how we get the two-tone effect!

Step 5: Combine Doughs
Now, add the red yeast flour and plain flour to the butter-egg mixture. Mix gently until everything comes together – no need to overmix! You’ll have two doughs: one plain, one pink. Keep them separate for now.

Step 6: Roll Out the Dough
Place each dough ball on a clean surface. Roll them out into sheets about 4mm thick – use a rolling pin and maybe a little flour to prevent sticking. Lay the dough between two sheets of plastic wrap to keep it clean, then roll. Once rolled, chill in the fridge for 30 minutes – this firms up the dough so it’s easier to cut later!

Step 7: Trim and Cut into Strips
Okay, time to cut! After chilling, take the dough sheets out and trim the edges to make them square (or rectangle – whatever shape you want). Use a sharp knife and a cutting board (under your silicone mat!) to avoid cutting the mat. Then, cut the dough into 8mm wide strips – these are the “braiding” parts!

Pro tip: Save the trimmings! I usually roll them into a ball and make extra cookies with them – no waste, right? Those little scraps are perfect for patching up later, too.
Step 8: Braid the Strips
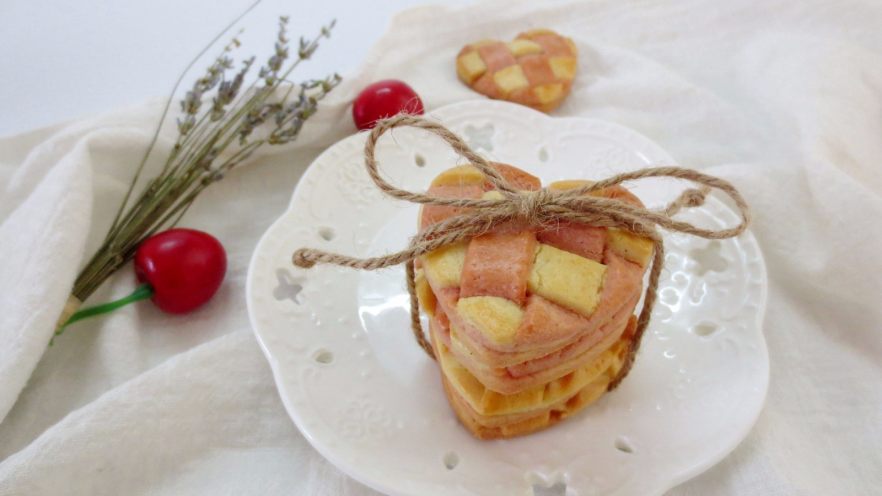
Now, the fun part: braiding! Take all the strips from the plain dough and lay them out in a row (these are the “odd” strips). Then, lay a horizontal strip across them – this is the first cross strip. Next, lay all the pink strips out in a row, then place the second horizontal strip on top. Repeat until you have a little braid. It’s like making a mini rug with cookie dough! Be gentle – you don’t want the strips to separate.

Once braided, trim the ends to make it even, then set it aside. Repeat with the other dough if you have extra, but we’ll use this braid for a base cookie.
Step 9: Cut Out Shapes and Assemble
Use a cookie cutter (or a glass, if you’re lazy like me) to cut out shapes from the braided dough. I use a 5cm circle, but any shape works! Place these on a baking sheet lined with parchment paper. Then, take the remaining dough scraps (the trimmings we saved!) and roll them into a flat sheet, cut more shapes, and place them on the sheet too.

Now, take a small bowl of apple jam (about 1 tsp per cookie) and place a dollop on each shape. Then, take another braid shape and place it on top – gently press the edges together so the jam doesn’t leak out. This is the “top” of the cookie!
Step 10: Bake and Cool
Preheat the oven to 160°C (320°F). Brush the top of the cookies with a little egg wash (1 egg yolk mixed with a splash of water – optional, but makes them shiny!). Then bake for 20-22 minutes. Watch carefully – the edges should be golden brown, and the jam might bubble a bit. If it’s too pale, let it go a few more minutes, but don’t overbake!

Once done, let them cool on the tray for 5 minutes, then transfer to a rack. They’ll be soft when warm, but get crispy as they cool. Yum!
Pro Tips for Cookie Perfection
Here are my personal hacks to make these cookies even better – you’re welcome!:
- Butter temperature matters: Softened butter (not melted!) is key for that perfect fluffy texture. If it’s too soft, the dough might spread too much; too hard, it won’t cream properly. Aim for room temp where it’s easy to press with a finger.
- Chill dough before cutting: This is non-negotiable! Chilling firms up the dough so strips stay straight and don’t crumble. I once forgot and the strips stuck together – not fun. Save yourself the frustration!
- Homemade apple jam hack: If you’re making your own jam, boil 500g apples (diced), 100g sugar, and 1 tbsp lemon juice for 15-20 mins until thick. No pectin needed – trust me, it’s so good!
- Swap red yeast for fun colors: If you don’t have red yeast, use 1 tsp matcha powder (green), 1 tbsp cocoa powder (brown), or even turmeric (yellow) for a rainbow! Experiment and have fun.
- Oven differences: Every oven is weird! I have a tiny toaster oven that runs hot, so I bake at 150°C for 18 mins. Check at 15 mins and adjust if needed – no two ovens are the same!
Final Thoughts: Your New Winter Favorite
These two-tone apple jam cookies are the ultimate winter snack. Crispy on the outside, chewy in the middle, and that sweet-tart apple jam oozing out? They’re like a warm hug in every bite. I promise, once you make these, you’ll be making them every weekend. Tag me if you do – I want to see your cookie art! Happy baking, and stay cozy this winter!

")


")


")