

 & Red Dates Pork Bone Soup Recipe | Nourishing Chinese Wellness Dish")

: The Viral Sweet Treat Taking Foodie Circles by Storm")
Cloud Cake (Xue Hua Su): The Viral Sweet Treat Foodies Can’t Get Enough Of
Hey everyone! I’ve been holding out on this recipe for way too long—sorry about that! I wanted to make sure I could share a foolproof version so everyone can nail this viral cloud cake (aka xue hua su). Let’s dive in!
First Things First: Ingredients That Make or Break Your Cloud Cake
Let me spill my go-to picks—these made my cloud cake turn out chef’s kiss:
- Marshmallows: I swear by Wujidao marshmallows. They melt super smoothly, no weird clumps!
- Nuts: Gentleman’s salted mixed nuts are my ride-or-die. The salt cuts the sweetness perfectly, and they’re tasty on their own too—win-win!
- Cookies: Skip soda cookies, trust me. I use Xiao Qifu round cookies (those buttery, crumbly ones). There are tons of brands, so pick whatever’s easy to find!
- Milk Powder: Devondale full-fat milk powder for that rich, creamy flavor. If you’re watching sugar, grab the unsweetened version—still delicious!
Pro tip: The total of dried fruit + nuts should be around 120g, but feel free to mix and match (dried cranberries, raisins, walnuts—your call!).
Ingredient Breakdown for 3 Irresistible Flavors
Why stick to one when you can have three? Here’s what you need for each:
Original Flavor
- Marshmallows: 150g
- Butter: 40g
- Milk powder: 45g
- Dried cranberries: 60g
- Mixed nuts: 60g
- Xiao Qifu cookies: 180g
- Surface powder: 15g milk powder (adjust if needed)
Matcha Flavor
- Marshmallows: 150g
- Butter: 40g
- Milk powder: 45g
- Matcha powder: 7g
- Dried cranberries: 60g
- Mixed nuts: 60g
- Surface powder: 15g milk powder + 3g matcha powder
Cocoa Flavor
- Marshmallows: 150g
- Butter: 40g
- Milk powder: 45g
- Cocoa powder: 10g
- Dark chocolate (65%+ cocoa): 15g
- Dried cranberries: 60g
- Mixed nuts: 60g
- Surface powder: 15g milk powder + 7g cocoa powder
Step-by-Step Guide: Let’s Make Cloud Cake!
The process is similar to nougat, so if you’ve made that before, you’re halfway there! Let’s go step by step:
Prep Work (Super Important—Don’t Skip This!)

1. Gather all your ingredients first! Winter’s cold, so you don’t want to be scrambling mid-melt—trust me, I’ve been there.

2. Toss the cookies, cranberries, and mixed nuts together in a bowl. Want the nuts to mix better? Pop them in the oven at 100°C (212°F) to keep them warm—game-changer!

3. Grab your tools: a non-stick pan (absolute must), non-stick baking tray, disposable PVC gloves, parchment paper, a flour sieve, and a silicone spatula. No non-stick? Line everything with parchment paper—you’ll thank me later.
The Melting & Mixing Magic

4. Melt the butter in the non-stick pan over low heat until it’s liquid. Don’t let it burn!

5. Add the marshmallows and stir constantly until they melt. Pro hack: Cut the marshmallows into small pieces first—they’ll melt way faster!

6. Once the marshmallows are liquid: If you want softer cloud cake, add the milk powder right away. If you prefer it a bit firmer (my favorite!), stir for 10-15 more seconds before adding the powder.

7. Add the milk powder (and matcha/cocoa powder for flavored versions) and turn off the heat or keep it on the lowest setting.

8. Stir until the powder is fully mixed into the marshmallow butter mix—no lumps allowed!
Bring It All Together

9. Dump in the cookie-nut-cranberry mix and give it a quick stir—you don’t need to overdo it yet.

10. Use your silicone spatula to gather all the ingredients into a big clump, then transfer it to your prepared baking tray.

11. Pop on those gloves! Fold and pull the marshmallow mix over the cookies and nuts until everything is coated. This part is messy, but fun—just keep folding!

12. Once everything’s coated, press the mixture flat in the tray. Use your hands or a spatula to get it even.

13. For a super smooth top, use a rolling pin (or the bottom of a square pan) to flatten it out. This makes cutting way easier later!
The “Snowflake” Finish

14. While the cloud cake is still warm, sift the surface powder over the top—that’s where the “snowflake” look comes from! It adds extra flavor and prevents sticking. Flip it over and sift another layer on the other side too.

15. Grab a sharp bread knife or kitchen knife and cut it into your favorite shapes—squares, rectangles, whatever! Just make sure the knife is sharp so you don’t squish the cake.

16. Ta-da! Your cut cloud cake is ready to eat (or share—if you’re feeling generous).
Flavor-Specific Tips
The steps are almost the same for all three flavors, but here are the tiny tweaks you need:
17. For matcha flavor: Mix the matcha powder with the milk powder and sift them together before adding to the marshmallow mix. Do the same for the surface powder!
18. For cocoa flavor: Add the dark chocolate along with the marshmallows so it melts together—this gives it that rich, chocolatey kick!
Final Touches & Fun Ideas
19. Look at these three flavors—original, matcha, and cocoa! They’re so pretty together, right?
20. Cut them up and arrange them on a plate—perfect for snacking or gifting.
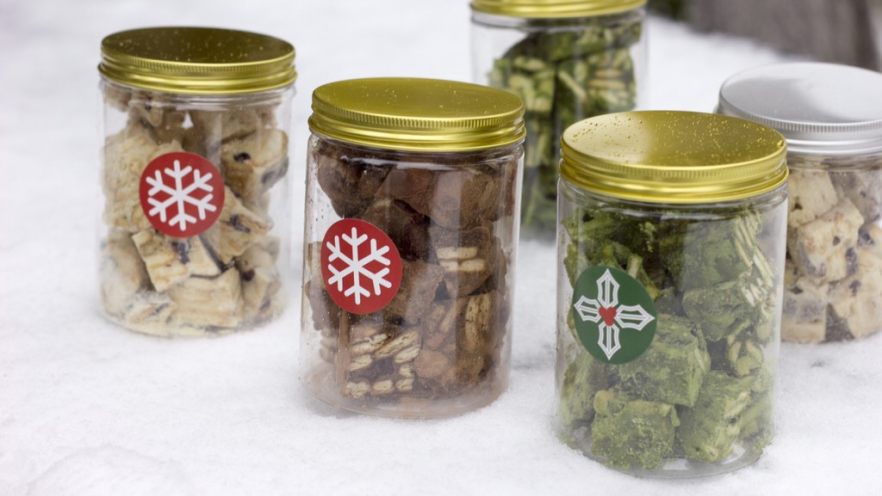
21. Pop them in a cute jar and give them to friends or family—they’ll love this homemade treat!
22. Or use small wrappers to individualize them—great for parties or as little gifts!
23. How cute does this look in the snow? Total winter vibe!
24. I really hope you love this cloud cake recipe—let me know how yours turns out!
Quick Tips to Avoid Disasters
I’ve already dropped most tips in the steps, but just in case:
- Use non-stick everything—seriously, no stuck cloud cake here!
- Work fast once the marshmallows are melted—they set quickly!
- If you’re new, start with the original flavor—it’s the easiest to master.
Got questions? Drop a comment below—I’m here to help!


 – Perfect Winter Side Dish to Pair with Rice Porridge")


