


")
How to Make Perfect Honey Glazed Coke Chicken Wings (My Go-To Recipe for Juicy, Crispy Bites!)
Okay, let’s be real—who hasn’t made basic Coke chicken wings at some point? They’re like the gateway drug to cooking for most of us, right? A friend hit me up yesterday, panicking because she’d bought a mountain of chicken wings and had no clue what to make. I thought for 5 whole seconds (total pro move) and went, “DUH—honey glazed Coke wings!” But wait, why settle for the boring version when you can make it taste like it came from a fancy restaurant? Let’s dive in—this is my secret recipe that’ll make your wings so juicy, your friends will beg for the recipe (and maybe even a second helping).
What You’ll Need for This Magic (Ingredients List)
First things first—grab these ingredients. No fancy stuff, promise. Just things you probably already have in your kitchen (or can pick up at the grocery store in 5 minutes):
- 6 chicken mid-wings (trust me, mid-wings are the juiciest—skip the weird tiny ones)
- 1 bottle of Coke (I use Pepsi, but Coke works too—if you like extra sweet, go for Coke)
- 10 small rock sugar cubes (or brown sugar if you’re out—don’t judge)
- 2 slices of licorice root (yes, licorice! It’s the secret weapon for flavor and cutting grease)
- 1 bay leaf (adds that warm, cozy vibe—you know the one)
- 5g of salt (not too much, not too little—just right)
- 10g of cornstarch (game-changer for crispiness)
Step-by-Step: From Raw Wings to Glazed Perfection
Let’s get cooking! I’m breaking this down into super easy steps—no fancy chef skills required. Just follow along, and you’ll be golden.
1. Prep All Your Ingredients First (Pro Tip: Mise en Place Saves Lives)
Before you even touch the wings, get everything laid out. Trust me—nothing’s worse than realizing you forgot the licorice root mid-cooking. So grab your wings, Coke, sugar, spices, salt, and cornstarch. Lay ’em out like you’re hosting a tiny cooking party. Done? Great—let’s move on.

2. Marinate the Wings (No Knife Cuts—Yes, Really)
First, wash those wings and pat them dry with a paper towel (or shake the hell out of ’em if you don’t have towels—no judgment). Now, here’s the big secret: don’t cut the wings. I know everyone says to slice them for flavor, but that’s a trap! Cutting makes the wings lose moisture, turning them dry and chewy. Gross. Instead, massage the salt into the wings. Like, really get in there—rub that salt all over. Let ’em sit for 5-10 minutes. The salt breaks down the meat fibers, making it super tender and juicy. Magic, right?

3. Dry, Dry, Dry (Or Shake Like a Maniac)
Okay, after marinating, you need to dry the wings again. Why? Because if they’re wet, they’ll splatter oil all over your stove (and your shirt—trust me, I’ve been there). Use paper towels to pat them dry, or if you’re lazy (like me), shake them over the sink until no more water drips. Done? Good—on to the next step.

4. Coat with Cornstarch (Crispiness 101)
Now, dust the wings with cornstarch. Just a light coat—don’t drown them. Why cornstarch? Two reasons: 1) It absorbs extra moisture, so no more oil splatters. 2) At 80°C (175°F), cornstarch gets crispy and locks in the wings’ juice. So you get a crispy outside and a juicy inside. Chef’s kiss.

5. Heat the Pan (Hot Pan = No Sticking)
Here’s another pro tip: heat the pan first. Like, really hot. How do you know? Put your hand above the pan—if it feels like a tiny sun is beating down on it, it’s ready. Then add oil. If the pan’s not hot, the wings will stick, and you’ll end up with a mess. Trust me—wait for the pan to heat up. It’s worth it.

6. Fry the Wings (One at a Time—Don’t Crowd the Pan)
Now, add the wings to the pan—one at a time, skin side down. Don’t dump all of them in! Crowding the pan makes the oil temperature drop, and the wings won’t get crispy. If you’re scared of oil splatters, turn the heat down to medium-low, but once all wings are in, crank it back up to high. You want that crispy skin fast.

7. Flip When Ready (No Forcing—Patience Pays Off)
Wait until the wings can move easily before flipping. If you try to flip them too soon, you’ll tear the skin and lose all that juicy moisture. How do you know? Gently wiggle a wing with a spatula—if it slides, it’s time to flip. Keep the heat high the whole time—this locks in the juice and makes the skin crispy.

8. Flip and Fry the Other Side
Once you flip ’em, let the other side cook until it’s golden too. You don’t need to cook them all the way through—just until the skin is crispy and the outside is golden. We’ll finish cooking them later with the Coke glaze. So don’t overcook now!

9. Another Quick Fry (Just to Be Safe)
Give ’em one more quick fry on each side—just 30 seconds or so. This ensures the skin is super crispy, and the outside is sealed. Then take them out and set them aside. They should look golden and crispy—like little golden nuggets of joy.

10. Take ’Em Out (Don’t Overcook—Juice = Happiness)
Once the wings are golden all over, take them out of the pan. Don’t leave them in too long—you want the inside to be juicy, not dry. Set them on a plate with paper towels to drain excess oil. Good job—you’re halfway there!

11. Make the Sugar Glaze (Don’t Burn the Sugar—Easy Peasy)
Now, use the same pan (no need to clean it—hello, flavor!). Add the rock sugar and turn the heat to low. Stir it around until it melts. Don’t panic if it clumps a little—just keep stirring. The goal is to get a light caramel color. If you’re scared of burning it, just stir for 30 seconds and stop. It doesn’t need to be dark—just a little color to make the wings look amazing.

12. Add the Wings (Quickly—Sugar Burns Fast)
As soon as the sugar is melted, add the wings back to the pan. Toss them quickly to coat them in the sugar. If you wait too long, the sugar will burn, and your wings will taste like burnt candy (yuck). So move fast! The wings will already look shiny—wait until you see the next step.

13. Look at That Shine! (Sugar = Sparkly Wings)
See how shiny they are? That’s the sugar working its magic. The wings will look like they’re glowing—perfect for Instagram (or for impressing your friends). Just wait until we add the Coke—this is about to get even better.

14. Pour in the Coke (Enough to Cover the Wings)
Now, add the Coke. Pour enough so it’s level with the top of the wings—don’t drown them, don’t skimp. I use Pepsi because I like the slightly less sweet taste, but Coke works too (if you’re into that extra sweetness). Pro tip: Don’t use diet Coke—trust me, it tastes weird. Regular Coke is the way to go.

15. Add Spices and Simmer (Flavor Bomb Time)
Throw in the licorice root and bay leaf. These are the secret weapons! The licorice adds a subtle sweet-spicy flavor that cuts through the grease, so you can eat 3 wings without feeling sick. The bay leaf adds that warm, cozy taste—like a hug in your mouth. Stir everything together, then cover the pan and let it simmer on low for 15 minutes. Set a timer—you don’t want to forget this step!

16. Check the Sauce (It Should Be Half Gone)
After 15 minutes, take off the lid. The sauce should have reduced by half—thick and syrupy. If it’s still too runny, let it simmer for a few more minutes (uncovered this time). If it’s already thick, you’re good to go!

17. Thicken the Sauce (Stir Fast—Don’t Let It Burn)
Turn the heat up to high and stir the wings constantly. You want to thicken the sauce until it’s sticky and coats the wings. Stir fast—this is when the sauce can burn, so don’t walk away! Once the sauce is thick, take the pan off the heat. Your wings are done!

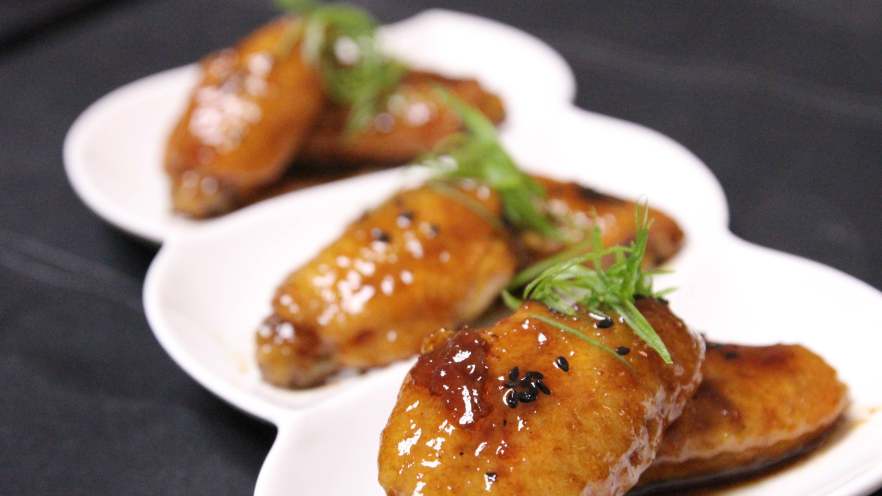
18. Plate It Up (Make It Look Fancy—Even If It’s Easy)
Now, plate the wings. Use a long, pretty plate (because presentation matters, even if it’s just for you). Sprinkle a little toasted sesame seeds on top for extra crunch, and add some fresh green onions for color. Boom—you’ve got a dish that looks like it came from a fancy restaurant, but you made it in 30 minutes. Impressive, right?

19. Enjoy! (Hot = Best)
And that’s it! Your honey glazed Coke wings are ready. Eat them hot—they’re way better when they’re fresh. The skin is crispy, the inside is juicy, and the glaze is sweet, tangy, and just a little spicy from the licorice. Trust me—your friends will be begging for the recipe. I know mine did!

So that’s my go-to recipe for honey glazed Coke wings. It’s easy, it’s quick, and it’s way better than the basic version. If you try it, let me know how it turns out! I’m always on the lookout for new easy recipes—next time, maybe something with tofu? Or maybe a fancy pasta dish? Who knows—stay tuned for more simple, delicious recipes that don’t require a culinary degree. Happy cooking!


: My Homemade Recipe for Safe, Delicious Summer Eats")


")


 Recipe: A Light Twist on a Classic Dish")