Hey guys! Let me tell you a little story: I’ve been wanting to make tiramisu forever, but my family? They’re not into coffee or cocoa. Like, even the smell of coffee makes my little sister wrinkly her nose, and chocolate? Forget it. So for years, I’ve been stuck with “classic” desserts that just… didn’t work for us. But then! I found this Matcha Tiramisu recipe in a book by Fumiko Fukuda (her “I Love Japanese Western Confections” book is chef’s kiss), and I tweaked it a tiny bit to make three 450ml boxes. No coffee, no cocoa—just green tea, cream, and a whole lot of love. Perfect for anyone who loves tiramisu but can’t stand those traditional flavors! Let’s dive in!
First, let’s get the ingredients together. You’ll need:
- 10g high-quality matcha powder (the star for that vibrant green color and earthy flavor—don’t skimp here!)
- 25g granulated sugar (for the matcha syrup)
- 100g hot water (to dissolve the matcha and sugar)
- 5g rum or brandy (optional, but adds a subtle boozy kick—skip if you want non-alcoholic)
- 2 egg yolks (for the creamy base)
- 30g sugar (for the egg yolks)
- 50g plain yogurt (I used homemade thick yogurt—you can use store-bought, just avoid watery ones!)
- 200g mascarpone cheese (the creamy, tangy base of the classic tiramisu)
- 100g heavy cream (to lighten the mascarpone and add fluffiness)
- 2 egg whites (for the meringue layer—so it’s not too dense!)
- 30g sugar (for the egg whites)
- 18 ladyfinger cookies (or savoiardi—you’ll need enough to cover the bottom of the boxes)
- A pinch of matcha powder (for dusting on top at the end)
Okay, let’s start with the most important part: the matcha syrup. This is what gives the cake its signature sweet, green flavor without any coffee bitterness.
Step 1: Make the Matcha Syrup (Critical for That Matcha Kick!)
I’ll be honest—this syrup is so important. It’s what makes every bite taste like a little green heaven. Let’s get started!
1. Grab a small bowl and add the 10g matcha powder. (See the first image below to visualize this green goodness!) 
2. Stir in the 25g sugar. It might look clumpy at first, but we’ll fix that with the hot water! 
3. Now, slowly pour in the 100g hot water—don’t dump it all at once! If you do, the matcha will clump into gross green blobs, and we don’t want that. Instead, add half the hot water first and whisk like crazy. 
4. After the first half dissolves, add the remaining hot water slowly, whisking continuously. The goal? A smooth, vibrant green liquid with no lumps. 
5. Let the mixture cool to room temperature. Once it’s warm but not hot, stir in the 5g rum or brandy. (Pro tip: If you’re making this for kids, skip the alcohol and add a splash of vanilla extract instead!) 
6. Transfer the syrup to a container and stick it in the fridge. This will keep it ready for when we need to soak the ladyfingers later. 
Okay, moving on to the creamy mascarpone layer—the part that makes this dessert so decadent.
Step 2: Whip Up the Creamy Mascarpone Base
This is where the magic happens. We’re making a dreamy, light cream that’s not too heavy but still rich. Let’s separate those eggs first.
1. Crack the 2 egg yolks into a bowl, leaving the whites for later. (Clean hands, please—no egg yolk sneaks into the whites!) 
2. Add the 30g sugar to the yolks and whisk until the sugar dissolves and the yolks turn pale yellow and fluffy. 
3. Now, pour in the 50g plain yogurt. I used homemade yogurt here, which was thick and creamy—so it added extra richness. If you’re using store-bought, make sure it’s not runny! 
4. Mix the yogurt into the yolks until everything is smooth. It should look like a pale yellow cream now. 
5. Add the 200g mascarpone cheese and whisk gently. You want to avoid lumps, so take your time here. The texture should become silky-smooth. 
6. Now, take the 100g heavy cream and whip it to “sixthly” beaten stage—meaning soft peaks form when you lift the whisk. Not too stiff, not too runny—just right! 
7. Gently fold the whipped cream into the mascarpone-yogurt mixture. This is like combining two best friends—don’t overmix, just until smooth and creamy. 
Now, the egg whites. They’ll add lightness to the cream so it’s not too dense.
8. In a clean, dry bowl, add the 2 egg whites and 30g sugar. Beat until they form soft, droopy peaks—this is “wet meringue,” not stiff! 
9. Slowly fold the egg whites into the mascarpone cream. Do this in parts to keep the airiness—fold a third, then a third, then the rest. It should look light and fluffy when combined. 
Step 3: Assemble the Matcha Tiramisu Layers
Now, let’s turn this into a cake! We’re using 450ml boxes, but you can use any container you like—ramekins, jars, or even a big cake pan.
1. Take one box and line the bottom with 6-7 ladyfingers. They should cover the base without overlapping too much. 
2. Quickly brush each ladyfinger with the matcha syrup—don’t soak them, just a light brush so they’re moist but not soggy. 
3. Spread about 1/3 of the mascarpone cream on top of the soaked ladyfingers. Smooth it out with a spatula. 
4. Repeat the process: add another layer of ladyfingers, brush with syrup, then spread cream. Do this two more times (so three total layers of ladyfingers, syrup, and cream). 
5. Once all layers are done, smooth the top with a spatula and cover the box tightly with plastic wrap. Pop it in the fridge for at least 4 hours—overnight is even better! This lets the flavors meld and the cream set. 
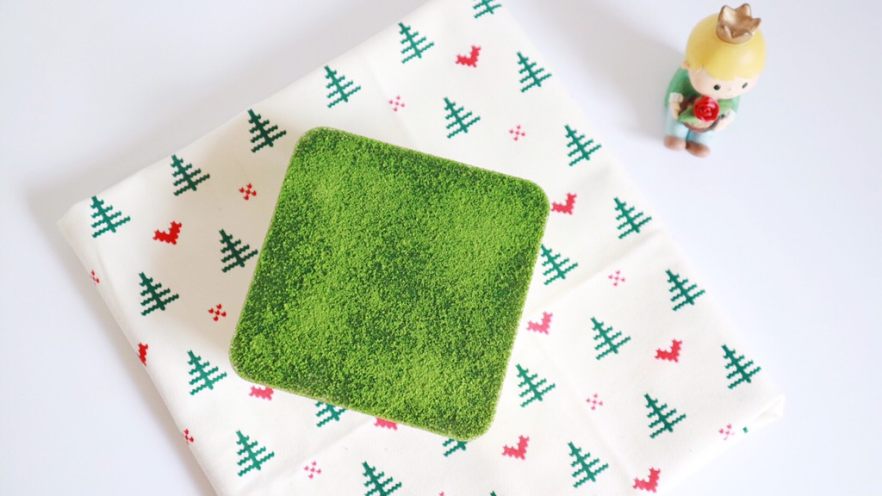
6. When you’re ready to eat, take it out of the fridge and dust the top with a generous pinch of matcha powder. Look at that beautiful green dusting! 
7. Cut into slices and enjoy! The texture is so creamy—just a perfect mix of sweet matcha and rich mascarpone. And since there’s no coffee or cocoa, even the pickiest family members will love it! 
Pro Tips for Success
- Storage: Keep leftovers in an airtight container in the fridge for up to 5 days. Let it sit at room temp for 10 minutes before eating to soften the cream.
- Adjustments: Want more matcha? Add a little extra matcha powder to the syrup (start with 10g and go up). For less sugar, reduce the sugar in the syrup and egg yolks by 5g each.
- Non-alcoholic Version: Swap rum/brandytomilk, orange juice, or skip it entirely! Kids will gobble this up.
- Leftover Ladyfingers: If you have extra ladyfingers, save them for a quick snack with milk—they’re still good!
This recipe is a game-changer for anyone who loves tiramisu but needs a coffee-free, cocoa-free alternative. The matcha adds a beautiful earthy flavor, and the mascarpone cream is so light you’ll forget it’s “healthy” (okay, maybe not healthy, but less heavy!). Plus, making it in boxes is perfect for portion control and gifting. I made three boxes—one for my family, one for friends, and one for myself (don’t judge!).
So, if you’re tired of classic tiramisu’s coffee and cocoa flavors, or if you want to surprise someone with a unique Japanese-Italian dessert, this Matcha Tiramisu is the recipe to try. It’s easier than you think, and the results are absolutely stunning. Let me know if you try it—I’d love to hear your thoughts!