


Why Scrambled Eggs with Green Peppers Is My Go-To Weeknight Meal
Let’s be real—weeknights are chaos. Between work, errands, and maybe chasing a kid (or a pet) around, the last thing I want is a complicated dinner. That’s why scrambled eggs with green peppers has become my ultimate lifesaver. It’s cheap, takes 10 minutes tops, and somehow feels way more satisfying than just plain eggs. Plus, it’s one of those recipes even my cousin who burns toast can nail. Win-win!
But wait, it’s not just about convenience. This combo is secretly a nutritional powerhouse. Let me break it down without sounding like a textbook—promise.
The Dynamic Duo: Eggs + Green Peppers
Eggs: The Unsung Hero of Your Fridge
Eggs are like the Swiss Army knife of food. They’re cheap (hello, $2 a dozen!), last forever in the fridge, and literally everyone can eat them—from fussy toddlers to my grandma who can’t chew tough meats. The best part? That protein punch. One egg has about 6 grams of high-quality protein, which keeps me full until lunch (no 3 PM vending machine runs here!). And while eggs get flak sometimes, they’re packed with vitamins like B12 and choline—stuff your body needs but doesn’t shout about.
Green Peppers: The Crunchy, Vitamin-Packed Sidekick
Green peppers? I used to think they were just the “boring” veggie in a stir-fry. Boy, was I wrong. They’re low in calories (like, 20 calories a cup—insane!), have zero fat, and are loaded with fiber. That fiber means I don’t feel hungry an hour after eating, which is a game-changer for late-night snack cravings. Oh, and they’re chock-full of vitamin C—way more than I thought! My mom swears they help her beat winter colds, and honestly? I’m starting to believe her.
Put them together, and you’ve got a meal that checks all boxes: protein from eggs, vitamins from peppers, and enough flavor to make you forget you’re eating “healthy.”
What You Need (No Fancy Groceries Required)
Let’s talk ingredients. The best part? You probably already have most of these in your kitchen. No trip to the specialty store for weird sauces—thank goodness.
- 1 green pepper (any size works—just adjust if you love extra crunch)
- 3 large eggs (or 4 if you’re extra hungry)
- 10 grams of garlic (that’s 2-3 cloves—garlic makes everything better, duh)
- 1 tablespoon of oyster sauce (trust me, it adds a savory kick—no fishy taste, I promise)
- A pinch of chicken bouillon (or salt if you don’t have it)
- A dash of salt (go easy—oyster sauce is salty too!)
- Some cooking oil (vegetable or canola works—nothing fancy)
Step-by-Step: Make Perfect Scrambled Eggs with Green Peppers
Okay, let’s get cooking. I’m going to walk you through this like we’re chatting in my kitchen—no confusing jargon.
Step 1: Prep Your Ingredients (5 Minutes Max)

Grab all your stuff and lay it out. This is called “mise en place” but let’s just call it “not running around the kitchen like a headless chicken.”
Step 2: Chop & Mix

First, the green pepper: cut off the top, scoop out the seeds (they’re bitter—yuck), and chop it into small chunks. Next, crack the eggs into a bowl and whisk them until they’re smooth (no streaks of white left!). Then mince the garlic—pro tip: if you hate chopping garlic, use a garlic press. I won’t judge.
Step 3: Cook the Eggs (The Fluffy Secret)

Heat a pan over medium heat and pour in a splash of oil. Wait until the oil is shimmering (not smoking—burned oil = gross eggs). Pour in the whisked eggs.

Here’s the trick to fluffy eggs: use chopsticks (or a fork) to stir them constantly as they cook. This breaks them into tiny, soft pieces instead of a big rubbery mess. Cook for 1-2 minutes until they’re just set—don’t overcook them! They’ll keep cooking a little after you take them out.

Scoop the eggs into a plate and set them aside. Easy peasy.
Step 4: Sauté the Peppers & Garlic

Leave the pan on (no need to wash it—less cleanup!) and add another tiny splash of oil. Toss in the minced garlic and sauté for 10 seconds until it smells amazing. Don’t burn it—burnt garlic is the worst thing ever.

Add the green pepper chunks and stir-fry for 2-3 minutes. You want them to be tender but still have a little crunch (called “al dente” for veggies). If they get mushy, they’ll taste like sad cafeteria food—we don’t want that.
Step 5: Combine & Season

Put the cooked eggs back into the pan with the peppers. Stir everything together gently—you don’t want to mash the eggs.

Add 1 tablespoon of oyster sauce. Stir it in—this is where the flavor magic happens. Then add a pinch of chicken bouillon and a dash of salt. Taste it first, though! Oyster sauce is salty, so you might not need extra salt.


Stir everything one more time to make sure the seasonings are evenly mixed.
Step 6: Serve & Enjoy!

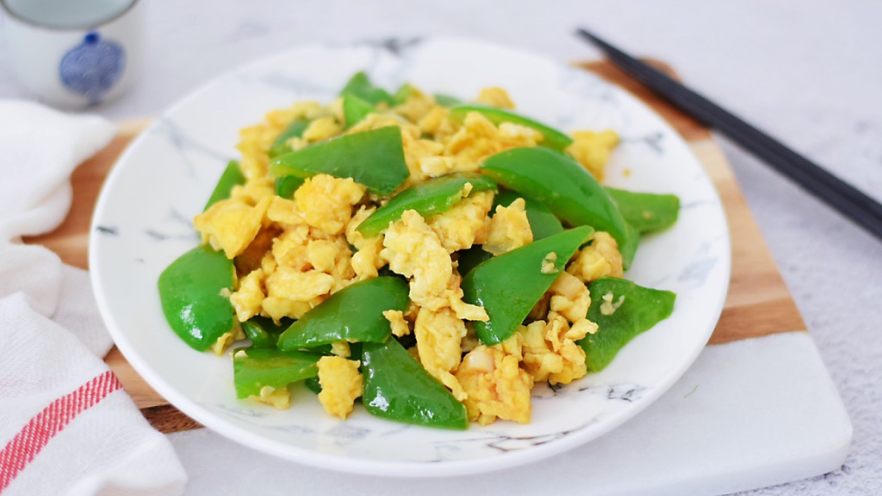
Turn off the heat and scoop your masterpiece onto a plate. That’s it—dinner is done!

I love eating this with a bowl of white rice, but it’s also great with toast or even on its own. My kid dips it in ketchup (don’t judge—kids will be kids), and it still tastes good.
Pro Tips for Making It Even Better
Want to switch things up? Here are my favorite hacks:
- Add a pinch of chili flakes for a little heat—perfect for spice lovers!
- Use red or yellow peppers instead of green for a sweeter flavor and a pop of color.
- Throw in a handful of spinach when you add the peppers—extra veggies, no extra effort.
- If you don’t have oyster sauce, use soy sauce and a tiny bit of sugar instead. It’s not the same, but it’s close.
Final Thoughts
Scrambled eggs with green peppers isn’t just a recipe—it’s a lifesaver for busy nights. It’s cheap, fast, tasty, and good for you. What more could you ask for? Next time you’re staring into your fridge wondering what to cook, give this a try. I promise you won’t regret it.
Now if you’ll excuse me, I’m off to make a batch for dinner. Happy cooking!

: My Homemade Recipe for Safe, Delicious Summer Eats")


")
")

