Introduction: When Your Cheese Cravings Are Stronger Than Your Willpower
Okay, let’s get real—who hasn’t stared at their fridge and thought, “I need something cheesy, NOW”? Whether you’re a cheese lover, a dessert fiend, or just someone who needs a little pick-me-up, this cream cheese cake is your new BFF. Think creamy, rich, and so tangy-sweet it’ll make you swear you’ve been missing this your whole life. And don’t worry about “cheese deficiency”—this isn’t magic, just pure, unadulterated cheese heaven in a pan. Let’s dive in!

Why This Cream Cheese Cake Is a Must-Try
First off, let’s talk about the vibe: this isn’t just a recipe. It’s a mood. Picture this: a buttery, crumbly base that melts like butter, topped with a silky, tangy filling that’s so smooth it might just make you cry (happy tears, promise). It’s the kind of dessert that makes you want to slow down and savor every bite, even if you’re shoveling it in like it’s the last slice of pizza on Earth. Pro tip: it’s perfect for beginners too—no fancy tools, just good old-fashioned kitchen know-how.
Ingredients You’ll Need (No, This Isn’t a Shopping Nightmare)
Let’s list everything clearly, so you don’t have to play “find the butter” mid-bake. Grab these before you start:
- 250g cream cheese (room temperature—trust me, this is non-negotiable for smoothness)
- 200g heavy cream (the richer, the better—no skimping here)
- 40g granulated sugar (adjust if you like it sweeter, but 40g is chef’s kiss)
- 2 egg yolks (not whole eggs—we want creaminess, not scramble)
- 10g cornstarch (this thickens the filling, so it doesn’t collapse)
- 10ml lemon juice (the zing that saves the day, trust me)
- 90g digestive biscuits (classic base; Oreos work too, we’ll cover that)
- 45g unsalted butter (melted, for that buttery crust)
Step-by-Step: Let’s Make This Cheesy Dream a Reality
Okay, let’s get our hands dirty (metaphorically). Follow these steps, and you’ll be a cream cheese cake pro in no time. No cutting corners—we’re aiming for perfection here!

Step 1: Prep All Ingredients (Chaos-Free Zone)
First rule of baking: lay out all ingredients before you start. Cream cheese at room temp, butter softened, digestive biscuits in a bag—you name it. No hunting for items while the oven’s preheating! Trust me, this saves sanity and prevents that “WHERE IS THE BUTTER?!” panic.

Step 2: Bag Those Biscuits (Time to Channel Your Inner Crusher)
Take your digestive biscuits and put them in a ziplock bag. Seal it tight, then grab a rolling pin (or the back of a spoon, if you’re lazy). Now, whack that bag like you’re trying to break up a fight—crush those biscuits into fine crumbs. Think “flour consistency,” not “cookie chunks.” The finer the crumbs, the crisper the base!

Step 3: Melt the Butter (And Mix It in)
Melt the butter—either in the microwave (1 minute, check halfway!) or on the stovetop (gentle double boiler). Once liquid gold, pour it into the biscuit crumbs. Stir like you’re trying to fix a broken heart—until everything sticks together. The goal? A crumbly yet sturdy base.

Step 4: Press the Base (Firmly, Please)
Take your pan (springform, cake tin, whatever you got) and press the biscuit-butter mixture into it. Use the back of a spoon or your palm—pat it down hard so it doesn’t fall apart later. Pop it in the fridge to chill for 15+ minutes while you make the filling. Patience, grasshopper!

Step 5: Whip the Cream Cheese to Silky Perfection
Take the softened cream cheese and beat it until it’s smooth—no lumps! If you have an electric mixer, use it (life hack: it’s faster). If not, a whisk works, but arm workout warning. Scraping the bowl is key—no cream cheese left behind!

Step 6: Add Heavy Cream & Sugar (Richness Alert)
Pour in the heavy cream and sugar. Beat on medium until combined—this lightens the cream cheese and adds that dreamy thickness. Taste here! If you want more sugar, add it now. Otherwise, enjoy the sweet-tart balance.

Step 7: Mix in Egg Yolks (One by One, Please)
Add egg yolks one at a time, mixing after each. Egg yolks = creaminess, so don’t rush. Mix until fully incorporated—no curdling allowed! If it looks off, keep mixing; the magic happens.

Step 8: Stir in Cornstarch & Lemon Juice (The Secret Sauce)
Cornstarch first—sprinkle it in and whisk until smooth. Then lemon juice! The zing cuts through the richness and makes the cake sing. The batter should look thick, like a creamy yogurt—perfect.

Step 9: Pour the Filling (Slow & Steady)
Take that chilled base out of the fridge and pour the filling on top. Smooth it with a spatula, then tap the pan on the counter to release air bubbles. Pro tip: leave ½ inch of space at the top—filling puffs up, and overflow is the enemy!

Step 10: Bake (Patience, Oven God)
Preheat oven to 180°C (350°F). Bake for 25 minutes—keep an eye on it! The center should jiggle slightly (not runny, not solid). If it browns too fast, cover with foil halfway through. You don’t want a burnt top!

Step 11: Cool & Chill (The MVP Step)
Let the cake cool for 10 minutes at room temp, then fridge for 1-2 hours (4+ hours is even better!). This is when the flavors meld, and the texture goes from “good” to “I need to hide this from my friends.”

Step 12: The Big Reveal – Eat It!
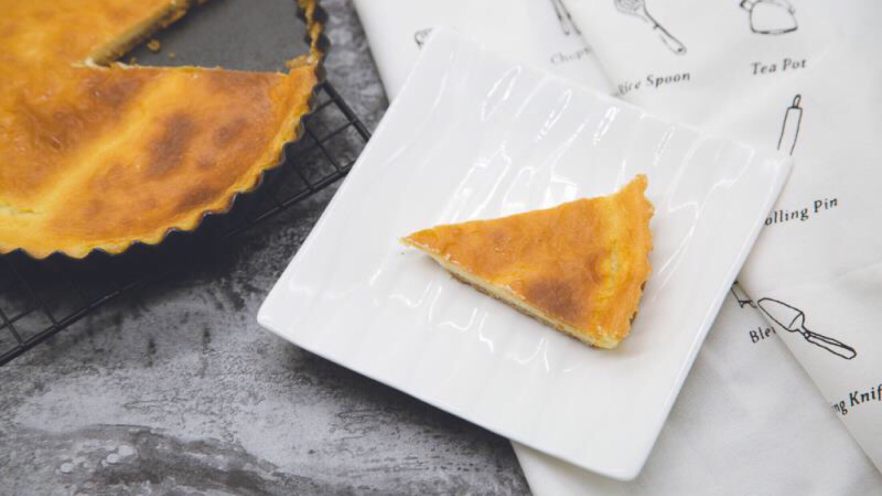
Take it out, slice with a sharp knife (wipe between cuts for clean edges), and enjoy! Serve with berries, whipped cream, or just by itself—no judgment here. This cake is self-contained magic.
Pro Tips: How to Avoid Cream Cheese Cake Disasters
Save yourself the stress! Here are my hard-earned hacks to make this cake flawless every time:
- Crumbly Base Hack: Crushed biscuits should be powdery fine—like dust, not chunky. More butter = sturdier base, so don’t skimp on the 45g!
- Oreo Swap: Love Oreos? Crush them instead! (Remove cream if you want less sweetness, or keep it for extra gooeyness.) Reduce sugar by 10g if you do this.
- Oven Warning: Fill the pan no more than ¾ full—the filling puffs! If it spills, clean it up fast, but trust me, prevention is key.
- Chill Time = Flavor Time: 1-2 hours minimum, but 4+ hours is next-level. The longer it chills, the silkier and more tangy it gets.
Final Thoughts: Why This Recipe Is Your Cheese-Deficiency Cure
So, you might be thinking, “I’m not into cream cheese.” But let me stop you right there—this isn’t just any cream cheese cake. It’s the kind that turns skeptics into addicts. The creamy, tangy, buttery goodness is a game-changer. Whether you’re hosting, treating yourself, or making a friend smile, this cake delivers.
Life is too short for boring desserts. Grab your ingredients, put on your favorite playlist, and bake away. Tag me when you do—I want to see your cheesy masterpiece. And remember: a little cream cheese never hurt anyone. In fact, it might just save your day.