






Why 12-Hole Hamburger Buns Are My Family’s Go-To
Let’s be real—some days, I just don’t have the energy to bake fancy pastries. But my kids? They’re always begging for fresh bread. That’s when these 12-hole hamburger buns save the day! They’re simple, versatile, and perfect for busy weeknights or lazy weekends. I’ve lost count of how many times I’ve pulled a batch out of the oven and watched them disappear in minutes. Seriously, they’re that good.
What I love most is their flexibility. Fresh out of the oven? Slather on some jam and call it a snack. Need a quick lunch? Toast one, add a patty, cheese, and veggies—boom, a mini hamburger that’s just the right size for little hands (or my own, let’s be honest). And if there are leftovers? Freeze ’em! When the craving hits, pop a bun in the oven for 3 minutes, and it’s like fresh-baked all over again. These buns have become a staple in my kitchen, and I’m guessing they’ll become yours too.
What You’ll Need (Ingredients & Tools)
Tools First: The Star of the Show
I use the Wono 12-hole cake mold (UN11005) for these buns. It’s the perfect size—each bun is small enough for a mini hamburger but big enough to hold all your favorite toppings. Plus, the non-stick surface makes cleanup a breeze (hallelujah, no scrubbing!).
Ingredients List (No Fancy Stuff, Promise)
- 120g milk (I use whole milk for extra softness, but skim works too)
- 50g egg (about one medium egg—save a little for brushing later!)
- 10g milk powder (adds a subtle creaminess)
- 20g granulated sugar (just a touch of sweetness, not too much)
- 1g salt (balances the sweetness—trust me, you need this)
- 250g high-gluten flour (this is key for that chewy bread texture)
- Yeast (I use instant yeast, about 3g—check the package for exact amounts)
- 15g butter (unsalted, softened—makes the buns super tender)
- 15g egg wash (the leftover egg from earlier, or a new one if you need more)
- A pinch of sesame seeds (optional, but adds a nice crunch)
Step-by-Step: Let’s Bake Those Buns!
Don’t worry—this recipe is totally doable even if you’re a beginner. I’ll walk you through each step, and I’ve included photos to make it even easier.
Step 1: Prep the Dough (Bread Machine FTW)

First, grab your bread machine (or a stand mixer if you don’t have one). Add the ingredients in this order: egg, milk, sugar, salt, and milk powder. Pro tip: Put the sugar and salt in separate corners—they don’t play well together if mixed too early!
Step 2: Add Flour & Yeast

Next, pour the high-gluten flour over the wet ingredients. Then, make a small indentation in the flour (don’t go all the way to the wet stuff!) and add the yeast. This keeps the yeast dry until the machine starts mixing, which helps it activate properly.
Step 3: Knead Until Smooth, Then Add Butter

Start the bread machine’s kneading program. Let it knead for about 10-15 minutes until the dough is smooth and starts to pull away from the sides. Then, add the softened butter. Trust me—adding butter later makes the dough super soft and elastic.
Step 4: Knead Until It “Gloves” Up (Window Pane Test)

Keep kneading on high speed for another 20 minutes. How do you know it’s done? Do the window pane test: take a small piece of dough, stretch it thin. If it’s translucent and doesn’t tear (or tears in a smooth circle), you’re good to go! This means the gluten is developed, and your buns will be chewy, not dense.
Step 5: First Rise (Let It Puff Up!)

Take the dough out of the machine, shape it into a ball, and put it back in the bowl. Cover with plastic wrap and let it rise until it’s double in size—usually about 1 hour. The perfect temperature is around 28°C (82°F). If it’s hot outside, pop it in the fridge to slow the rise (no one wants over-fermented dough!). If it’s cold, put it in the oven with a bowl of warm water and set the oven to 30°C (86°F)—that little trick works wonders.
Step 6: Punch It Down (Release the Air!)

Once the dough is puffy, flour your counter lightly. Take the dough out and gently press it to release all the air. Don’t knead it too hard—you just want to get rid of the big bubbles.
Step 7: Divide & Roll (Size Matters!)

Divide the dough into 12 equal pieces—each should be about 35g. Roll each piece into a smooth ball. This part is fun—my kids love helping with the rolling! Just make sure the smooth side is up and the seam is down (this keeps the buns looking pretty when they bake).
Step 8: Place in the Mold

Put each dough ball into the 12-hole mold. Leave a little space between them—they’ll expand during the second rise.
Step 9: Second Rise (Don’t Overdo It!)

Now, let’s do the second rise. Put the mold in the oven with a bowl of warm water (to keep the humidity up) and set the oven to 38°C (100°F). Let it rise for 20-30 minutes. Important: Don’t let it rise too long! If the buns get too big, they’ll bake into a giant clump, and no one wants that. Keep an eye on them—they should be puffy but still hold their shape.
Step 10: Brush & Preheat

Take the mold and water out of the oven. Preheat the oven to 180°C (350°F) (upper and lower heat). Brush the top of each bun with egg wash—this gives them that golden, shiny crust.
Step 11: Add Sesame Seeds (Optional)

If you love sesame seeds, sprinkle a little on top. It’s totally optional, but it adds a nice flavor and crunch.
Step 12: Bake Until Golden

Put the mold on the middle-lower rack of the oven and bake for 15-20 minutes. Every oven is different, so check them after 15 minutes. They should be golden brown on top. If they’re browning too fast, cover them with aluminum foil.
Step 13: Cool & Store

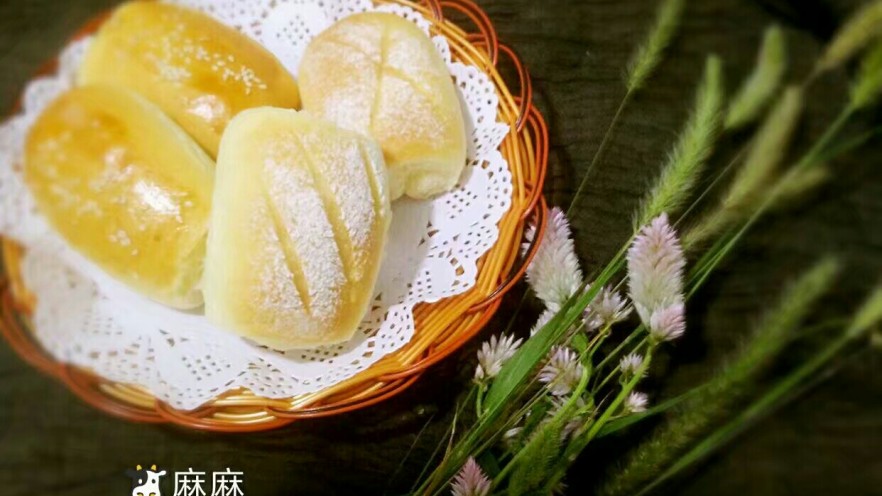
Take the buns out of the oven and let them cool to room temperature. Then, put them in a plastic bag to keep them soft. If you’re not eating them right away, freeze them! When you want one, just take it out, let it thaw a little, and bake for 3 minutes—good as new.
Step 14: Make Your Perfect Hamburger

Now for the fun part! Slice a bun in half, add your favorite toppings—fried egg, beef patty, cheese, ham, lettuce, tomato… whatever you like! These mini buns are the perfect size for a quick snack or a light meal. My kids love making their own “mini burgers” with these—messy, but totally worth it.
Pro Tips for Perfect Buns Every Time
I’ve made these buns so many times, I’ve learned a few tricks to avoid mistakes. Here are my top tips:
- Order matters! Always add wet ingredients first, then dry, then yeast. And butter goes in later—don’t skip that step.
- Watch the temperature! In summer, use cold milk or even ice cubes to keep the dough from rising too fast. In winter, use warm (not hot!) milk to help the yeast activate.
- Don’t over-rise! Both the first and second rises are important, but over-rising will make your buns taste sour and dense. Keep an eye on the clock.
- Smooth side up! When you roll the dough balls, make sure the smooth side is facing up. This gives the buns a nice, round shape when they bake.
Final Thoughts: Why These Buns Are a Game-Changer
These 12-hole hamburger buns are more than just bread—they’re a lifesaver for busy parents, a fun activity for kids, and a delicious addition to any meal. Whether you’re making mini burgers, slathering on jam, or just eating them plain, they’re sure to become a family favorite. So grab your mold, gather your ingredients, and let’s bake some buns—you won’t regret it!
![Homemade Cheesy Beef Burger Recipe: Better Than Fast Food! [Easy DIY Guide]](https://hearthsiderecipes.com/images/1713/pi0xfutbvri.jpg "Homemade Cheesy Beef Burger Recipe: Better Than Fast Food! [Easy DIY Guide]")





![French Savory Tart [Magic Cake] – Sugar-Free, Layered Delight (Forced My Friend’s Recipe to Obsession!)](https://hearthsiderecipes.com/images/5214/5mit2exneu1.jpg "French Savory Tart [Magic Cake] – Sugar-Free, Layered Delight (Forced My Friend’s Recipe to Obsession!)")