")


Why This Lazy Sweet and Sour Pork Ribs Recipe Is a Game-Changer
Let’s be real—some days, you crave that sticky, tangy, melt-in-your-mouth sweet and sour pork ribs, but the thought of marinating, frying, and juggling a million ingredients makes you want to order takeout instead. Enter: my lazy sweet and sour pork ribs recipe. No fancy techniques, no hours of prep, just 12 simple steps and a handful of pantry staples to get restaurant-worthy ribs on your plate in under 40 minutes. Trust me, this one’s a keeper for busy weeknights or lazy weekends when you don’t feel like slaving over the stove.
What You’ll Need (Super Simple Ingredients!)
First things first—let’s talk ingredients. The best part about this lazy recipe is that you probably already have most of these in your fridge or pantry. No weird sauces or hard-to-find spices here! Here’s the full list:
- 1 pound of pork ribs (I prefer baby back ribs for tenderness, but spare ribs work too—just cut them into smaller pieces)
- 4 slices of ginger (fresh is better, but dried ginger powder works in a pinch if you’re extra lazy)
- 1 tablespoon of cooking wine (Chinese rice wine is ideal, but regular white wine or even beer will do)
- 2 tablespoons of dark soy sauce (this gives the ribs that rich, deep color—don’t skip it!)
- 3 tablespoons of rice vinegar (black rice vinegar adds a nice depth, but white rice vinegar is totally fine)
- 4 tablespoons of white sugar (yes, 4—don’t worry, the vinegar balances the sweetness perfectly)
- A handful of roasted sesame seeds (for that extra crunch and nuttiness at the end)
Step-by-Step Lazy Sweet and Sour Pork Ribs (With Pics!)
Okay, let’s dive into the steps. I’ve broken it down with photos so you can follow along easily—no confusion, no stress.
Step 1: Sauté the Ginger Until Fragrant

Heat a little oil in a deep skillet or Dutch oven over medium heat. Toss in the 4 ginger slices and sauté for about 30 seconds until they smell fragrant. This step is key—it adds a warm, earthy flavor that cuts through the richness of the ribs.
Step 2: Add the Cleaned Ribs

Throw in your rinsed and patted-dry pork ribs. Make sure they’re in a single layer (if they’re crowded, they’ll steam instead of brown—so work in batches if needed). Let them cook undisturbed for a minute or two on each side.
Step 3: Stir-Fry Until Slightly Golden

Keep stirring the ribs until they turn a light golden brown all over. You don’t need to cook them through here—just get that nice sear to lock in flavor. It takes about 3-4 minutes total.
Step 4: Pour in the Cooking Wine

Add 1 tablespoon of cooking wine and stir everything together. The wine will sizzle and deglaze the pan, picking up all those browned bits (that’s where the flavor is!). Let it cook for 1 minute until the alcohol smell fades.
Step 5: Add Dark Soy Sauce for Color

Now, pour in the 2 tablespoons of dark soy sauce. Stir the ribs well so every piece is coated—you’ll see them turn that beautiful deep brown right away. So satisfying!
Step 6: Toss in the Rice Vinegar

Next up: 3 tablespoons of rice vinegar. Give it a good stir to mix with the soy sauce and wine. The tang here will balance the sweetness later—don’t skimp on it!
Step 7: Add the Sugar

Now for the star of the show: 4 tablespoons of white sugar. Sprinkle it evenly over the ribs—yes, that’s a lot, but trust the process. The sugar will caramelize a little and create that sticky glaze we all love.
Step 8: Stir Everything Until Combined

Stir the ribs vigorously for about 1 minute until the sugar dissolves completely and coats every piece. You don’t want any sugar clumps here—make sure it’s all mixed in.
Step 9: Pour in Hot Water to Cover the Ribs

Here’s a pro tip: use hot water instead of cold. Cold water will shock the meat and make it tough. Pour enough hot water to cover the ribs completely—this ensures they cook evenly and stay tender.
Step 10: Simmer and Then Reduce the Sauce

Cover the pan with a lid, turn the heat down to medium-low, and let the ribs simmer for 20 minutes. After 20 minutes, remove the lid, turn the heat up to high, and stir constantly as the sauce thickens. This is when the magic happens— the sauce will get sticky and glossy, clinging to every rib.
Step 11: Add Roasted Sesame Seeds and Serve

Right before you take the pan off the heat, sprinkle in the roasted sesame seeds and give everything a final stir. The sesame seeds add a nice crunch that pairs perfectly with the soft ribs.
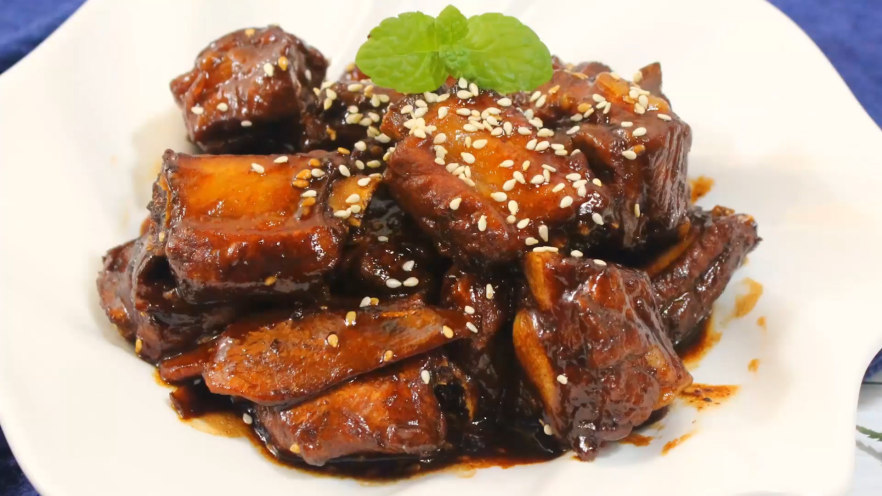
Step 12: Enjoy Your Lazy Sweet and Sour Pork Ribs!

Scoop the ribs onto a plate, drizzle any leftover sauce over them, and dig in! These ribs are sweet, tangy, tender, and so flavorful—you’ll forget they took less than 40 minutes to make.
Fun Fact: Different Styles of Sweet and Sour Pork Ribs
Did you know sweet and sour pork ribs vary by region in China? The version we’re making here is similar to the Shanghai or Zhejiang style— it’s a braised dish with a thick, glossy sauce. But in Sichuan, sweet and sour ribs are a cold appetizer! They’re fried until crispy, then tossed in a sweet-sour sauce with chili, making them spicy and crunchy. Both are delicious, but this lazy recipe leans into the braised, melt-in-your-mouth vibe because it’s way easier.
Final Tips for Lazy Cooking Success
- Use a non-stick pan: This prevents the ribs from sticking when you’re searing and thickening the sauce.
- Don’t overcook the ribs: 20 minutes of simmering is just enough—overcooking will make them fall apart.
- Taste as you go: If you like your ribs sweeter, add a little more sugar; if you want more tang, splash in extra vinegar.
 – A Comforting Home Recipe")


 with Vibrant Color, Rich Broth, and Tender Meat")

")