 Recipe for Lantern Festival")


: My Friend’s Request + 3 Easy Dishes You’ll Love")

Why Tangzhong Milk Toast Is a Game-Changer for Home Bakers
Let’s be real—there’s nothing sadder than a loaf of bread that turns rock-hard by day two. You spend all that time mixing, kneading, and waiting for it to rise, only to have it go stale before you can even finish half of it. But guess what? Tangzhong milk toast solves that problem! This magical technique uses a pre-cooked flour-water paste (the tangzhong) to lock in moisture, so your toast stays soft, fluffy, and even has that satisfying pull-apart texture for days. And don’t worry—it’s way easier than it sounds. I’m here to walk you through every step, no fancy baking degree required.
Ingredients You’ll Need
First things first: gather your supplies. I like to lay everything out beforehand (baker’s prep, duh) so I don’t forget anything mid-recipe. Here’s what you’ll need for both the tangzhong and the main dough:
Tangzhong (The Moisture-Locking Secret)
- 80g high-gluten flour (this is key for that chewy texture—don’t skimp!)
- 90g boiling water (make sure it’s rolling hot, not just warm)
Main Dough (The Bread Magic)
- 420g high-gluten flour
- 45g whole egg liquid (just crack an egg and measure it out—easy peasy)
- 210g milk (I use whole milk for extra richness, but skim works too)
- 6g salt (don’t skip this—it balances the sweetness!)
- 60g granulated sugar (gives a subtle sweetness without being overpowering)
- 5g high-sugar-tolerant yeast (super important—regular yeast might die from the sugar)
- 45g unsalted butter (softened, not melted—trust me on this)
Step-by-Step Tangzhong Milk Toast Recipe
Okay, let’s dive in! I’ve broken this down into simple steps with pics to help you along. Pro tip: I usually make the tangzhong the night before and stick it in the fridge—that way, I can jump straight to the main dough in the morning. Less stress, more bread joy.
1. Make the Tangzhong (Do This First!)

Take your 80g high-gluten flour and dump it into a small bowl. Pour in 90g of boiling water—yes, boiling! Stir it like crazy with a spatula until it’s all mixed into a smooth paste. No lumps allowed! Let it cool down to room temperature, then cover it with plastic wrap. If you’re prepping ahead, stick it in the fridge overnight. It’ll be thick and creamy when you’re ready to use it.
2. Mix the Main Dough (Minus Butter and Salt)

Get your bread machine bucket (or a big mixing bowl if you’re kneading by hand—bless your arms). Add all the main dough ingredients except the butter and salt. That means: 420g high-gluten flour, 45g egg liquid, 210g milk, 60g sugar, 5g yeast, and the tangzhong you just made. Dump everything in—no particular order, just don’t let the yeast touch the salt directly (it might kill it, oops).
3. Knead Until You Get a Rough Membrane

Pop the bucket into your bread machine and hit the “dough” setting. Let it knead for about 10-15 minutes until the dough is smooth and pulls away from the sides of the bucket. Now, do the membrane test: grab a small piece of dough and stretch it. If it forms a thick, ragged membrane that breaks easily? That’s your cue to add the butter and salt. This is called the “post-butter, post-salt method” and it helps the gluten develop better—who knew?
4. Knead Until You Get the Perfect Window Pane

Add the 45g softened butter and 6g salt to the dough. Let the bread machine keep kneading for another 10-15 minutes. Now for the fun part: the window pane test! Take a small piece of dough and gently stretch it. If you can make a thin, transparent membrane that doesn’t tear (even if you see light through it), you’re golden. This means the gluten is fully developed, and your bread will be super fluffy. If it tears easily, keep kneading a bit longer—don’t give up!
5. First Fermentation (Let It Grow!)

Let the dough stay in the bread machine (or transfer it to a greased bowl) for the first rise. How do you know it’s done? Dip your finger in flour and poke a hole in the center. If the hole doesn’t shrink back, it’s ready! If it springs back immediately, it needs more time. If it collapses? Oops, you over-fermented it—better luck next time. Pro tip: If it’s cold in your kitchen, stick the bowl in a warm oven (turn it off first!) with a bowl of hot water to speed things up.
6. Punch Down and Divide

Take the dough out of the bowl and give it a gentle punch to release all the air—this is called degassing. Now, divide it into 6 equal pieces. I use a kitchen scale to make sure each one is about 160g—uniformity helps the bread rise evenly. Don’t skip this step! If your pieces are different sizes, some will rise faster than others, and your loaf will look lumpy.
7. Rest the Dough (Important!)

Roll each piece into a smooth ball and place them on a baking sheet. Cover them with plastic wrap and let them rest for 10-15 minutes. This is called bench rest, and it relaxes the gluten so you can roll the dough out easily later. If you skip this, the dough will fight back when you try to shape it—trust me, I’ve been there. It’s like trying to fold a stubborn towel!
8. First Roll (Shape It Like a Tongue)

Take one rested dough ball and flatten it with your palm. Use a rolling pin to roll it into a long, thin shape—like a cow tongue (gross, but accurate). Don’t roll it too thin, though—you want it to have some thickness. Now, fold the top and bottom edges towards the center to make a rectangle. This helps create layers in the bread, which gives it that pull-apart texture.
9. Roll Into a Cylinder

Starting from the top of the rectangle, roll the dough tightly into a cylinder. Pinch the seam closed to make sure it doesn’t come undone. Place the cylinder seam-side down on the baking sheet and repeat with the other 5 pieces. Cover them with plastic wrap and let them rest for another 10-15 minutes—yes, another rest! The gluten needs to relax again after rolling.
10. Second Roll (Make It Tighter)

Take one cylinder and flatten it again with your palm. Roll it into a longer, thinner tongue this time—about 20cm long. Fold the top and bottom edges towards the center again to make a rectangle. This second roll makes the layers even tighter, which gives the bread that perfect crumb structure. You’ll thank me later when you see the pull-apart layers!
11. Final Roll Into a Cylinder

Roll the rectangle into a tight cylinder—tighter than the first time! Pinch the seam closed really well so it doesn’t open up during baking. Place the cylinder seam-side down on the baking sheet. Repeat with the rest of the dough pieces. You should have 6 neat cylinders ready to go into the toast pan.
12. Arrange in the Toast Pan

Take a standard 450g toast pan (the kind with a lid) and grease it lightly with butter or oil. Place the 6 cylinders into the pan—3 in the first row, 3 in the second. Make sure they’re touching each other—this helps them rise together and form a solid loaf. Don’t leave gaps between them! If they’re too far apart, the loaf will have holes.
13. Second Fermentation (Let It Rise Again)

Cover the pan with plastic wrap and let the dough rise again—this is the second fermentation. Place it in a warm, draft-free spot. If it’s winter, use your oven’s fermentation setting (if it has one) or preheat the oven to 35°C (95°F) for 1 minute, turn it off, and put the pan inside with a bowl of hot water. This creates a warm, humid environment that’s perfect for rising.
14. Check the Rise (Don’t Overdo It!)

Wait until the dough rises to about 80% full of the pan. This is crucial! If you let it rise too much, it will collapse in the oven. If it’s not risen enough, the loaf will be dense. How do you know? Stick your finger gently on the dough—if it springs back slowly, it’s ready. If it springs back fast, it needs more time. If it leaves an indentation that doesn’t spring back, it’s over-risen.
15. Bake It to Perfection

Preheat your oven to 190°C (375°F) about 10 minutes before baking. Once the dough is risen, put the lid on the toast pan—this gives the bread a nice, square shape. Pop it into the preheated oven and bake for 40 minutes. Don’t open the oven door during the first 30 minutes—this will cause the bread to collapse. I know it’s hard to resist peeking, but be patient!
16. Cool It Down (Don’t Skip This!)

Once the bread is done baking, take it out of the oven and immediately remove it from the pan. Place it on a wire rack to cool completely. Don’t cut it while it’s still warm! The inside is still cooking, and cutting it early will make it gummy. I know it smells amazing, but wait at least 1 hour—you’ll be glad you did.
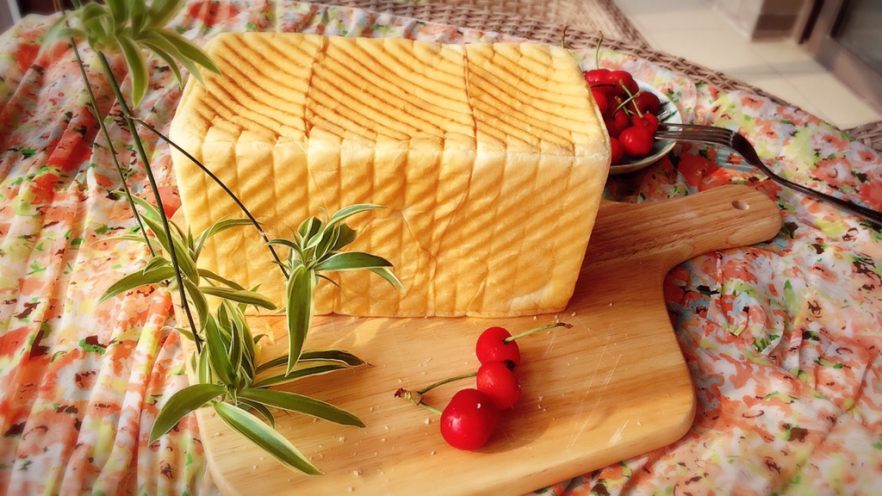
17. Slice and Enjoy!

Once the bread is completely cool, slice it with a serrated knife—this gives clean cuts without squishing the bread. Spread some butter on a slice, toast it, or just eat it plain. It’s so soft and fluffy, you’ll want to eat the whole loaf in one sitting! Pro tip: If you have leftover bread, store it in an airtight bag at room temperature. It stays fresh for 3 days in summer and 5 days in winter. Don’t put it in the fridge—it will go stale faster!
My Top Tips for Perfect Tangzhong Milk Toast Every Time
I’ve made this toast so many times, I’ve learned a few tricks along the way. Here are my top tips to help you avoid common mistakes:
- Be gentle when degassing and rolling: Don’t knead the dough too hard—you’ll destroy the gluten structure. Treat it like a baby!
- Adjust time and temperature for your oven: Every oven is different. If your bread is browning too fast, lower the temperature by 10°C. If it’s not browning enough, bake it for 5 more minutes.
- Reserve liquid: When mixing the main dough, reserve 15g of milk. Add it gradually if the dough is too dry. Flour brands have different water absorption rates, so this prevents the dough from being too sticky.
- Use high-gluten flour: This is non-negotiable. All-purpose flour doesn’t have enough protein to create the gluten needed for a fluffy loaf.
- Don’t over-ferment: This is the #1 mistake new bakers make. Keep an eye on the dough—once it passes the finger test, stop fermenting!
Final Thoughts
Tangzhong milk toast is my go-to recipe for a reason. It’s easy, it’s delicious, and it stays fresh longer than regular toast. Whether you’re a beginner or an experienced baker, this recipe is foolproof—just follow the steps and you’ll get a perfect loaf every time. So what are you waiting for? Grab your flour and get baking! And don’t forget to tag me in your photos if you make it—I’d love to see your creations.


")
 at Home – Easy Recipe with Step-by-Step Photos")
")
")
")
