

 & Red Dates Pork Bone Soup Recipe | Nourishing Chinese Wellness Dish")

 – Fluffy, Moist, and Easy to Make")
Why This Light Cream Chiffon Cake Is My New Obsession
Let me start by saying: I’ve been on a chiffon cake binge lately. Vanilla, spinach, cocoa—you name it, I’ve baked it. But none of them hit quite like this light cream version. It’s so silky and smooth, almost like a light cheesecake, but without that cloying sweetness. Plus, it’s the perfect way to use up leftover light cream (we’ve all been there, staring at a half-open carton wondering what to do). And the best part? I use the egg-yolk-last method, which makes the cake extra fluffy and tender. No more dense, sad chiffon disasters! This recipe makes one 18cm hollow chimney mold cake—let’s dive in.
Ingredients You’ll Need
First things first: gather all your stuff. No last-minute trips to the grocery store, okay? Here’s what you need:
- 5 large eggs (room temperature is best, but cold works too—just separate carefully!)
- 60g granulated sugar (for the meringue)
- 130g light cream (whipping cream works, but light cream gives a softer texture)
- 40g milk (any kind—dairy or plant-based, but dairy is more traditional)
- 20g granulated sugar (for the egg yolk batter)
- 90g cake flour (low-gluten flour—don’t use all-purpose, it’ll make the cake tough!)
- A few drops of lemon juice (or white vinegar, to stabilize the meringue)
Step-by-Step Instructions (With Pro Tips!)
Let’s break this down so it’s super easy. I’ve included photos for each step to help you out—no guesswork here!
1. Prep Your Ingredients

First, weigh everything out. I know, it’s a pain, but baking is science—you can’t wing the measurements. Trust me, I’ve tried (and failed) enough times to learn.
2. Separate Eggs (The Most Important Step!)

Separate the egg whites and yolks into two clean, oil-free, water-free bowls. Pro tip: Use a small bowl to separate each egg one by one. If a yolk breaks into the small bowl, you don’t ruin all your whites! Pop the egg whites in the freezer for 10-15 minutes—cold whites whip up fluffier and hold their shape better. Set the yolks aside.
3. Mix Light Cream and Milk

Pour the light cream and milk into a mixing bowl and stir until they’re combined. No need to whisk like crazy—just a gentle stir works.
4. Add Sugar to the Cream Mixture

Add the 20g sugar (for the yolk batter) and stir until it’s completely dissolved. You don’t want gritty sugar in your cake!
5. Sift in the Cake Flour

Sift the cake flour into the cream mixture. Sifting is non-negotiable here—it gets rid of lumps and makes the batter smooth. I usually sift twice just to be safe (yes, I’m that person).
6. Stir the Batter (Don’t Overmix!)

Stir the flour into the cream mixture with an irregular motion (like folding or cutting) until there are no dry spots. Stop as soon as it’s smooth—overmixing will make the cake tough. Nobody wants a rubbery chiffon!
7. Add All Egg Yolks at Once

Here’s the “egg-yolk-last” part! Dump all the egg yolks into the batter at once. I know it seems counterintuitive, but this method keeps the batter light.
8. Mix Until Smooth

Stir the yolks into the batter until everything is fully combined. The result should be a silky, thick yolk batter. Set this aside while you work on the meringue.
9. Check Your Yolk Batter

Take a quick look—your yolk batter should be smooth and free of lumps. If it’s not, give it a gentle stir, but don’t overdo it. Now, onto the fun part: whipping the egg whites!
10. Start Whipping the Egg Whites

Take the egg whites out of the freezer (they should have a thin layer of ice on the edges—perfect!). Add a few drops of lemon juice to help stabilize the meringue. Start whipping on medium speed with an electric mixer.
11. Add Sugar in Three Batches

Here’s how to get the perfect meringue:
- First batch: When the whites form big, bubbly “fish eyes,” add 1/3 of the 60g sugar.
- Second batch: When the whites get smooth and creamy, add another 1/3.
- Third batch: When the whites start to form soft peaks (they bend over when you lift the mixer), add the last 1/3.
This gradual sugar addition makes the meringue stable and shiny.
12. Whip to Soft Peaks (Almost Stiff)

Keep whipping until the meringue is just past soft peaks. That means when you lift the mixer, the peak bends slightly at the tip. Don’t whip to stiff peaks—your cake will crack! I’ve made this mistake before, and it’s not pretty.
13. Fold 1/3 Meringue into Yolk Batter

Take 1/3 of the meringue and add it to the yolk batter. Use a rubber spatula to fold it in—cut through the center, scrape the bottom, and fold over. This lightens the yolk batter so the rest of the meringue mixes in easily.
14. Fold in Another 1/3 Meringue

Add another 1/3 of the meringue and fold again. Be gentle—you don’t want to deflate the meringue (that’s where all the fluff comes from!).
15. Pour Yolk Batter into Remaining Meringue

Now, pour the yolk batter into the bowl with the last 1/3 of the meringue. This is easier than adding meringue to the yolk batter—trust me.
16. Fold Until Just Combined

Fold the batter quickly but gently until there are no white streaks left. Don’t overfold—stop as soon as it’s uniform. Overfolding will make your cake dense.
17. Pour Batter into Mold

Pour the batter into an 18cm hollow chimney mold. Fill it about 70% full—leave room for it to rise. Don’t grease the mold! Chiffon cake needs to cling to the sides to rise properly.
18. Tap to Remove Air Bubbles

Tap the mold firmly on the counter a few times to pop any big air bubbles. This prevents holes in your cake.
19. Bake It!

Preheat your oven to 150°C (300°F) before you start baking. Pop the mold on the middle rack and bake for 50 minutes. Don’t open the oven door for the first 40 minutes—sudden temperature changes will make the cake deflate.
20. Cool It Upside Down

When the cake is done (it should spring back when you touch the top), take it out and tap the mold on the counter again to release hot air. Then immediately invert it onto a wire rack or a bottle (to keep the hollow part supported). Let it cool completely—this is crucial! If you skip this step, your cake will collapse.
21. Demold and Enjoy

Once the cake is cool, run a knife around the edges and the center chimney to loosen it. Flip it onto a plate—ta-da! You’ve got a perfect chiffon cake.
22. Slice and Savor

Cut a slice and take a bite. The texture is so soft and creamy—you’ll forget all the work you put in. I like to eat mine plain, but you can add fresh fruit or a dollop of whipped cream if you’re feeling fancy.
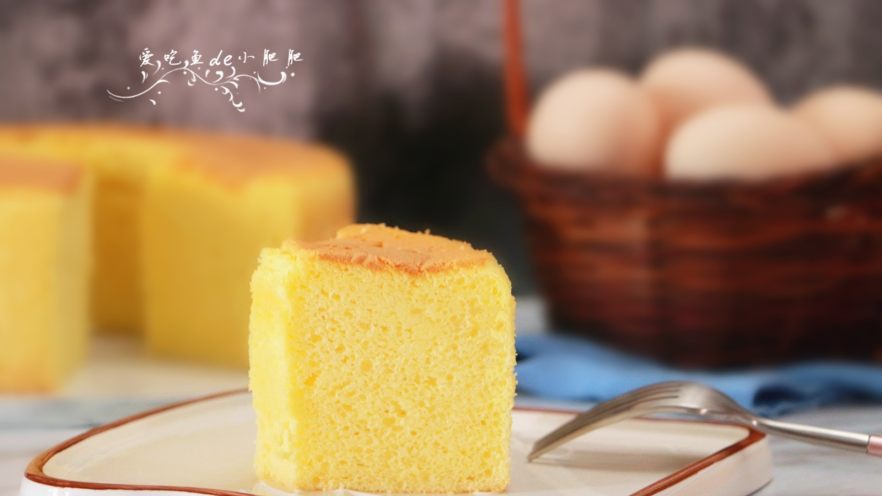
23. Check Out the Final Result!

Look at that golden top and fluffy crumb—isn’t it beautiful? This cake is perfect for afternoon tea, birthdays, or just a random Tuesday treat.
24. Another Angle of the Finished Cake

See how tall and light it is? The egg-yolk-last method really makes a difference. No more flat, dense cakes!
25. One More Shot of the Yummy Cake

I could stare at this cake all day. It’s just so pretty—and it tastes even better than it looks.
Pro Tips for Success
Let me share a few secrets to make sure your cake turns out perfect every time:
- Separate eggs carefully: Use a small bowl for each egg to avoid yolk contamination. A single drop of yolk can ruin your meringue.
- Don’t overwhip the meringue: Soft peaks (just past) are ideal. Stiff peaks will make your cake crack.
- Immediately invert after baking: This keeps the cake from collapsing as it cools. I use a wine bottle to support the hollow center—works like a charm!
- Use room-temperature eggs (if possible): They separate easier and whip better. But if you’re in a hurry, cold eggs are fine—just be extra careful when separating.
Final Thoughts
This light cream chiffon cake is now my go-to recipe. It’s easy, delicious, and uses up leftover light cream—what more could you ask for? The egg-yolk-last method makes it so fluffy, and the light cream adds a rich, creamy flavor without the sweetness of cheesecake. I’ve made it for friends and family, and everyone asks for the recipe. Give it a try—you won’t regret it!


 – A Cozy Winter Treat")


